
Personalize The Workflow Content
Customize Your Workflow Content With Confidence
Learn how to easily customize your workflows with your unique brand voice, images, and signature details—so your audience instantly connects and takes action.
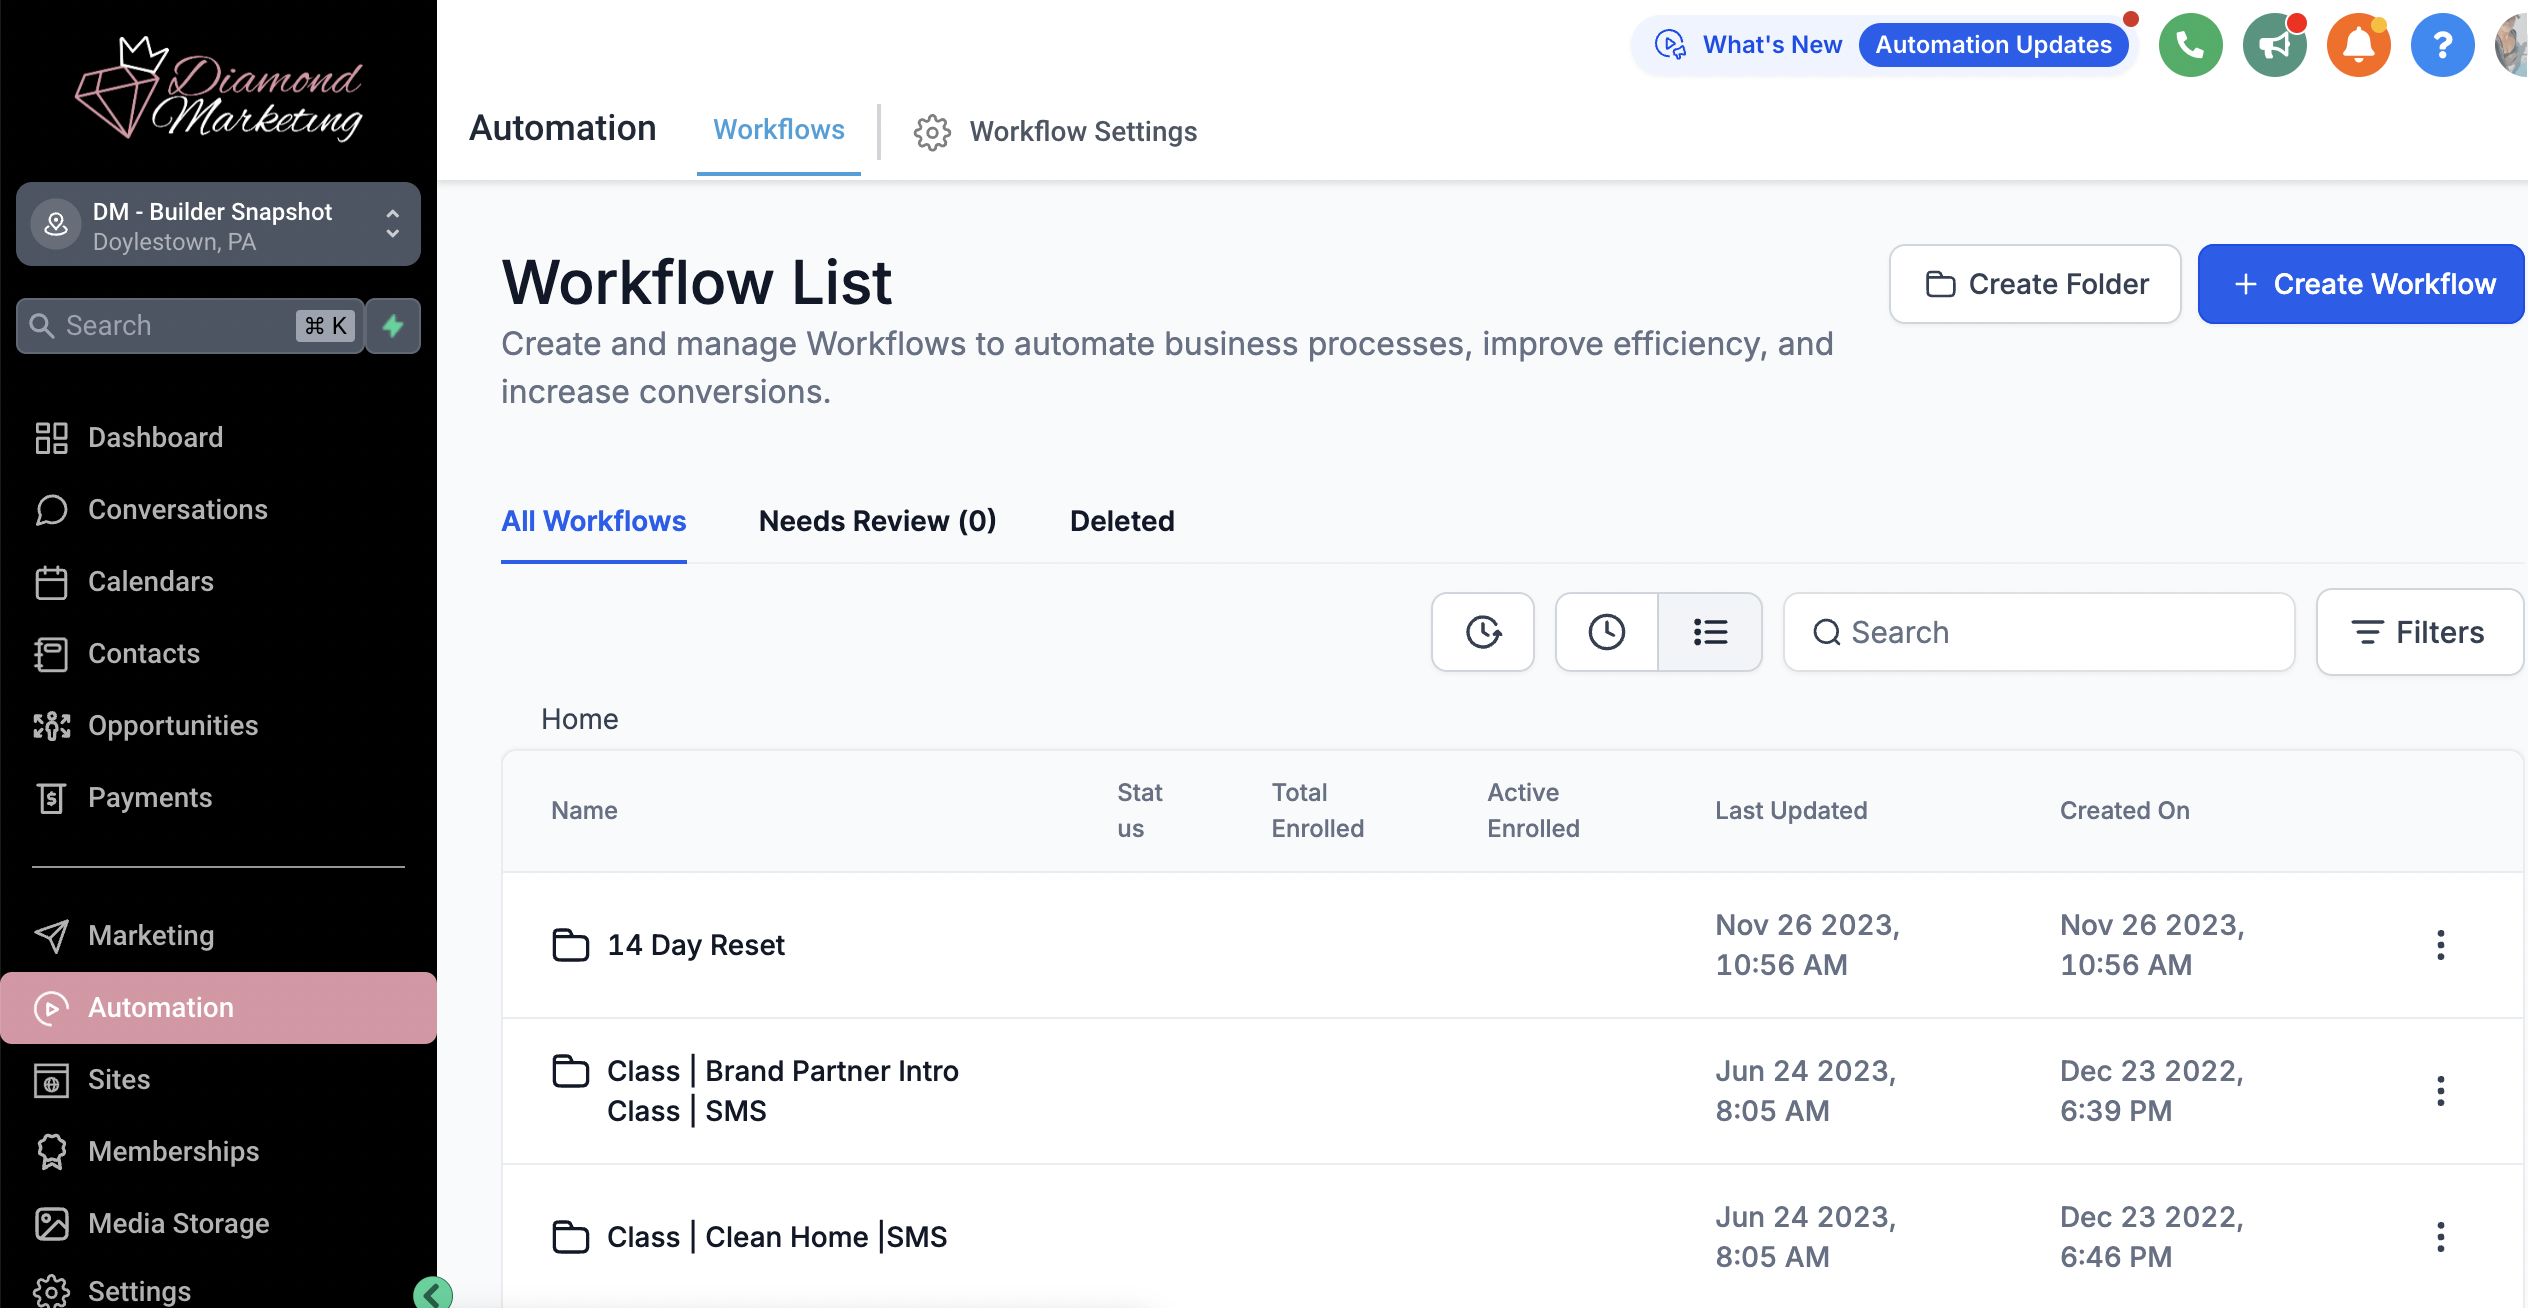
Workflow Templates Inside Diamond Marketing
Inside your Automations tab, you will find 25 pre-made Young Living specific workflow templates! We'll walk you through how to personalize your workflows with confidence—starting with your Onboarding templates for the best first impression!
Weekly Text and Monthly Email Oily Tips
Essential Oils 101 Text Class and Email Complete Guide
The Clean Home Text Class and Email Complete Guide
Kids + Oils Text Class and Email Complete Guide
The Safe Home Text Class and Email Complete Guide
Winter Wellness Text Class and Email Complete Guide
Spring Wellness Text Class and Email Complete Guide
Summer Wellness Text Class and Email Complete Guide
Fall Wellness Text Class and Email Complete Guide
Wellness for Less (Loyalty Rewards Class) Text Class and Email Complete Guide
Ditch the Candles Text Class and Email Complete Guide
YL Perks : Guide to Using Your Referral Link Text Class and Email Complete Guide
Referral Link Generator
Intro to Brand Partner Text Class and Email Complete Guide
Oils for the Holiday SeasonText Class and Email Complete Guide
Natural Spring Cleaning Text Class and Email Complete Guide
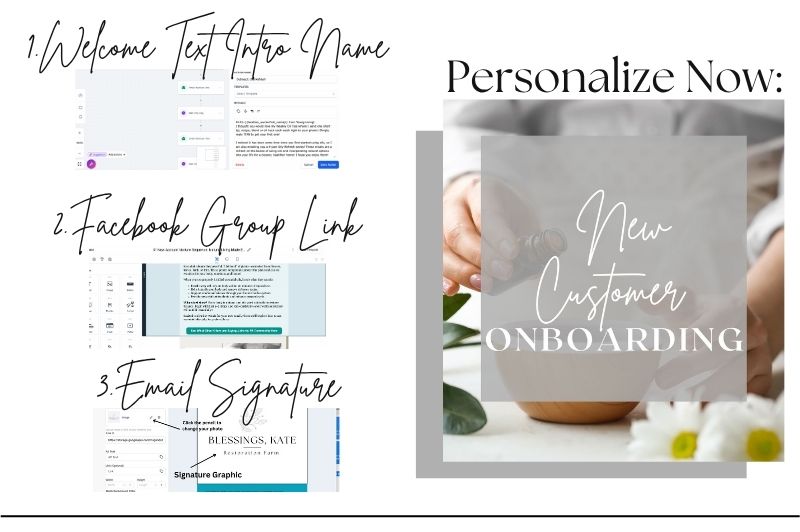
New Customer Onboarding
New Account Onboarding
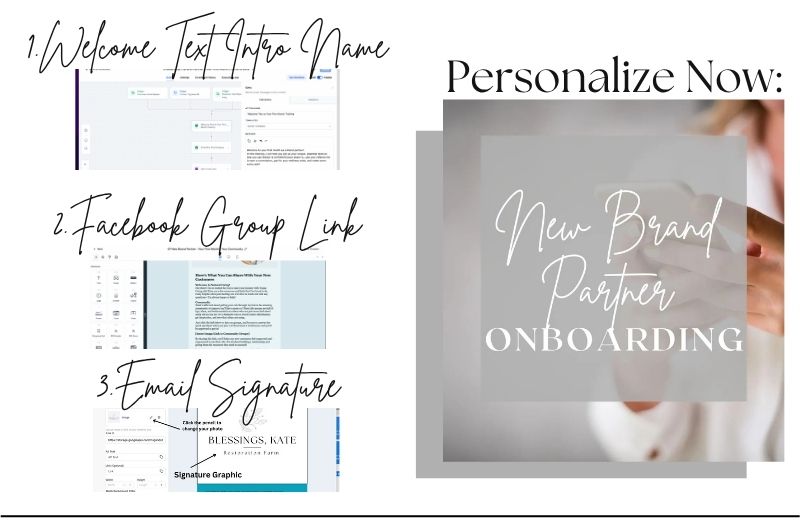
New Brand Partner Onboarding
Loyalty Rewards Reminders
MWO (Months Without Order) Nurture Series
Event Lead Magnet + Nurture Series
YL Health Shares
14 Day-Reset
Zyto Content
Learn how to use each template step-by-step in this lesson!
Understand the Workflow Templates:
It is EASY to customize our workflow templates and add your own branding or even content! Here is a little about how our templates are set up.
Do NOT forget about Text Messaging Compliance when adding in your own content!
Workflows are found inside the Automation Tab.
The Class Workflows:
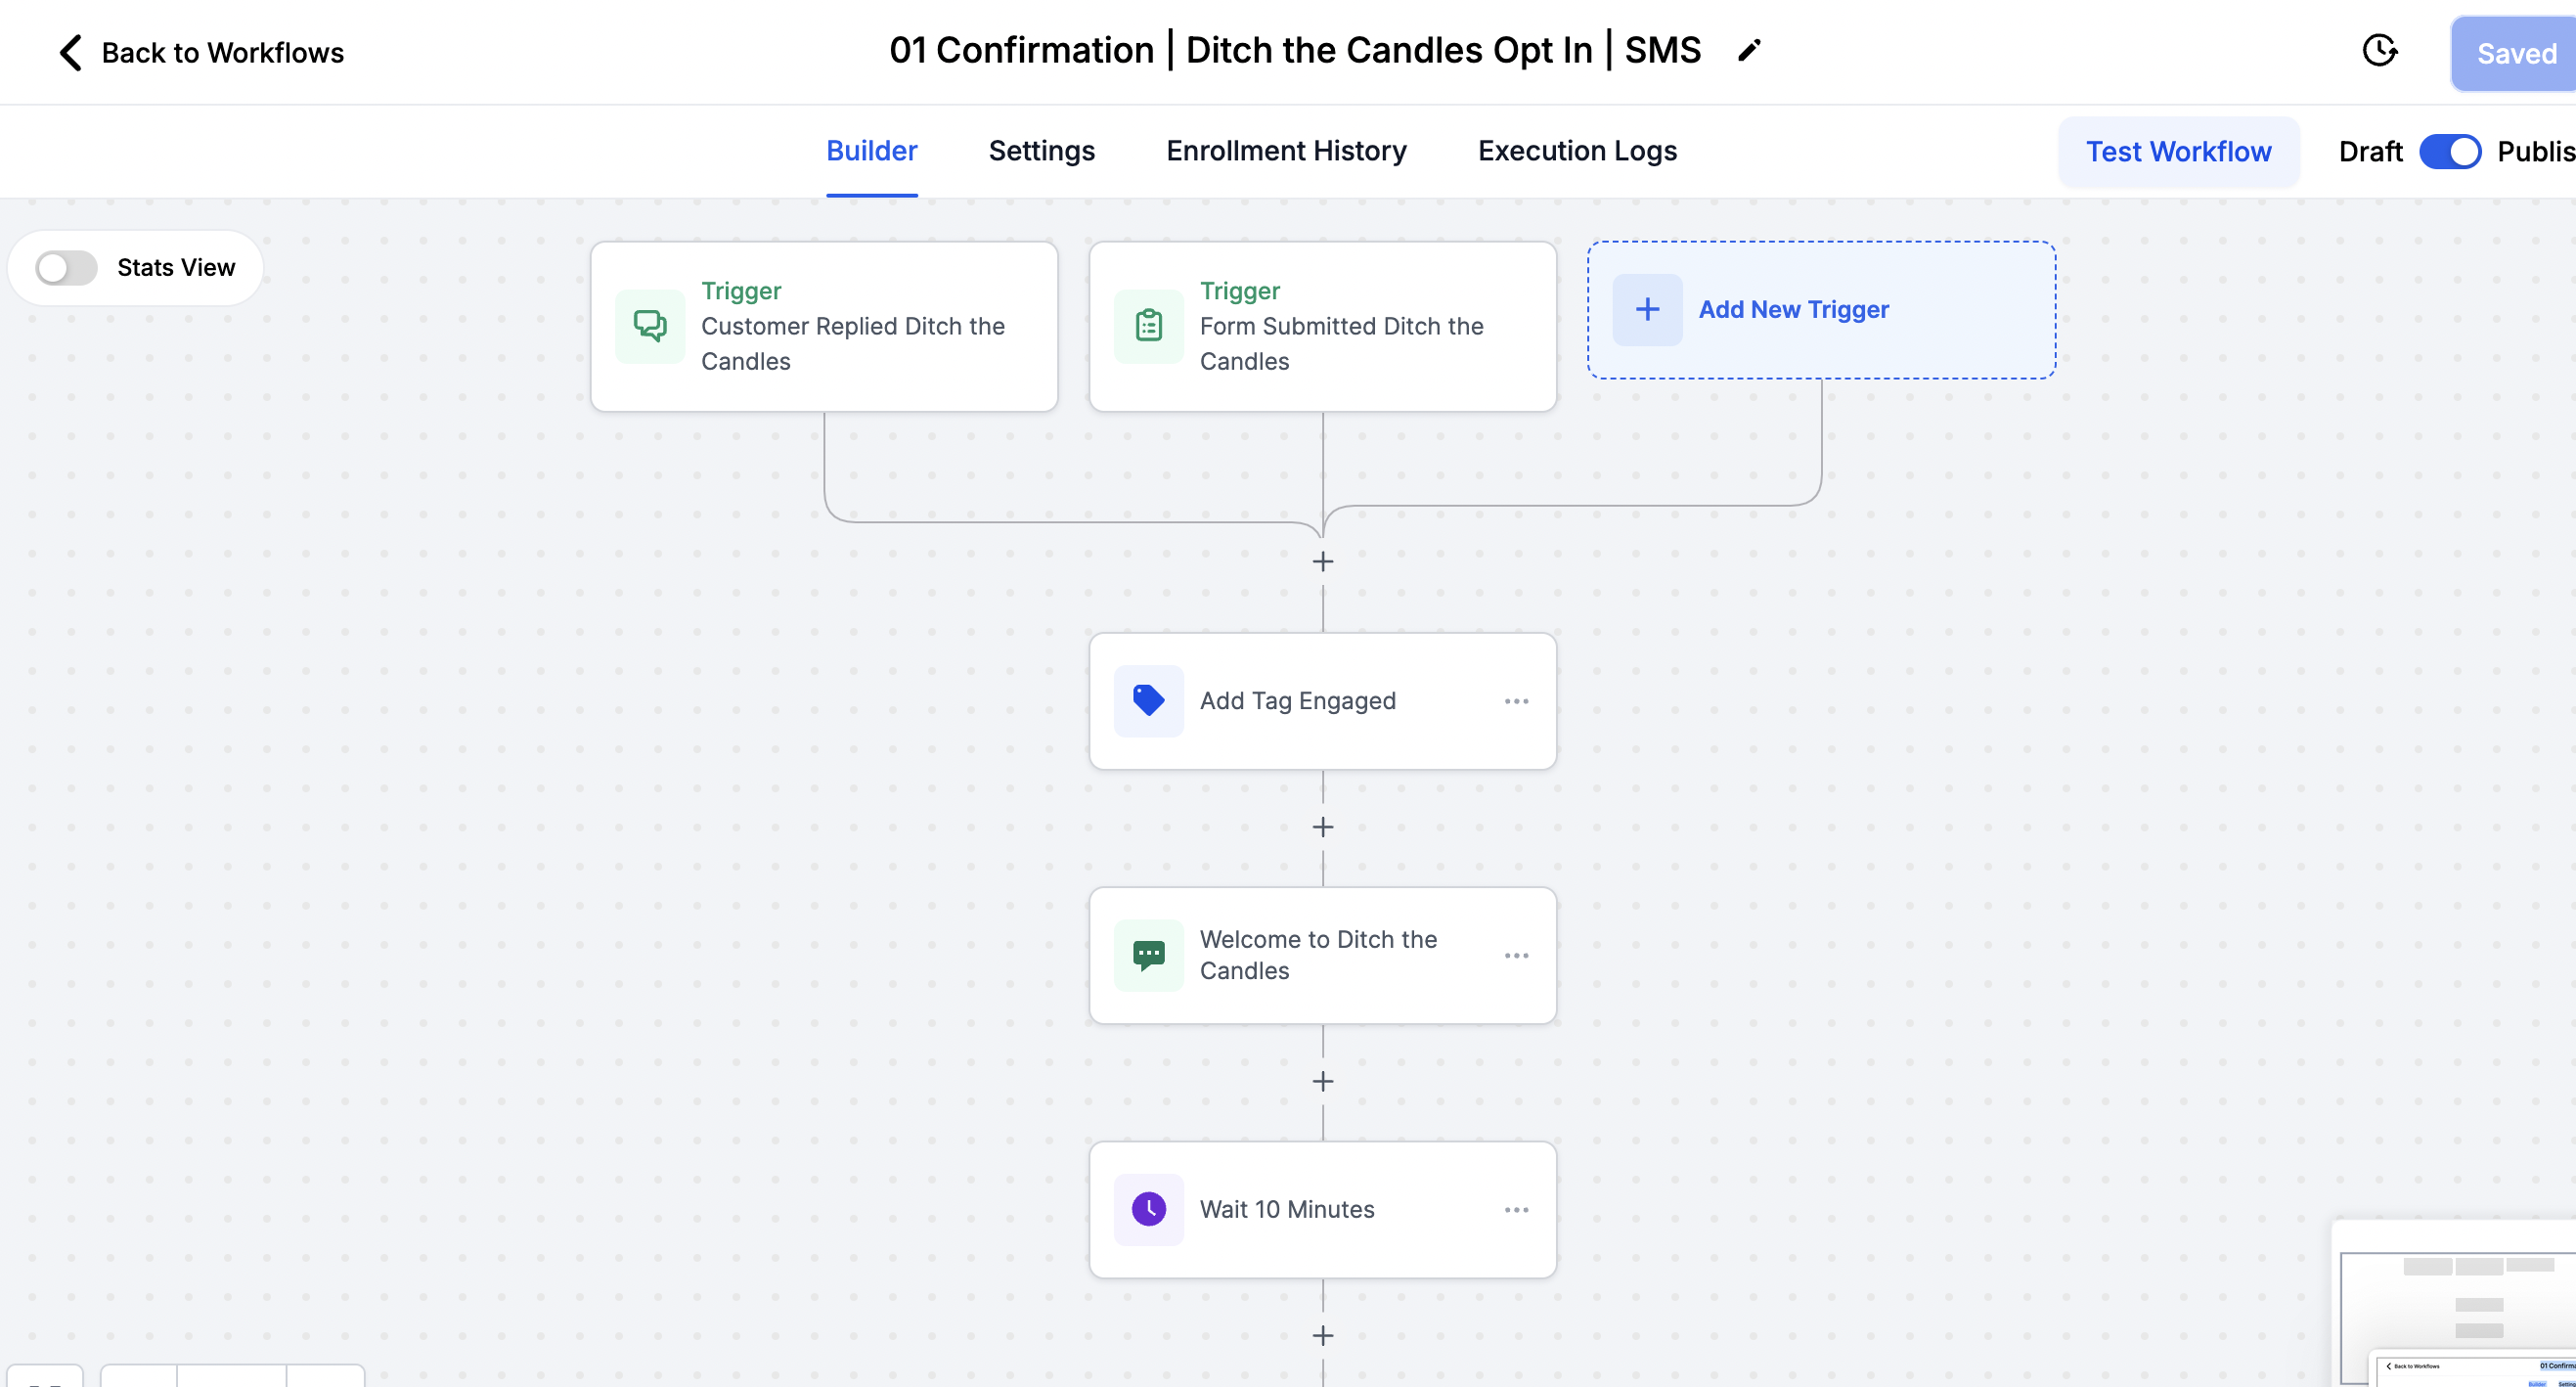
Our Class Folders contain two workflows: the Confirmation workflow and the Class workflow.
The Confirmation:
Sends a welcome message right away as a confirmation that your contacts have opted into the class correctly.
This workflow also tags the contact 'engaged' so you can filter for active contacts to send sale and announcement texts to.
The Confirmation Workflow is triggered by either a form or a customer text.
A form trigger is an automation tool that activates when someone fills out a form, such as a subscription or class registration form. Once the form is submitted, the trigger automatically initiates a workflow.
An SMS trigger is a keyword-based trigger activates when someone sends a specific word or phrase via text message to your marketing number. This trigger immediately enrolls the contact in a class workflow or sends them an automated response.
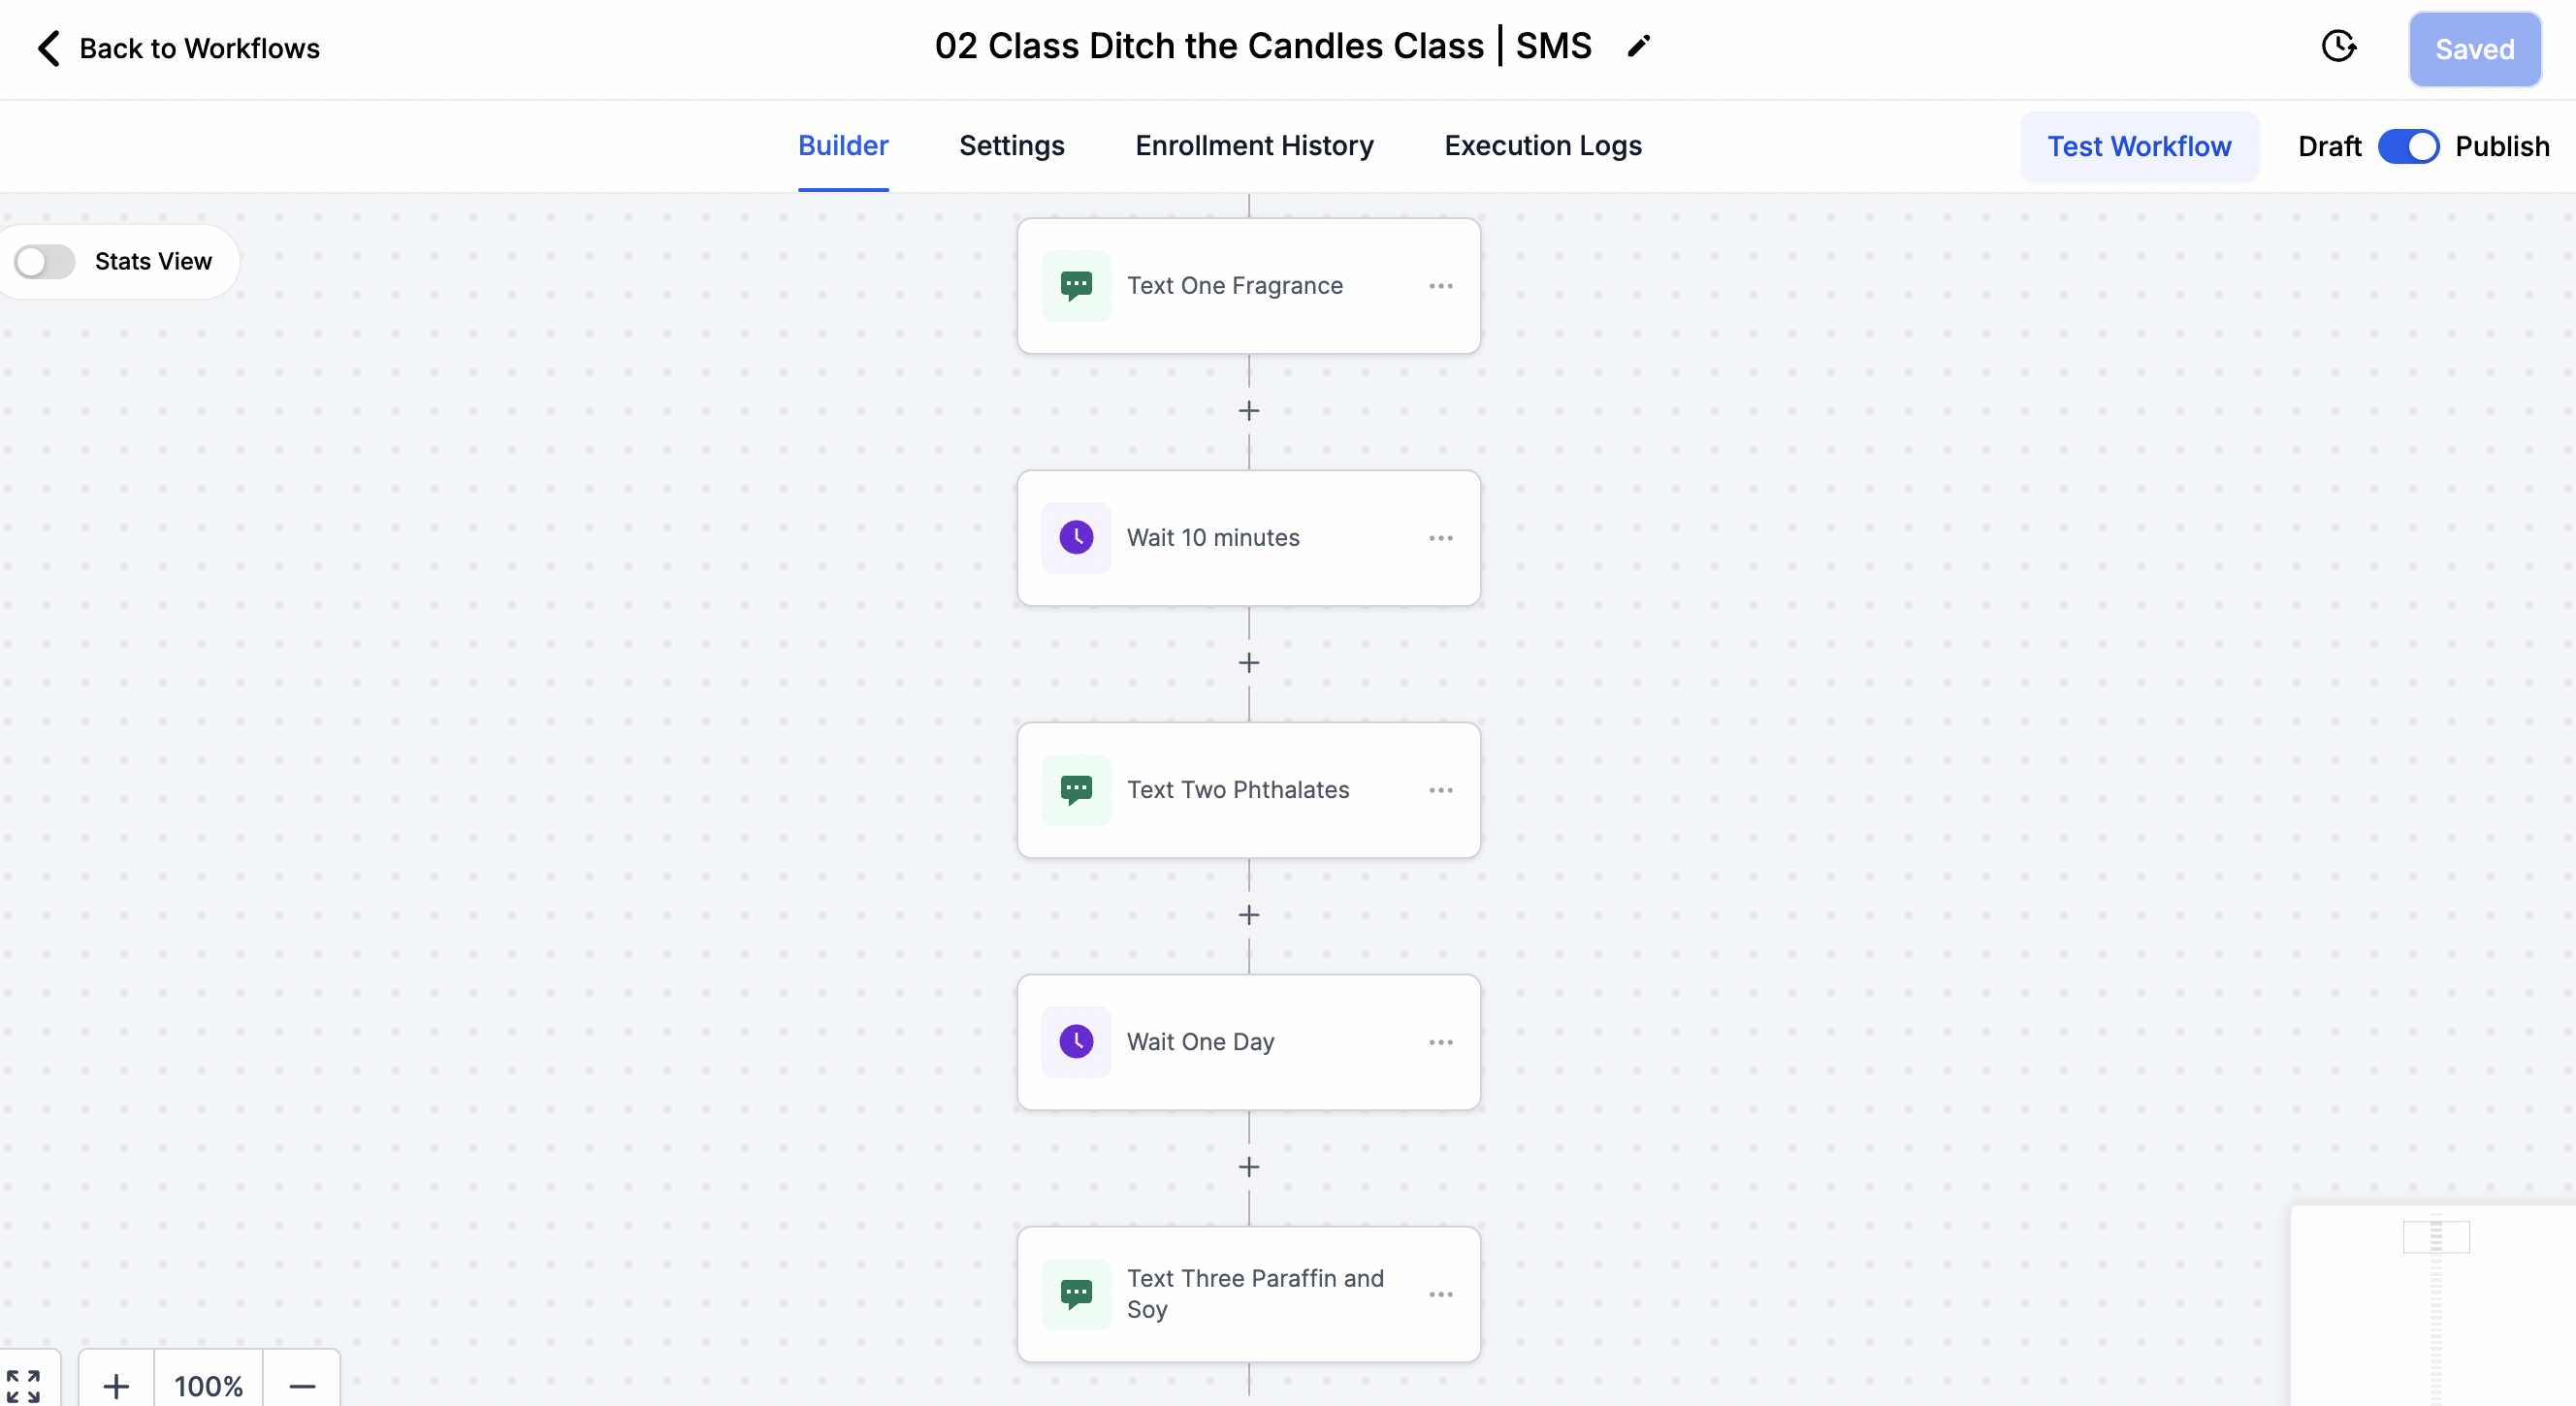
The Class Workflow:
Sends texts between the hours of noon and seven pm (your time zone). You can change the hours and time the content sends in the Settings tab of each workflow.
In between each action is a wait step. Our classes are set up to send two texts a day for five days so contacts can digest information in small chunks each day.
Learn how to use each template step-by-step in this lesson!
The Onboarding Workflows:
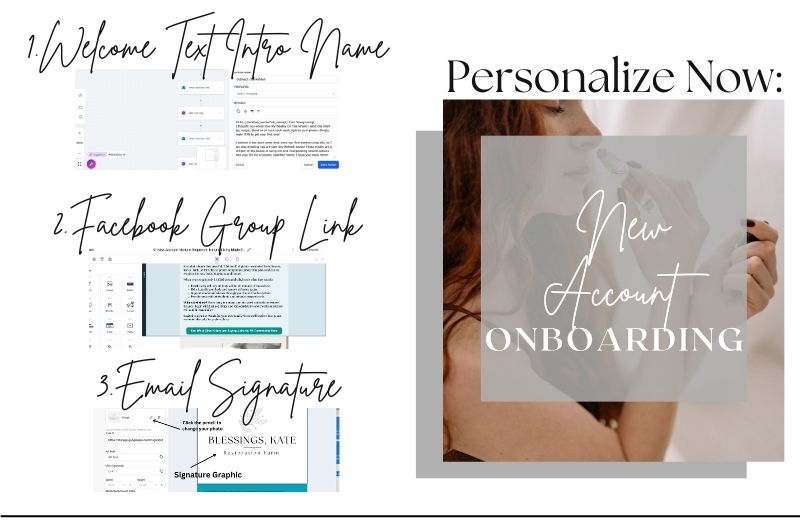
Welcome new customers, accounts, and brand partners like a pro—automatically!
Our Onboarding Workflows are designed to nurture and educate your newest contacts from day one, without you lifting a finger. These pre-built workflows deliver the perfect mix of education, product tips, and encouragement—right when your people need it most.
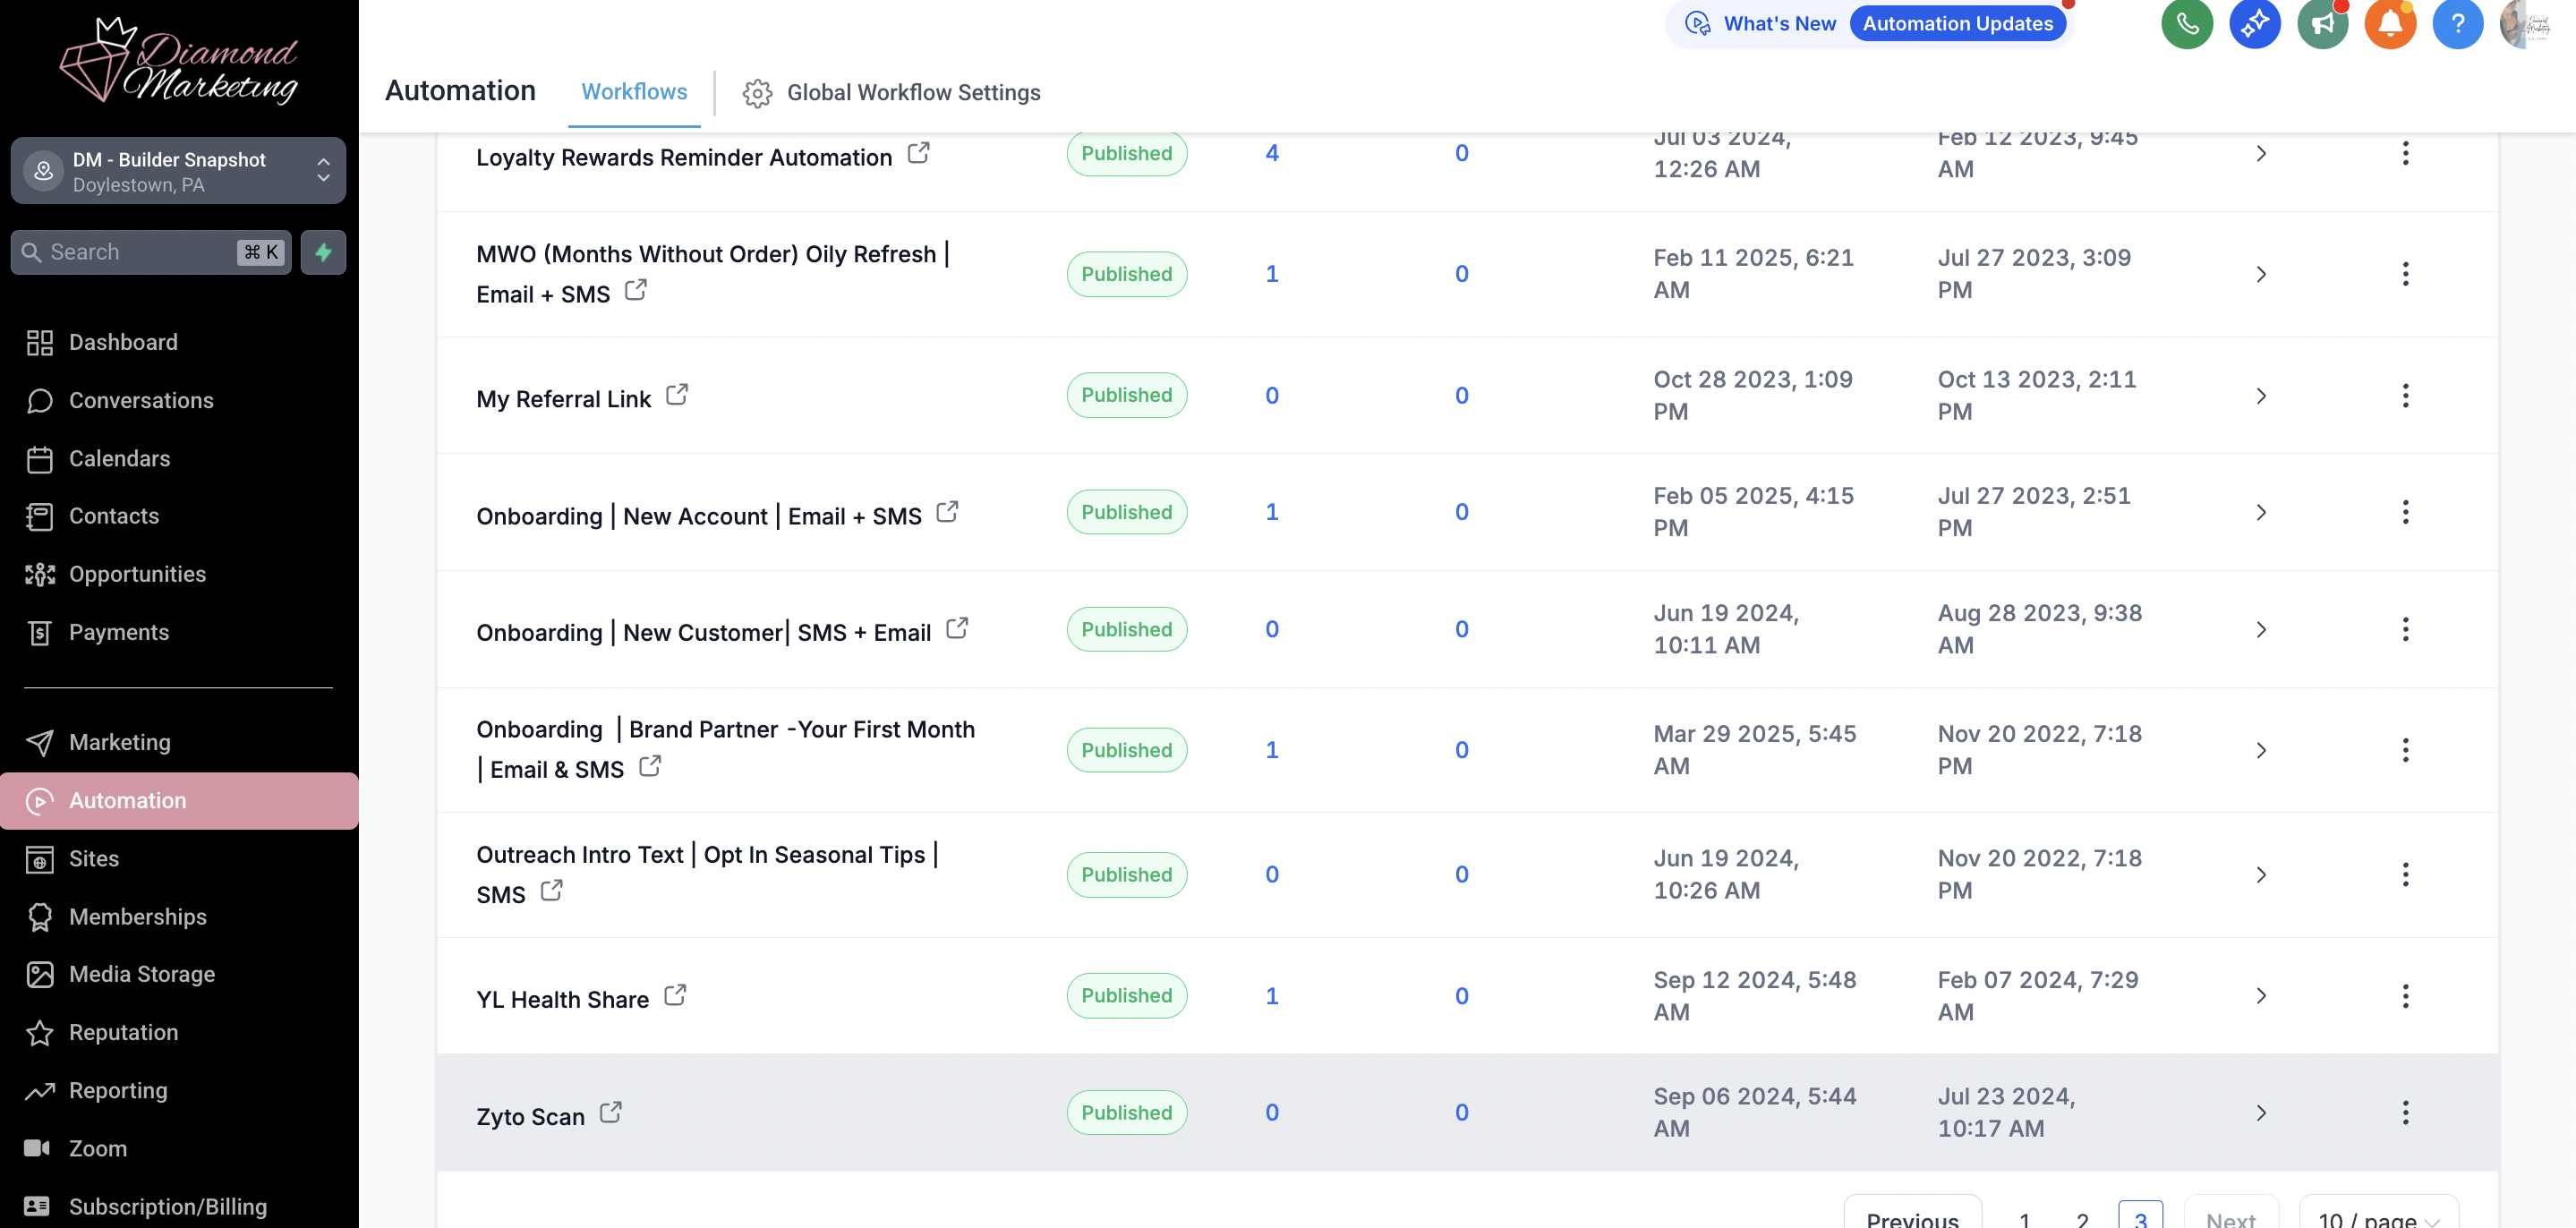
New Customer Onboarding– Educates new customers about their products, perks, and how to get the most out of their order.
New Account Workflow– Supports people who haven’t ordered yet but just opened a Young Living account with helpful info and encouragement.
New Brand Partner Workflow– Guides your newest BPs through their first steps with confidence—from setting goals to understanding the comp plan.
✨ How it works: Simply apply the tag (New Customer, New Account, or New BP) and the correct workflow will trigger automatically—keeping your team supported while you stay focused on growing your business.
It’s effortless, personal, and totally duplicatable! Scroll to the bottom to set up and use these onboardings for your team!
The Lead Magnet Workflows:
Turn interest into engagement—automatically!
Lead Magnet Workflows are your secret weapon for growing an engaged list full of people who actually want to hear from you. Whether you're hosting a vendor booth, sharing a wellness tool, or inviting someone into your community, these automated workflows deliver the value—and collect the contact info.
Each workflow is designed to offer something helpful and irresistible in exchange for a phone number or email address. You get a new lead, and they get a free resource they'll love.
Use these workflows to share:
Zyto Scan links and follow-up
The 14-Day Wellness Reset
Your custom Young Living referral link
Health Shares Explained (plus plan info!)
Weekly or Monthly Oil Tips
12 Days of Holiday Deals
In-Person or Vendor Event Giveaways
The Oily Tips
Social Media Responses
The Email Class Opt-Ins (Email Guides)
These workflows are triggered by the contact— when they fill out a form, send a keyword via text, social media (using Social Media Integration) or reply to an email (for email-based tips and guides).
Once they opt in, the workflow kicks in automatically, delivering your resource, building trust, and guiding them to your best content and tools.
The result? A growing list of warm, ready-to-engage contacts you can follow up with again and again.
Learn how to use each template step-by-step in this lesson!
The Customer Care Workflows:
Nurture, Retain, and Reignite Your Customers—Automatically!
Your business doesn’t grow from a single order—it grows through consistent, meaningful connection. The
Customer Care Workflows make that easy by helping you stay top-of-mind, support your customers with value-driven follow-up, and turn inactive accounts into re-engaged loyal buyers!
These automated workflows are your behind-the-scenes customer service team—reminding, checking in, and encouraging without you having to lift a finger (after the initial setup, of course!).
Loyalty Rewards Reminder Workflow: Gently remind your customers each month to process their Loyalty Rewards order using text and/or email reminders.
MWO (Months Without Order) Oily Refresh Workflow: Reignite connection with customers who haven’t ordered in a while by sending thoughtful check-ins, helpful product tips, and wellness support—so they feel seen, supported, and inspired to reengage.
Outreach Workflow (Inactive to Subscribe for Personally Enrolled):
Reignite interest from inactive customers by offering them the option to reconnect with your best oily content. They can opt in when they’re ready—no pressure!Outreach Intro Text Workflow (for Personally Enrolled):
Engage your personally enrolled contacts with a warm, friendly text inviting them to subscribe to your weekly oil tips—your easiest way to deliver ongoing value and education!
How it works:
The Outreach and MWO (Months Without Order) Oily Refresh workflows don't have automatic triggers—they require you to manually add contacts. This means you can filter your contacts for the right group and add them as needed.
The Loyalty Rewards Reminders workflow, on the other hand, is triggered automatically when the "Loyalty Rewards" tag is added.
Learn how to use each template step-by-step in this lesson!
How to Edit a Workflow:
If you have team content, want to update a workflow in your own words or replace the graphic, you will make changes right in the Automation Tab inside the specific workflow.
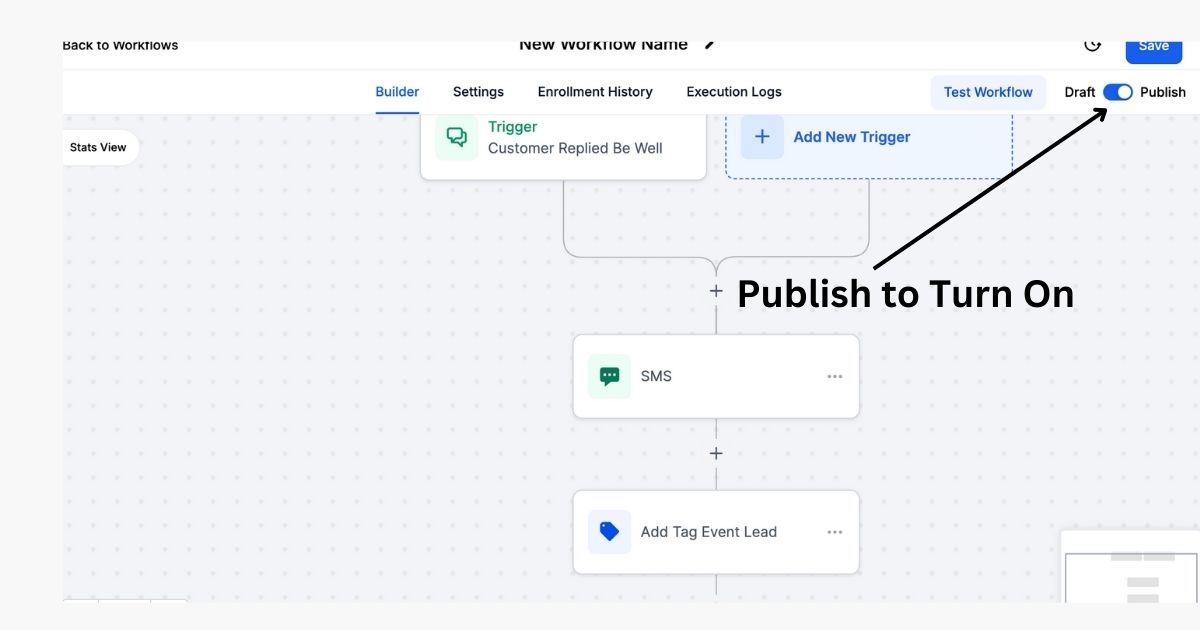
"Turn off " any workflow by toggling over to 'draft' mode from 'published' mode in the workflow itself to make it unavailable for your contacts to join. (see below).
We have a Content Creator Package you can purchase to have a Content Specialist do this for you your content for you.
You can also secure the help of a Diamond Marketing VA to help you add your content.
Here is how to edit a workflow on your own:
Head to the Automation tab
Select the Workflow you want to personalize (for example New Customer Onboarding)
Click inside the workflow
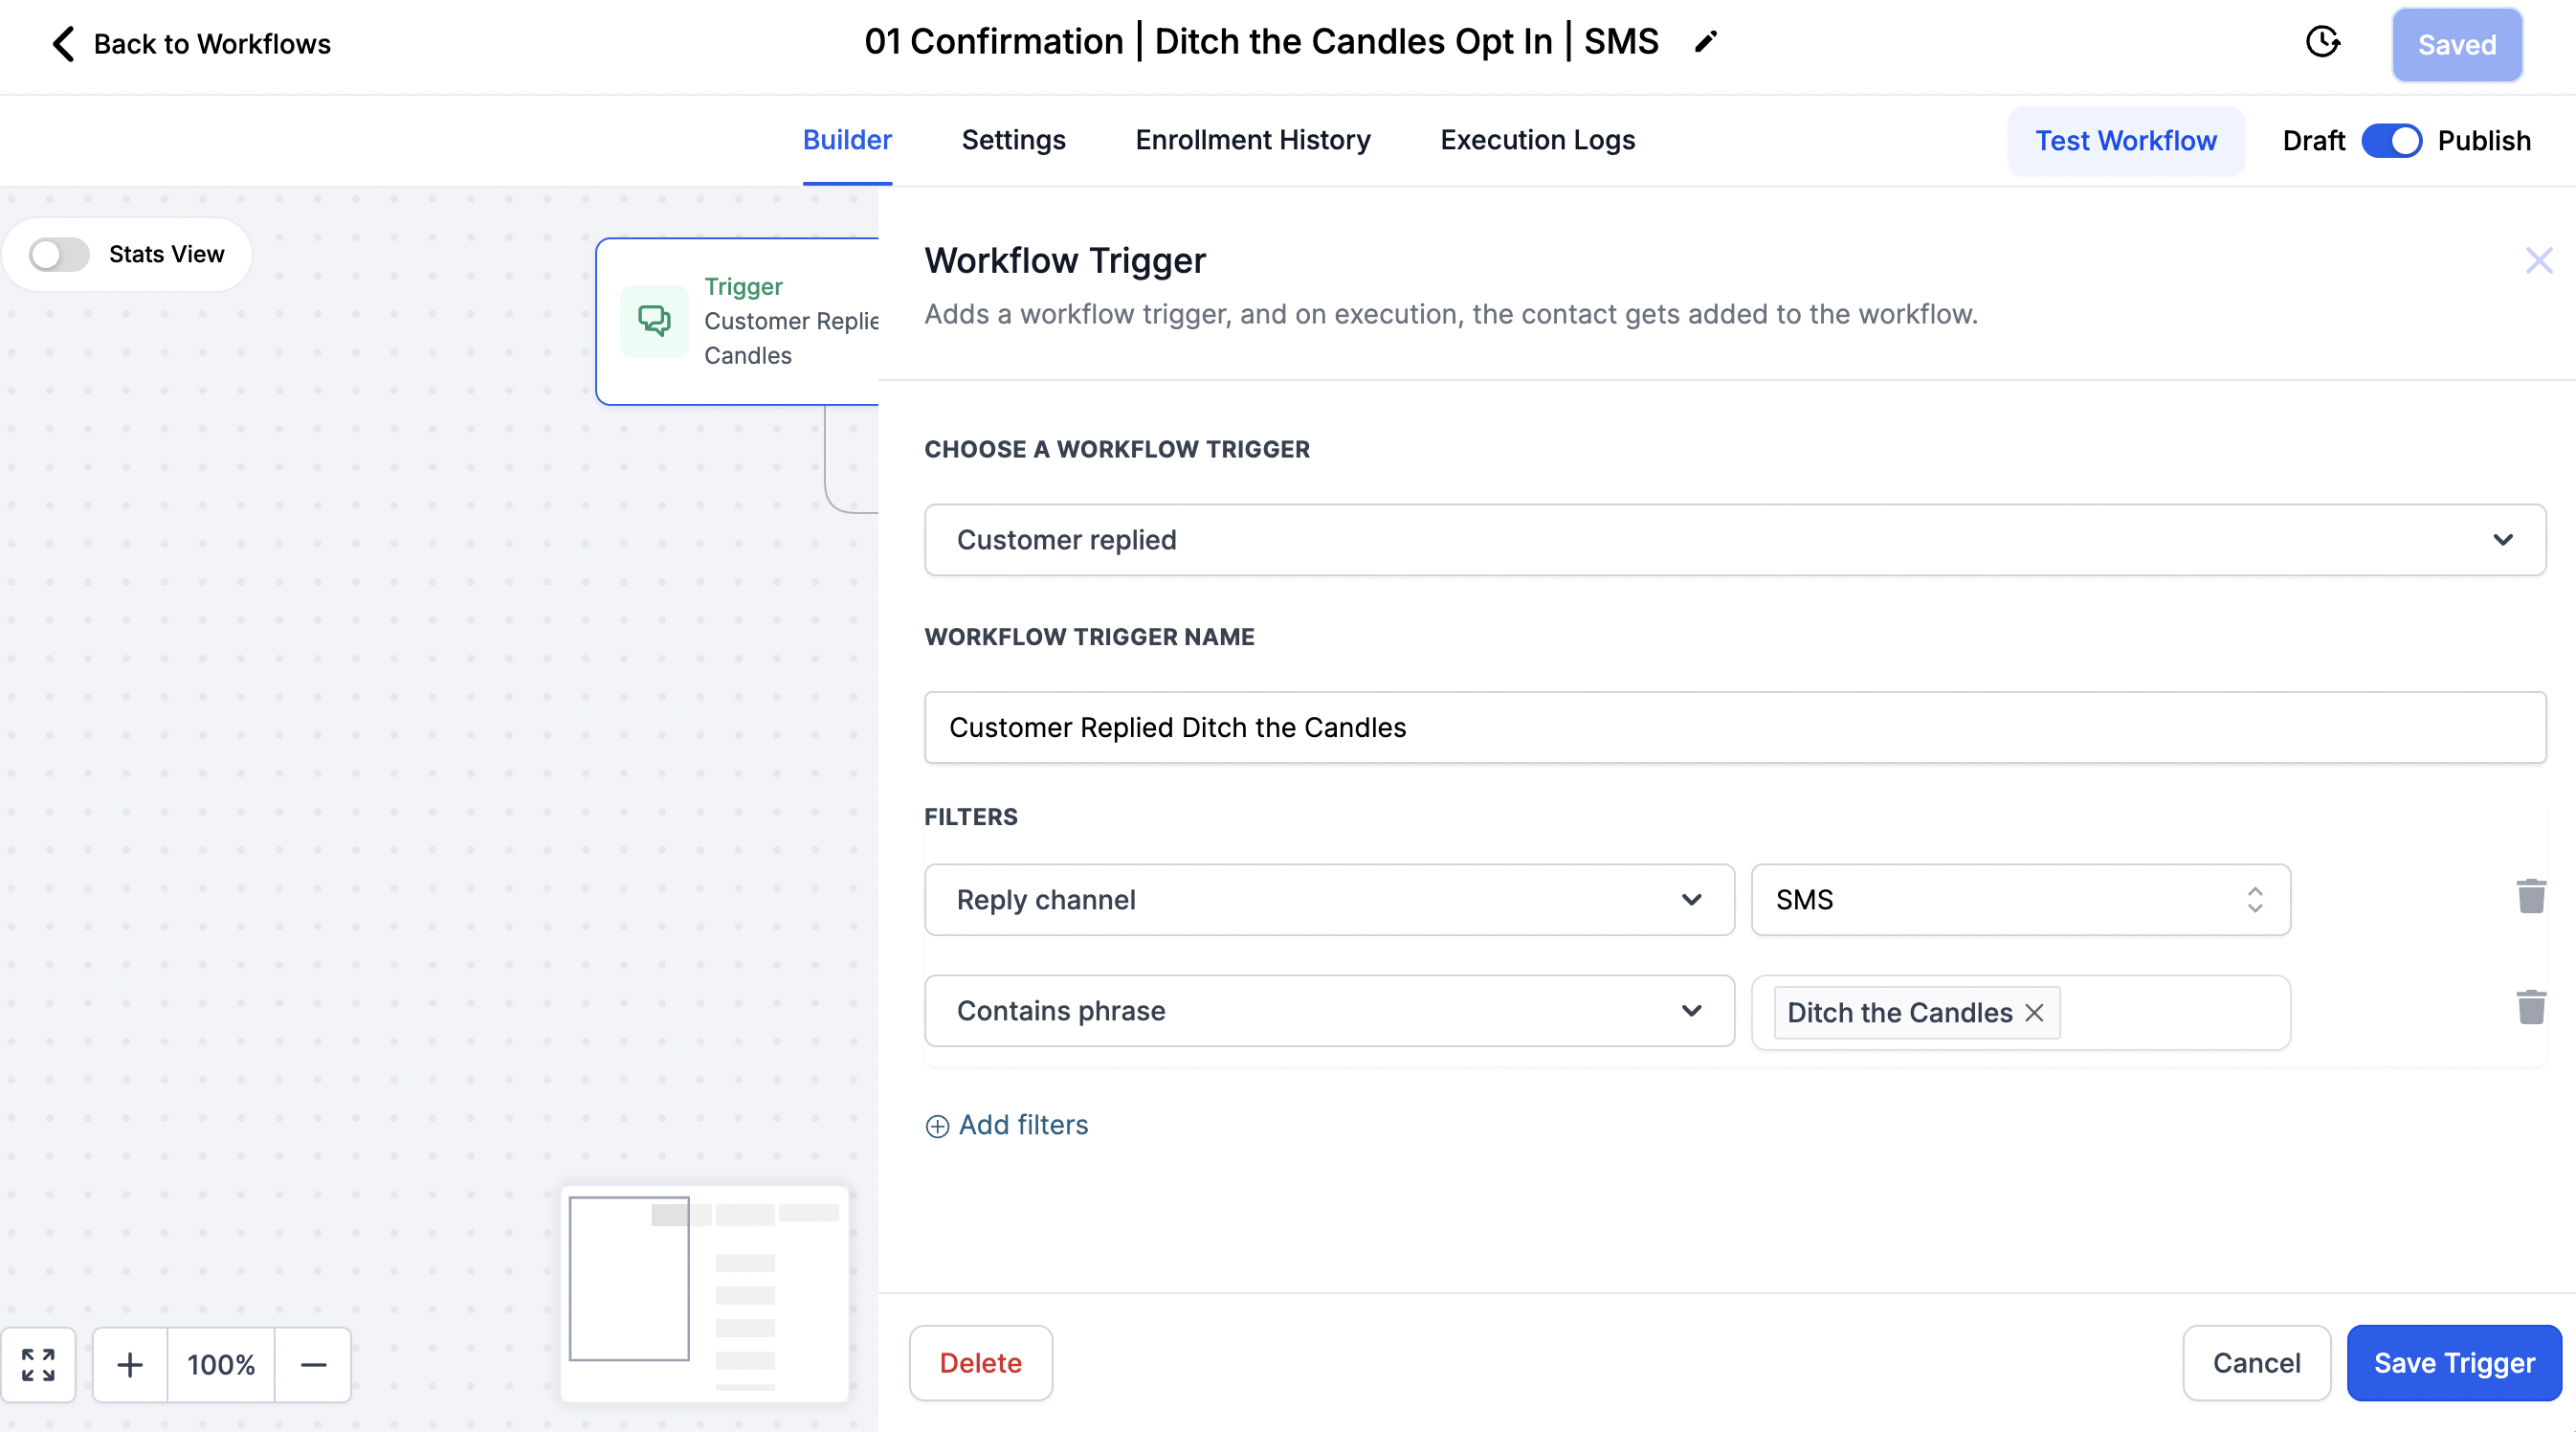
To change your Workflow Name, click the top box with the name and edit
To change the Trigger click either the Customer Replied or the Form action.
The Trigger of the workflow will add a contact into the workflow based on an action like SMS or Email Reply, Tag Added, or a form being filled out. Add any of these options will trigger the workflow.
Edit the Workflow Trigger:
1. Tag Added Trigger
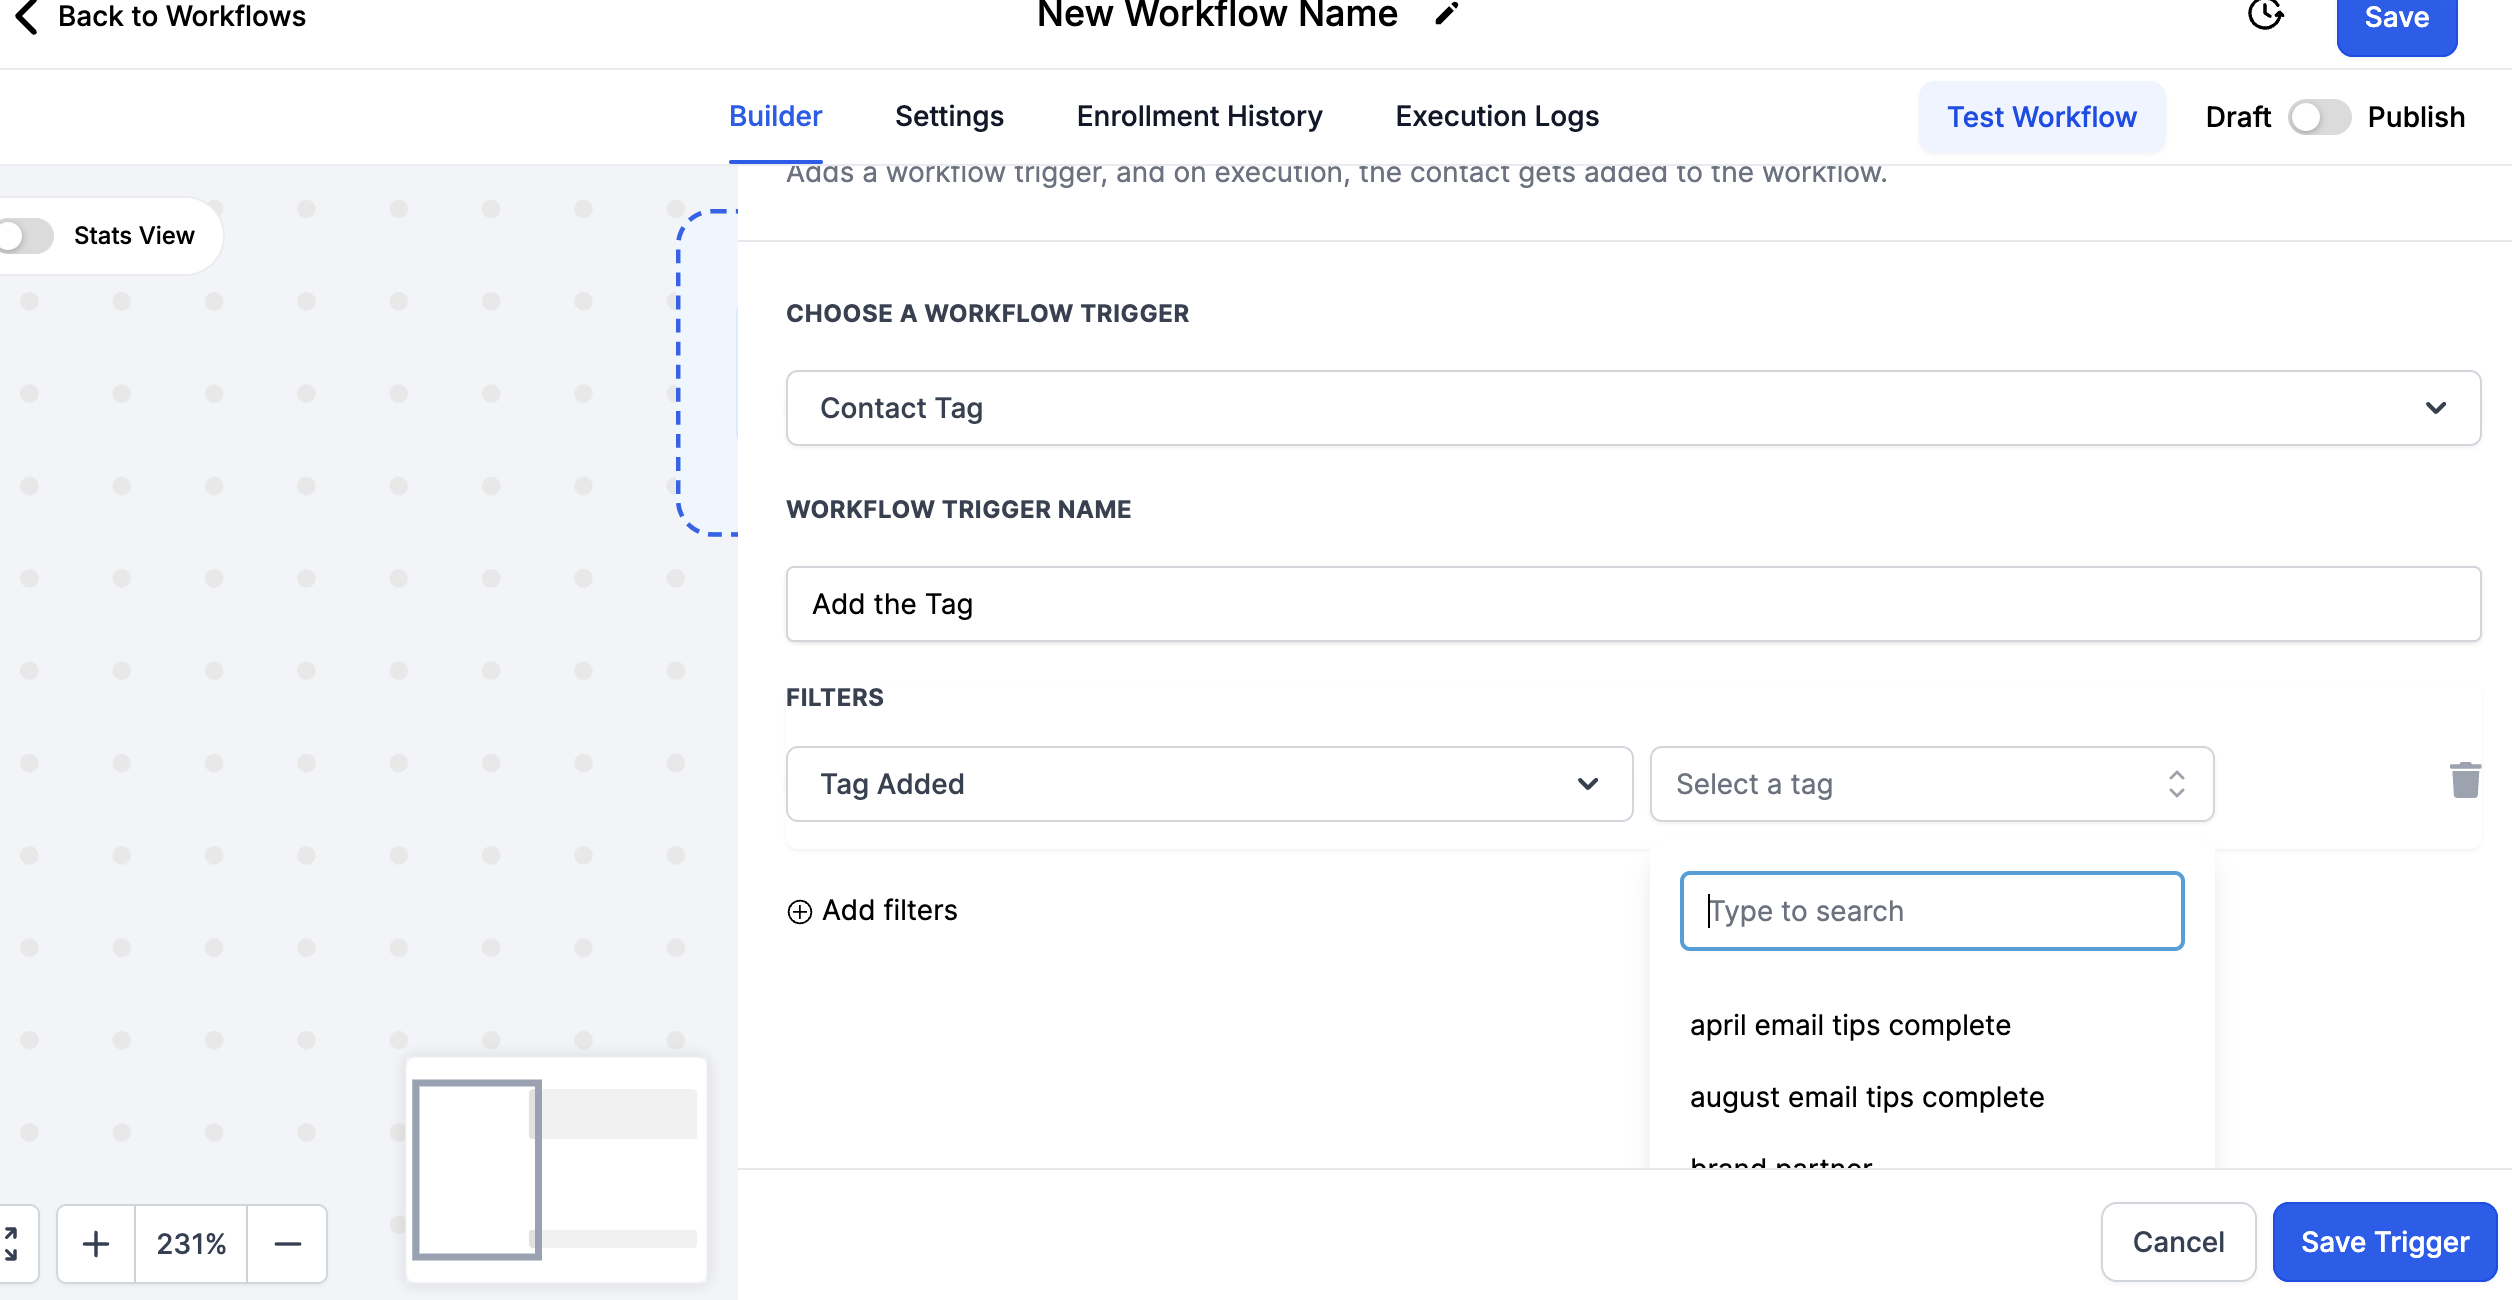
Select Contact Tag
Change the Workflow Trigger Name
Add the Filter 'Tag Added'
Select or Add a Tag
Save the Action
Save the Workflow in the top right
2. Customer Replied (SMS, Email)
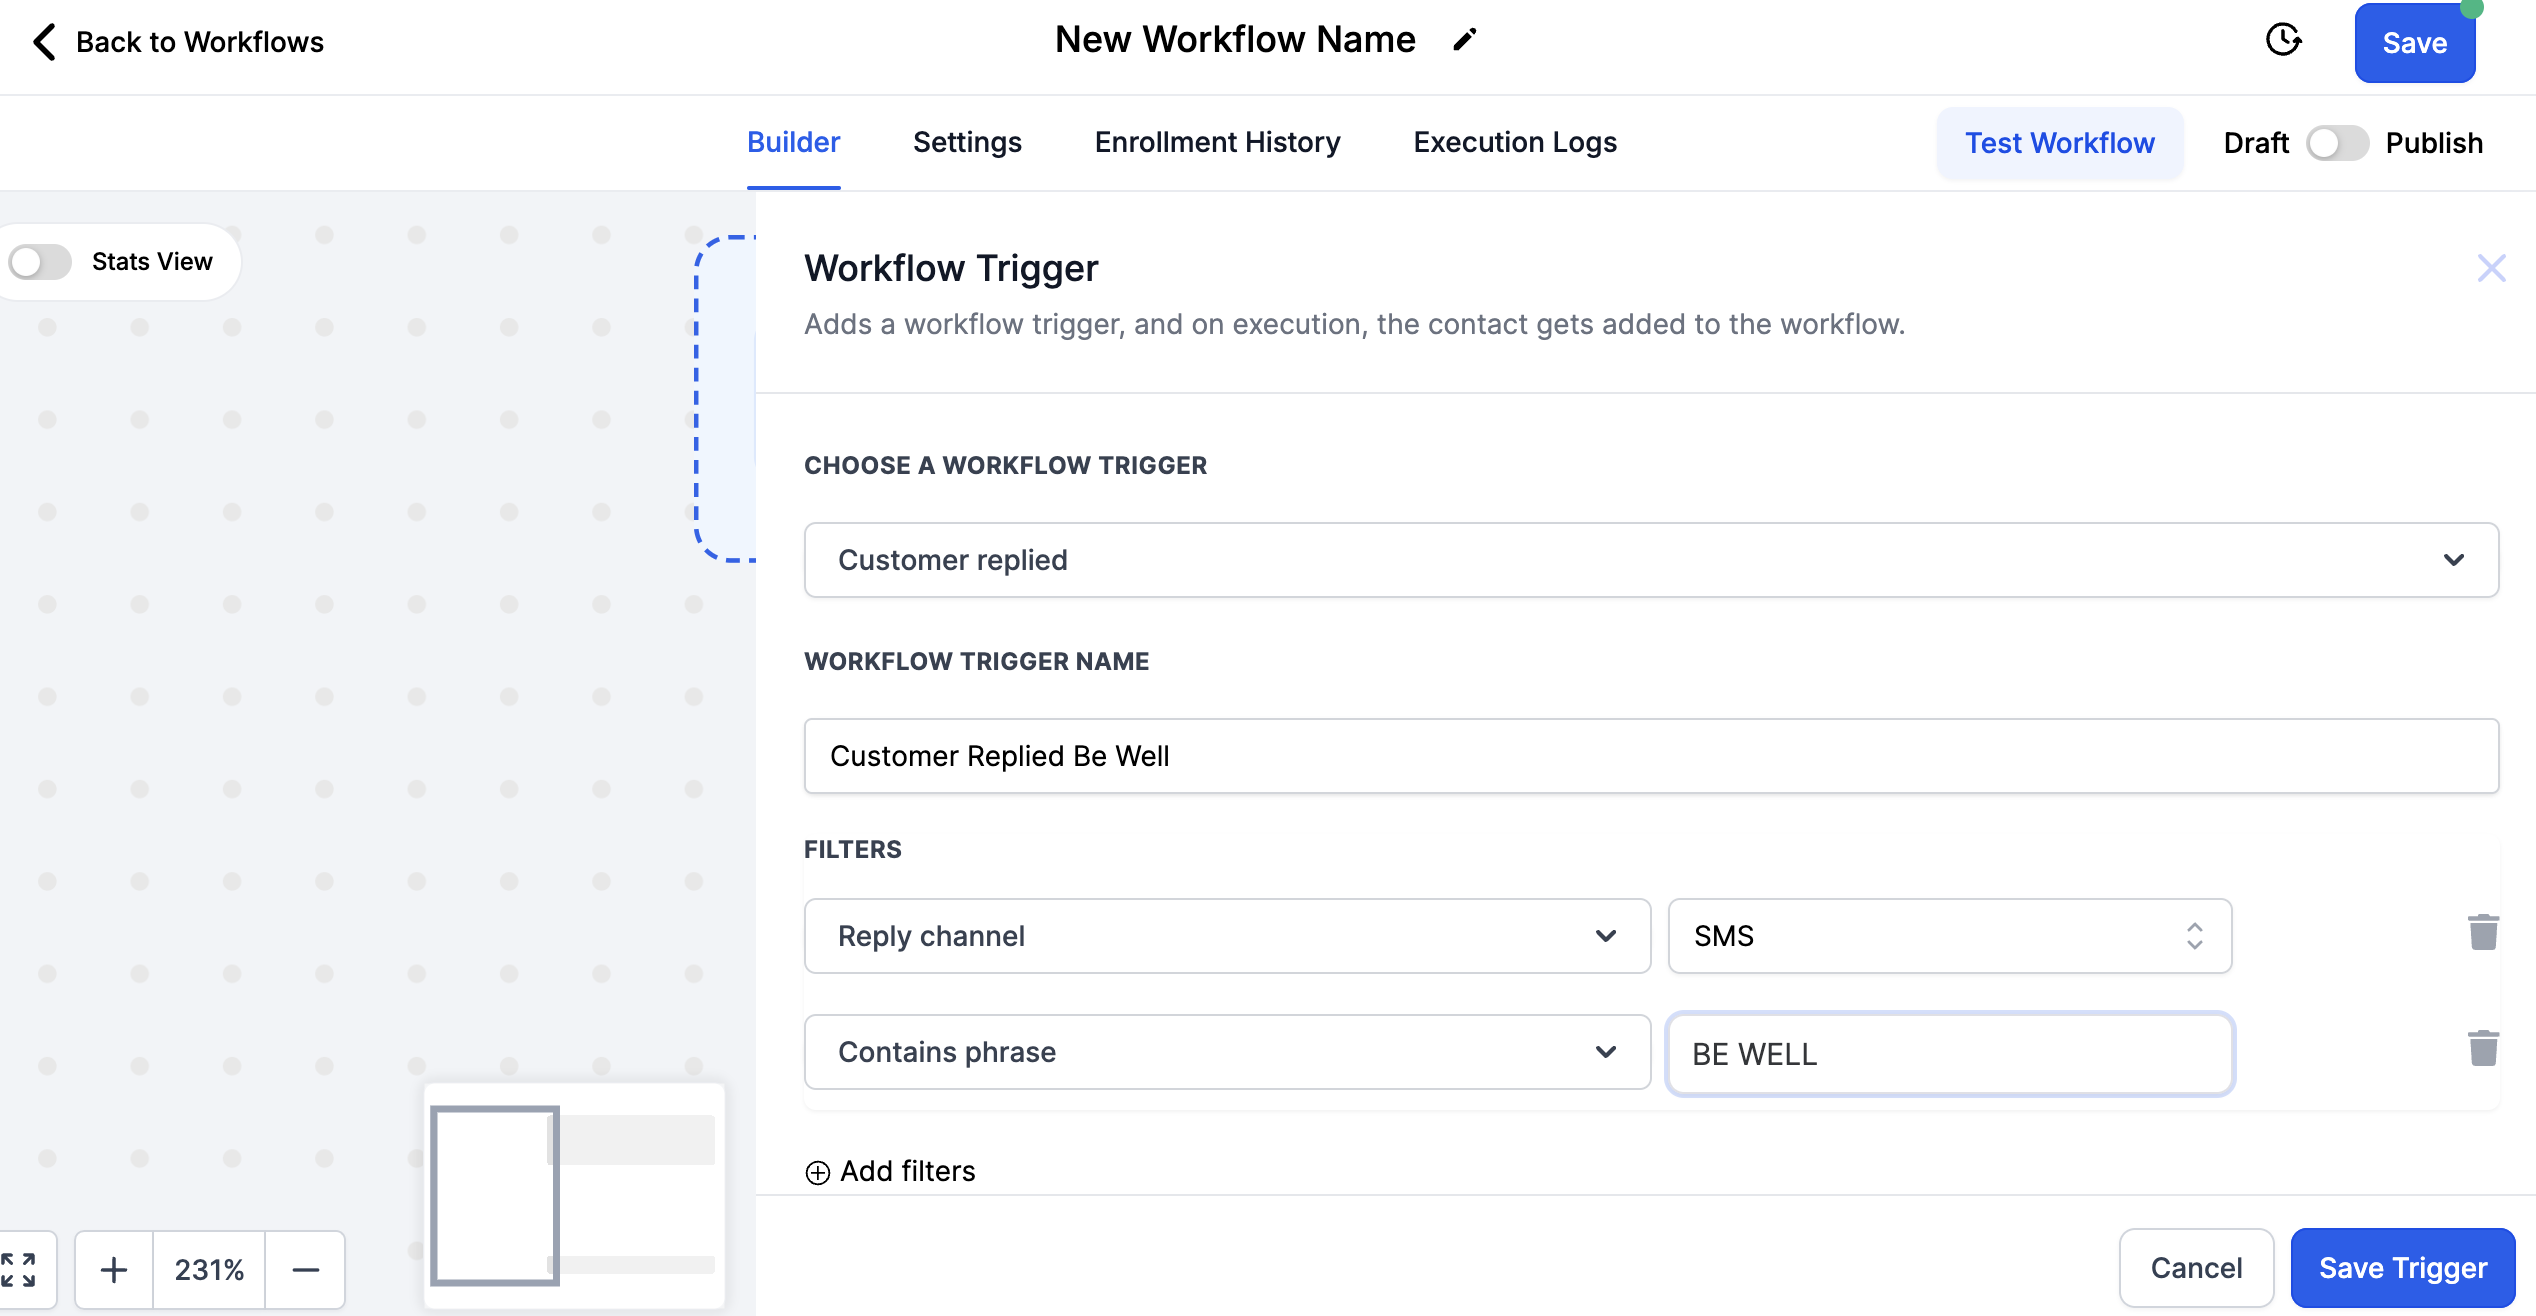
Select Customer Replied
Change the Workflow Trigger Name
Add the Filter 'Reply Channel' is
Select SMS for text and Email for email
Add the Filter 'Contains Phrase'
Add your Trigger Word
*We recommend using two words so the workflow is not accidentally triggered in conversation
Save the Action
Save the Workflow in the top right
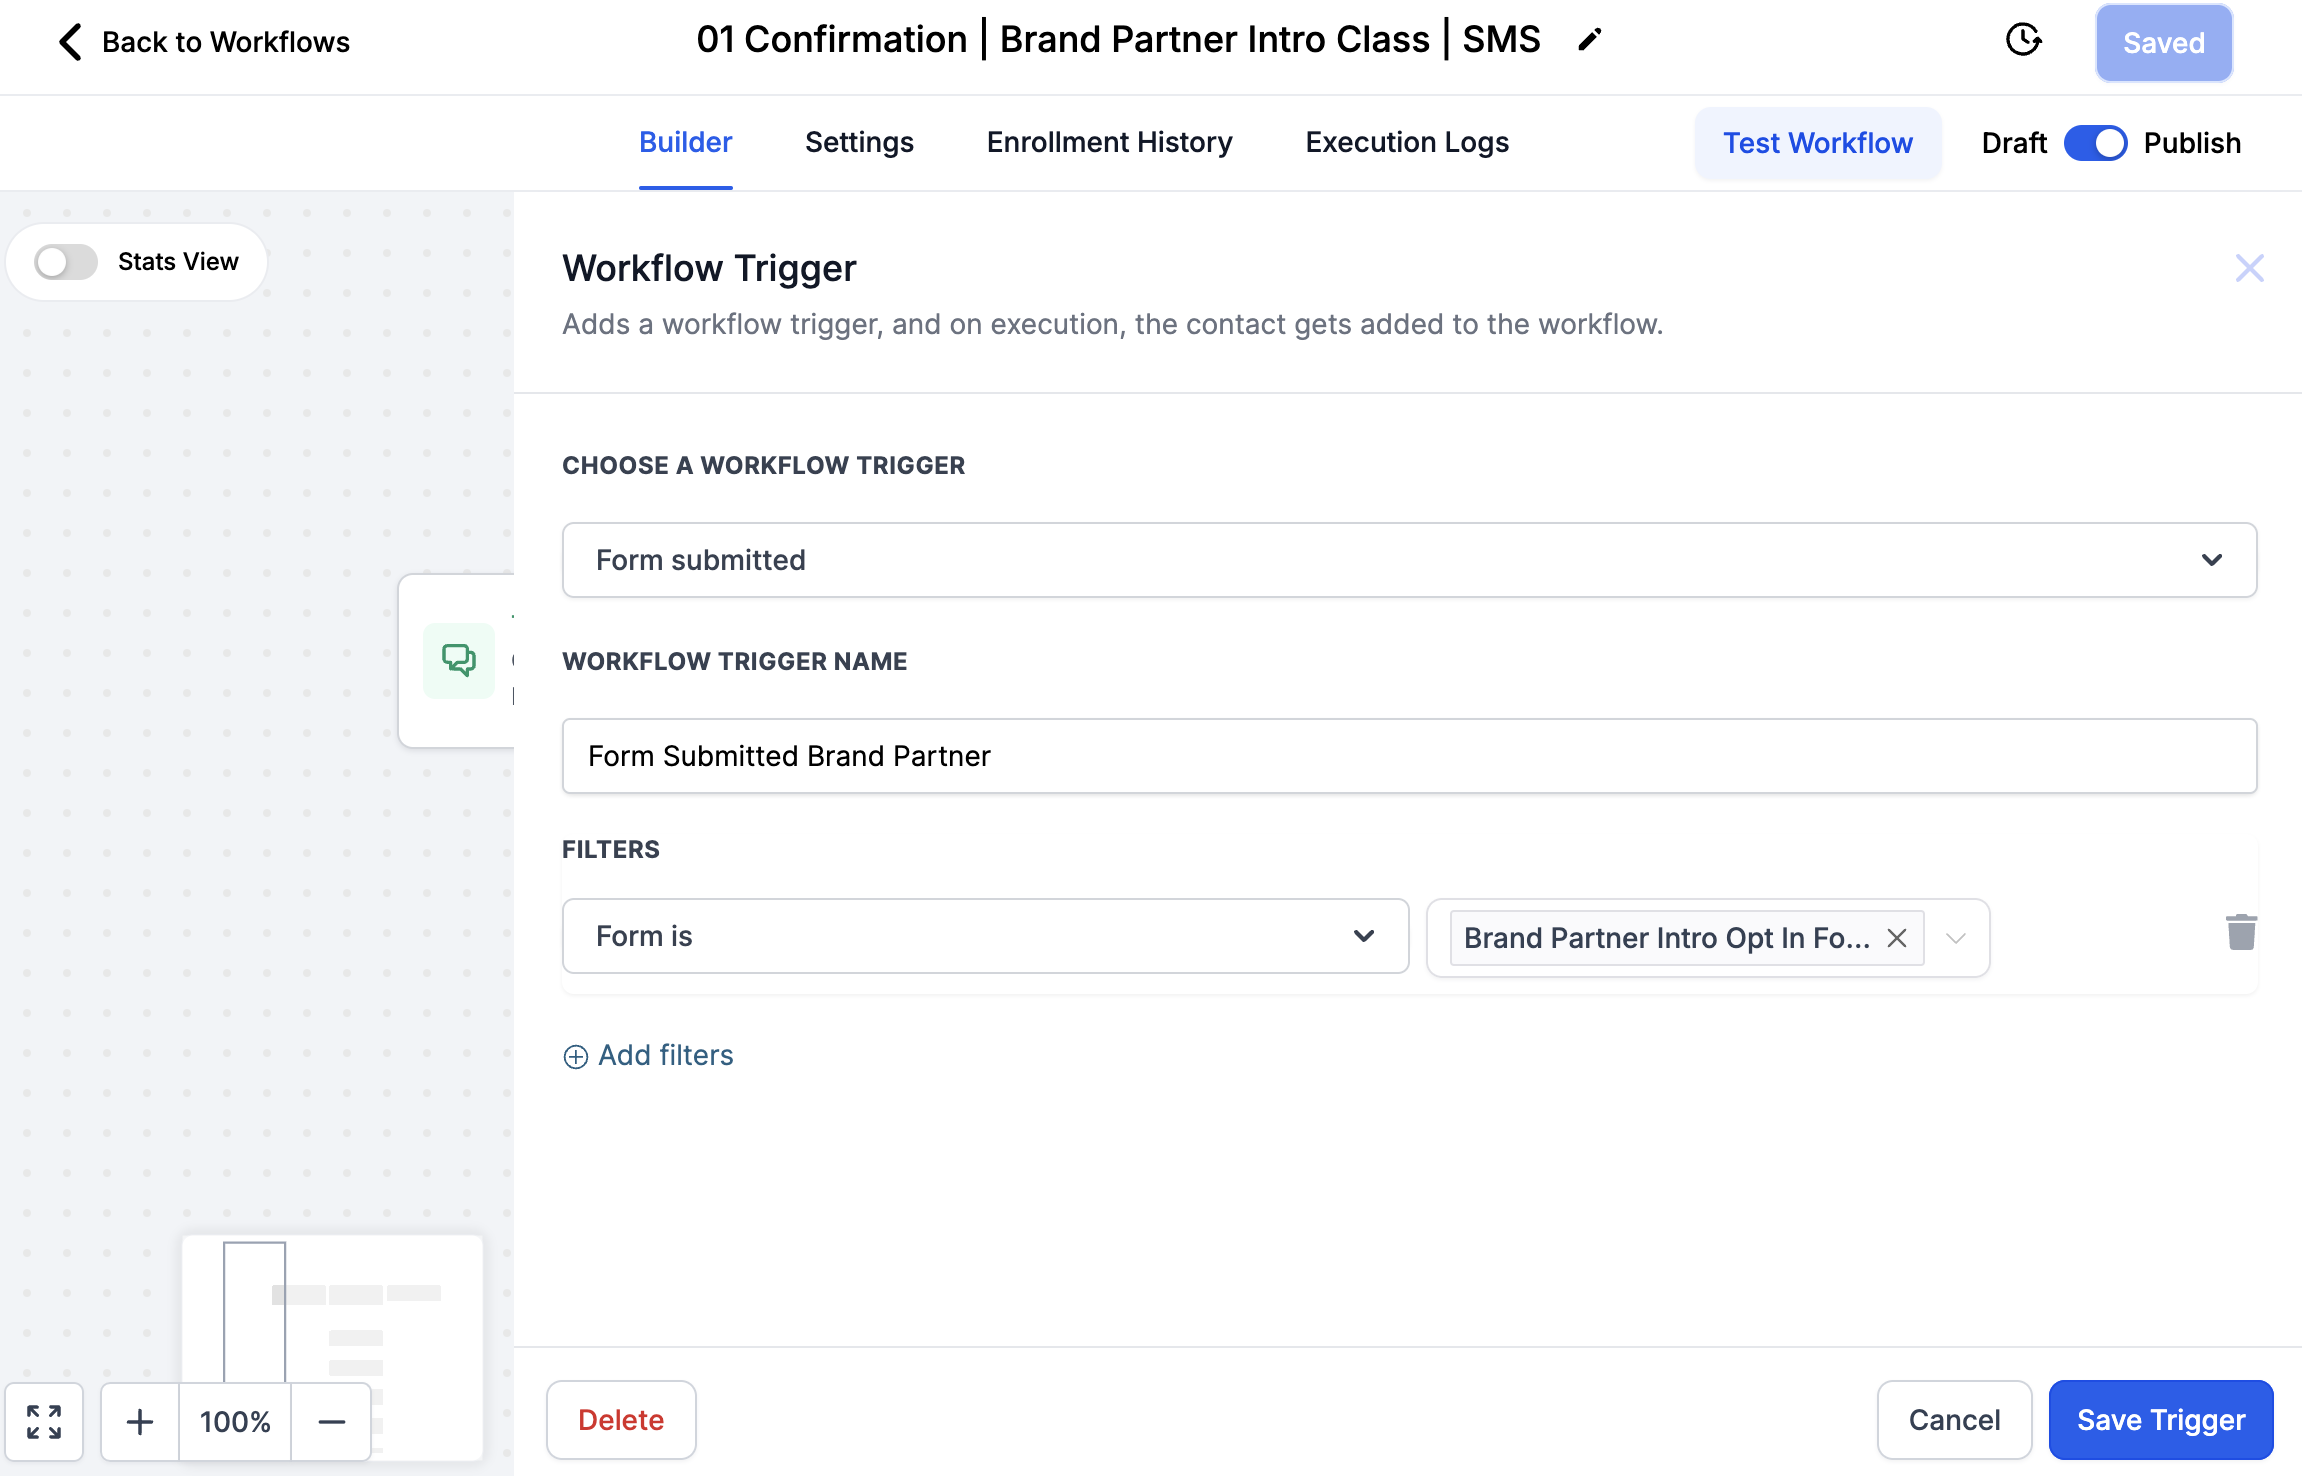
3. Form Added (Mentor & Leader Plans Only)
Select Form Submitted
Change the Workflow Trigger Name
Add the Filter 'Form is'
Select the form you created (Create forms in Websites in the Forms tab)
Save the Action
Save the Workflow in the top right
Lesson to create your own forms here.
Edit Actions in Your Workflow:
To Edit a SMS or Email Action: Select the Action
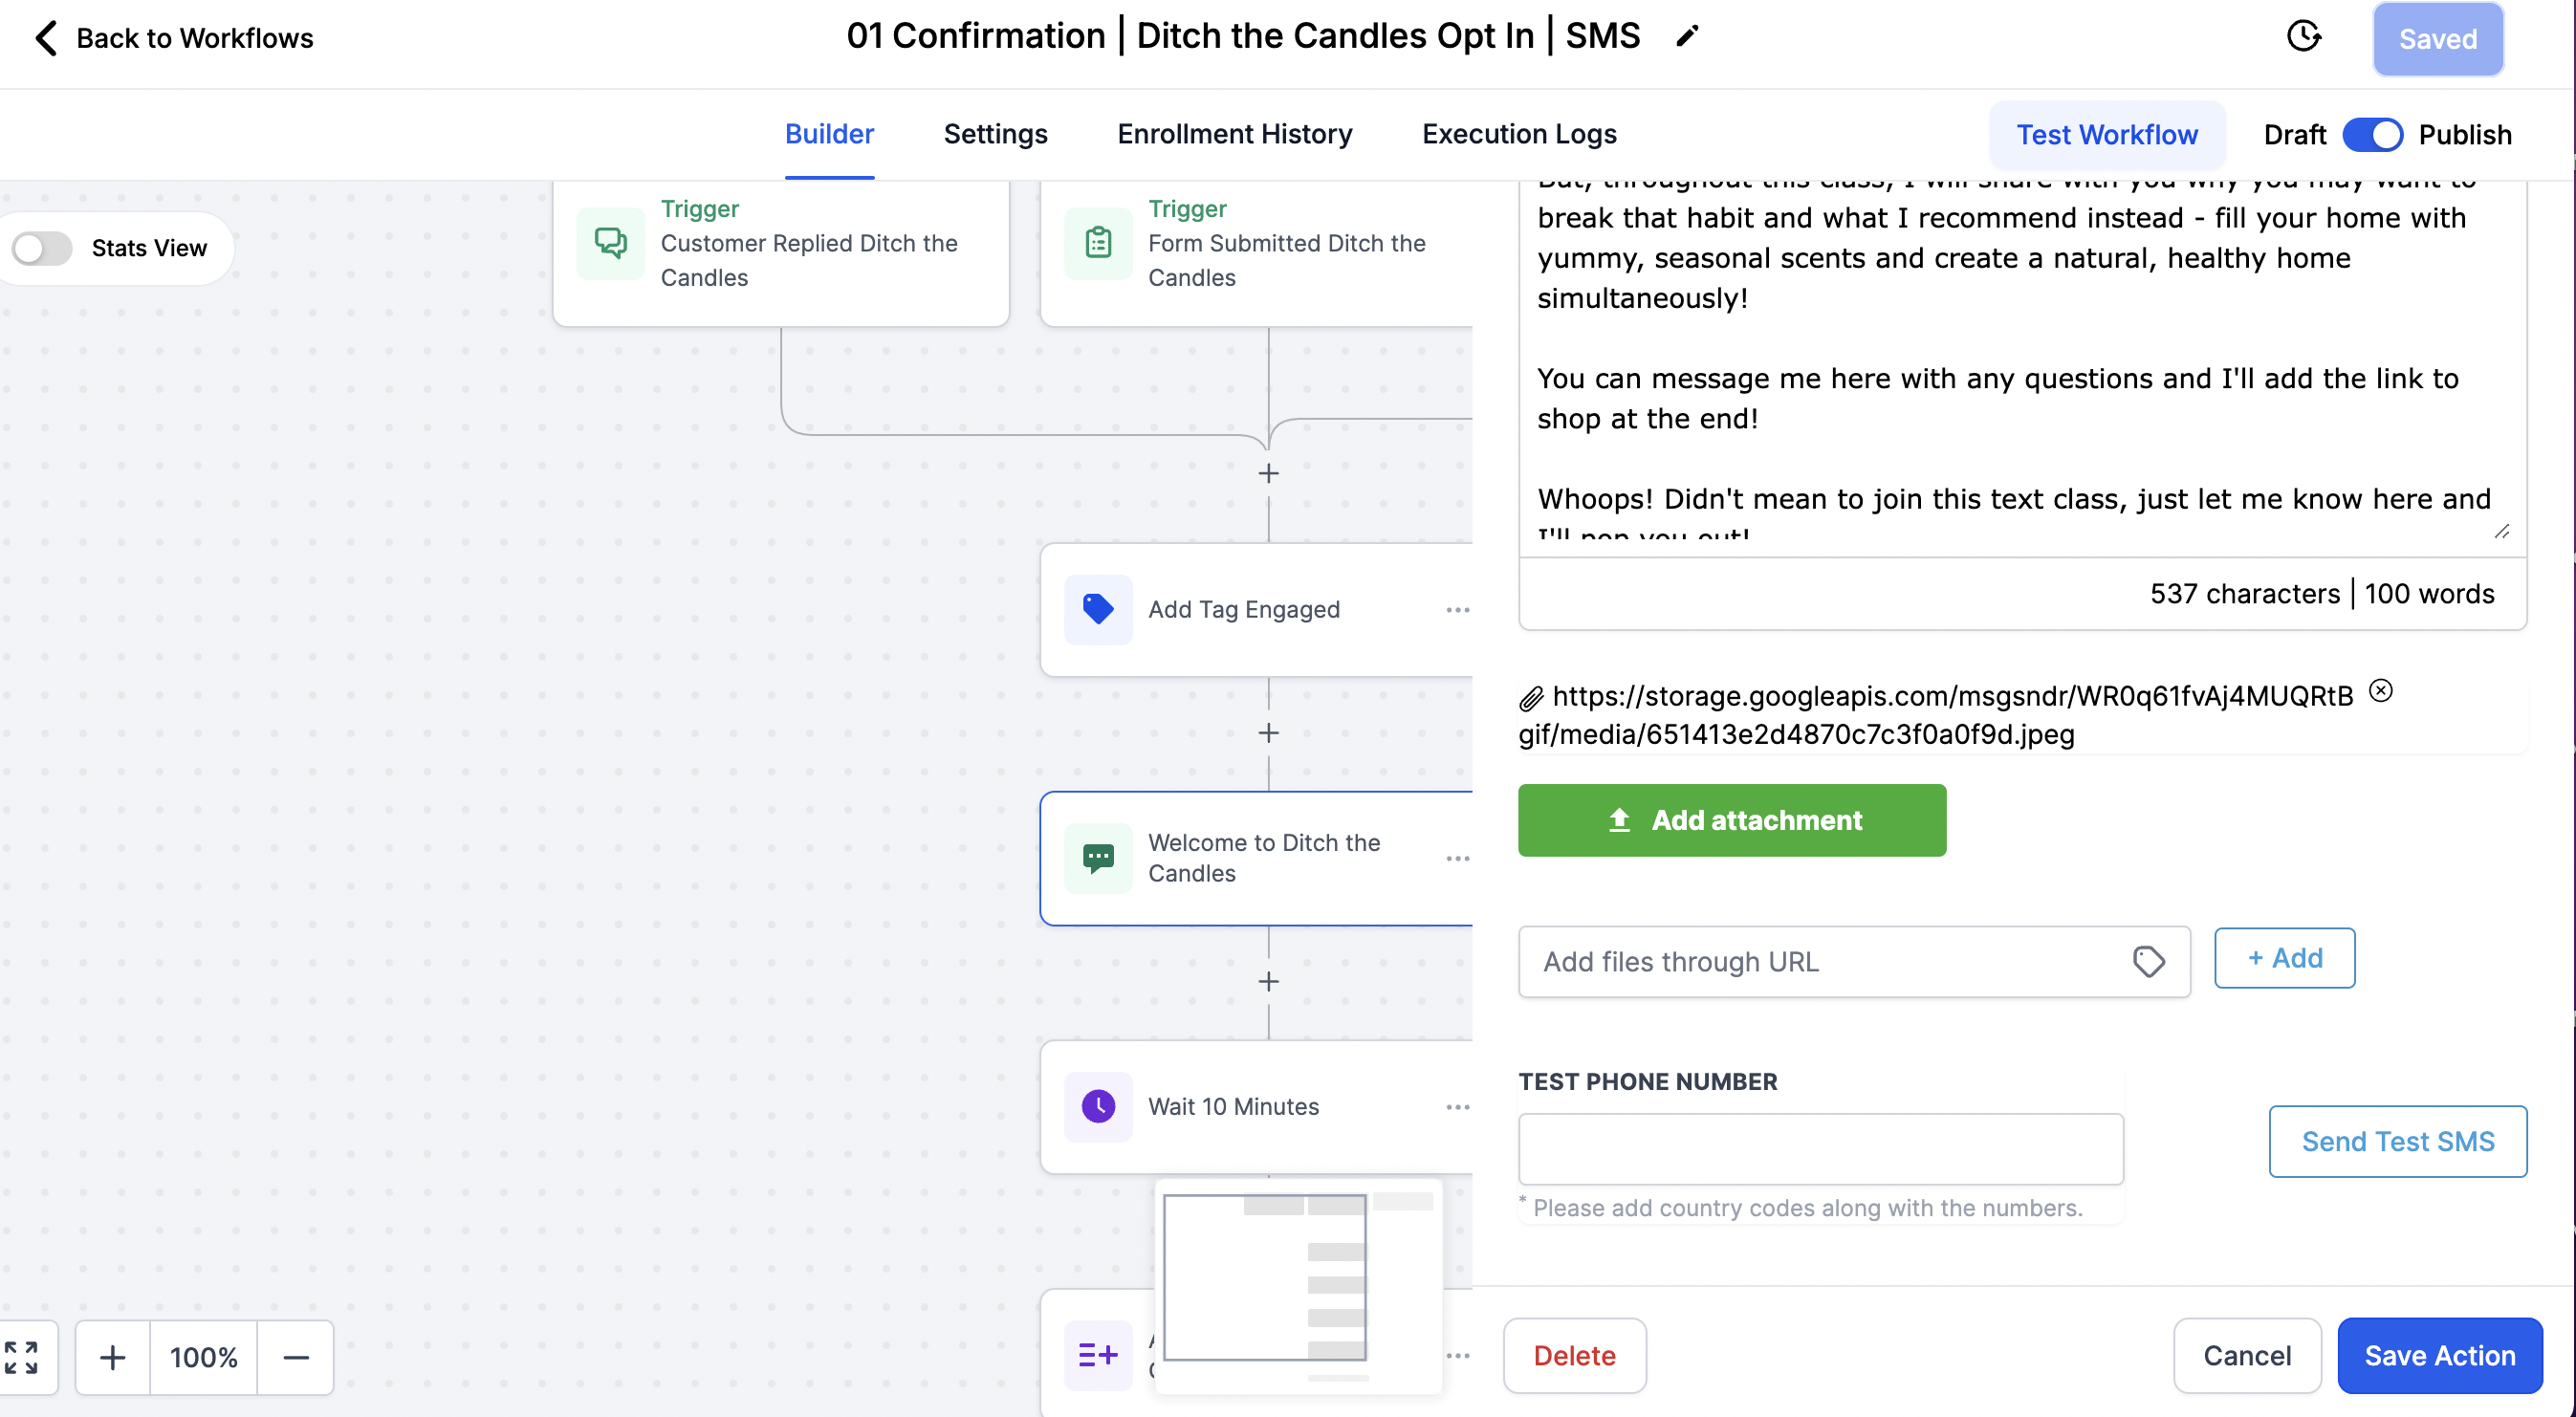
SMS/Texts: Edit wording in the text bubble. When including a photo texts can be 1600 characters. When NOT including a photo, texts can be 160 characters and can not include emoji's. Text Messaging 101 here.
View the photo: Copy the attached photo link and paste in a separate browser to view.
Change the photo: Click the X on the attached link and click the Add Attachment button to upload a new photo.
Test the Text: Add your phone number including the country code +1 to receive a sample of the text
*Save the Action and then Save the Entire Workflow to save your changes.
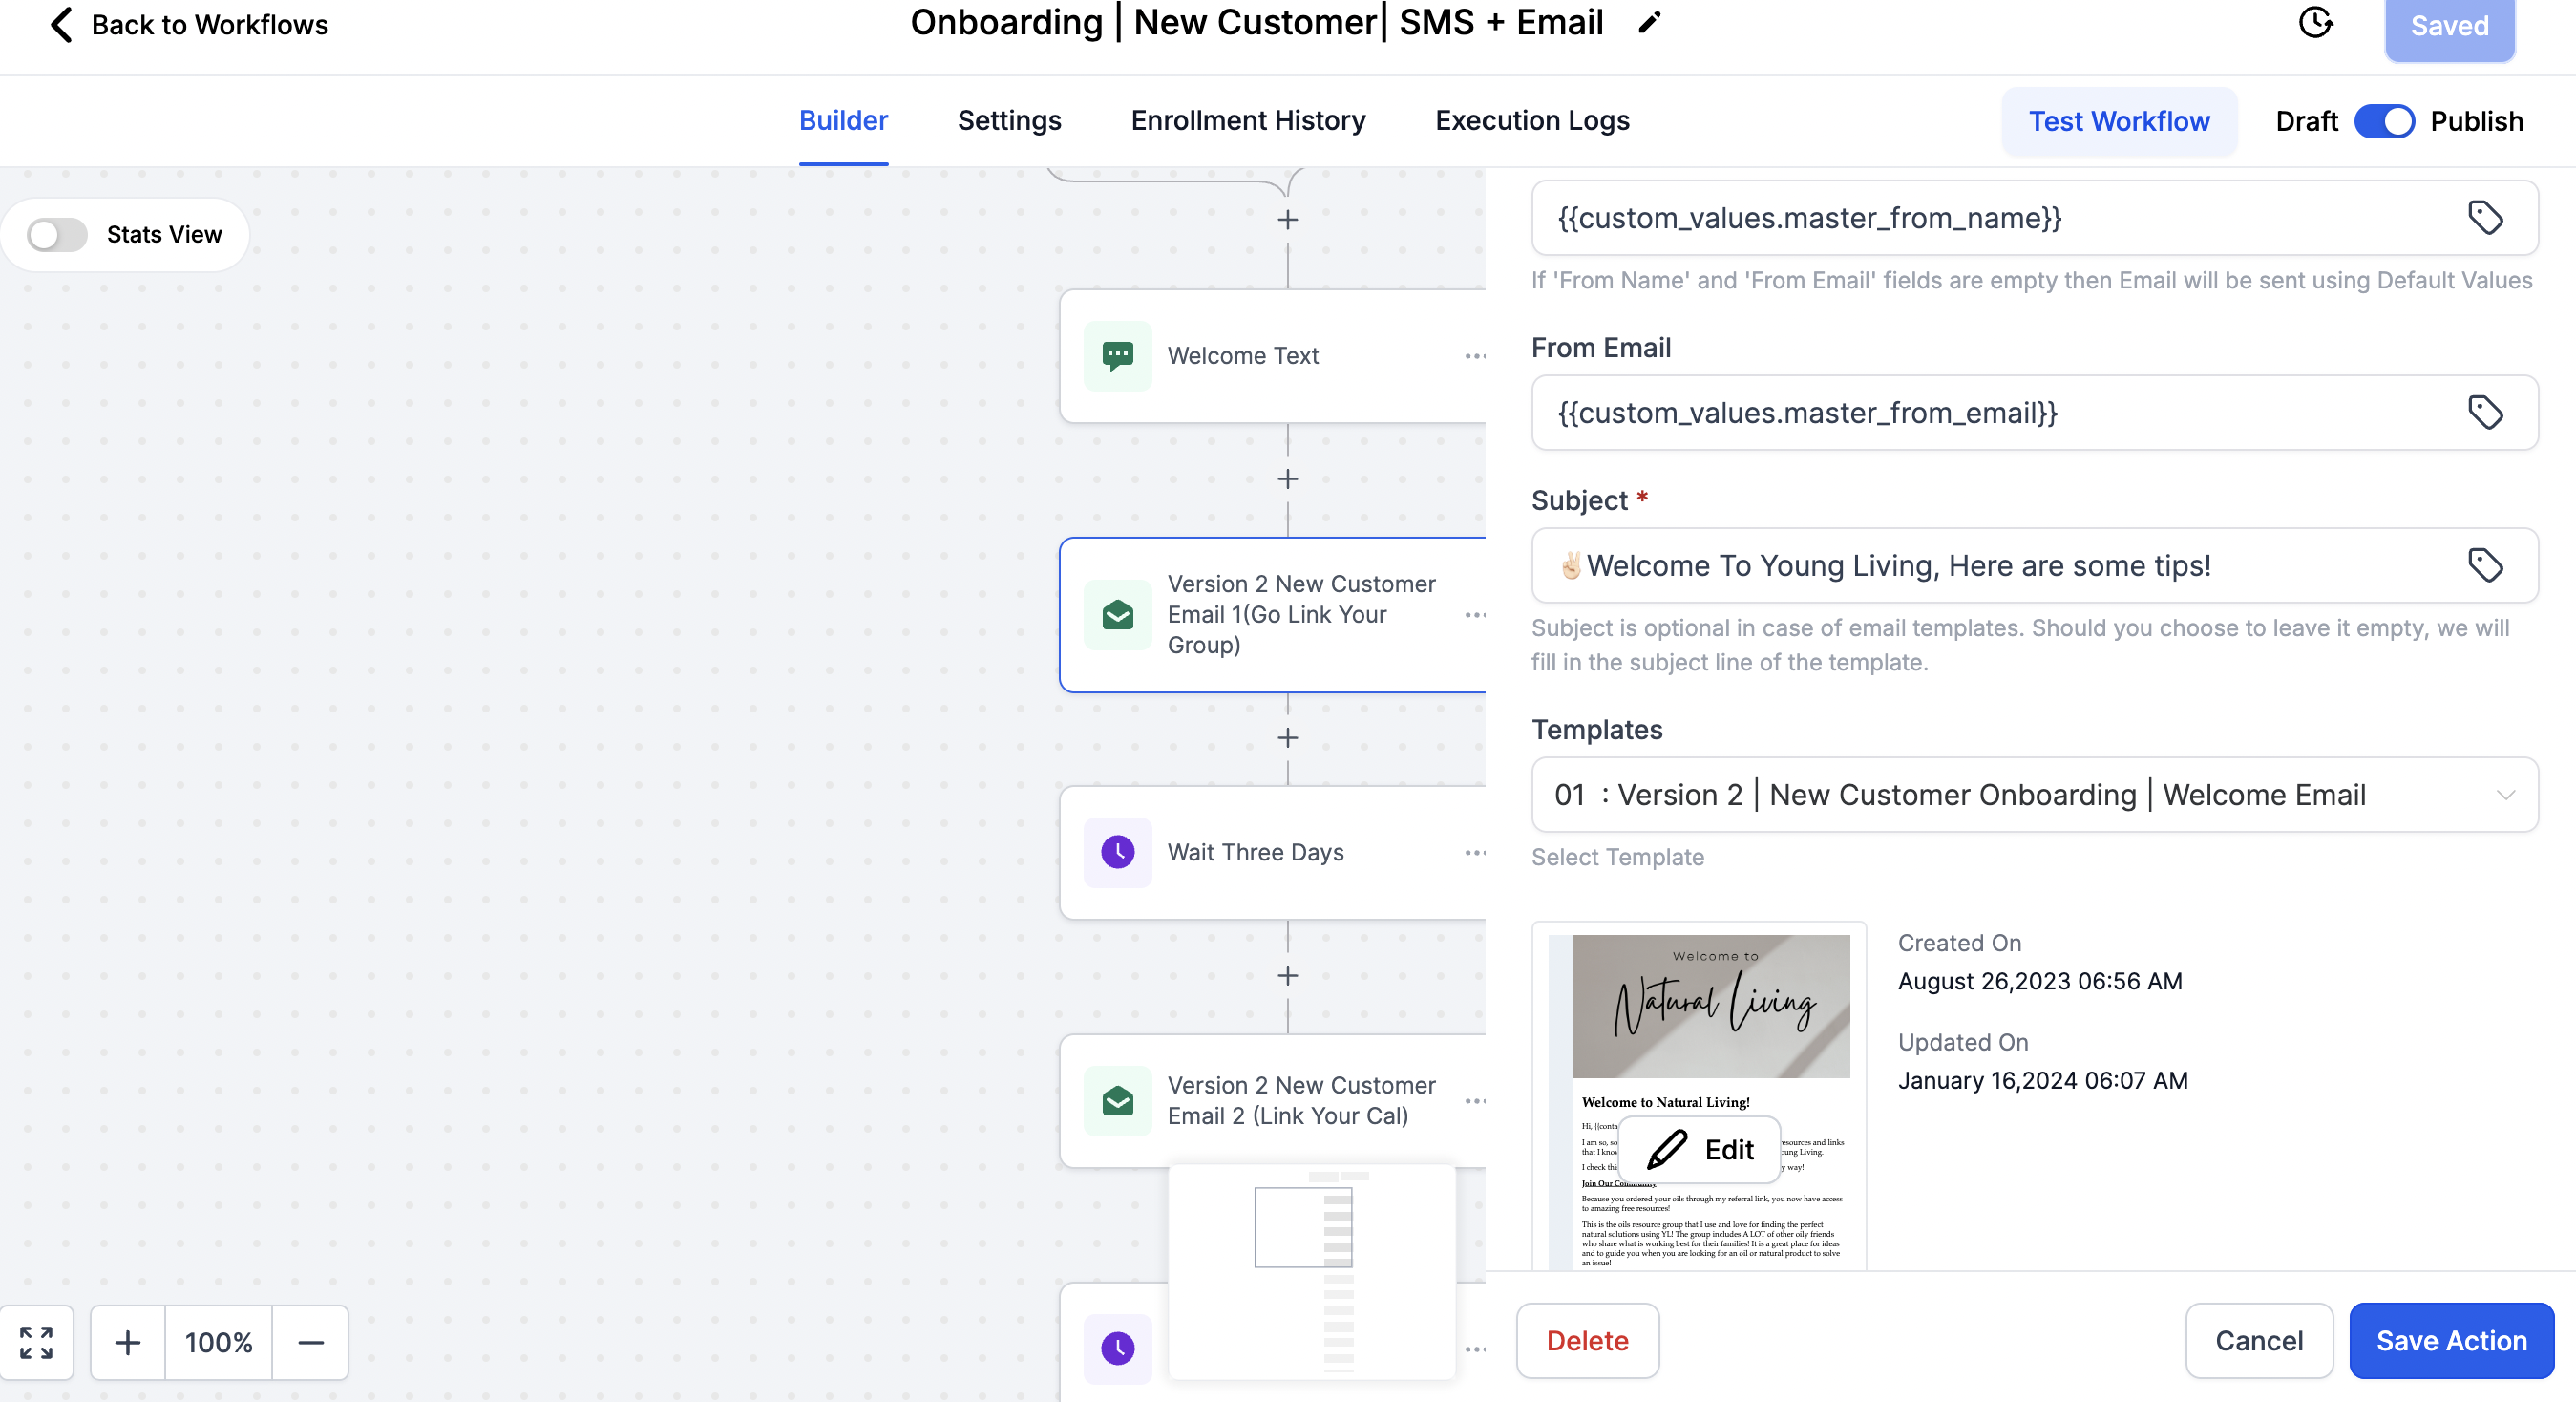
To Edit an Email Action: Select the Action
Template Linked: Our email actions link to email templates we have created. You can either:
Update the template link to link to a different email.
Go to the Marketing Tab and find the email template and edit within the template to keep your changes. If you edit from email templates, save the email and it will auto-populate in the workflow.
OR select Edit on the email preview photo from within the workflow and edit in the workflow. Edits inside the workflow will only save for the email template inside of this specific workflow. Edits do not change the original email template.
*Click Save in the email template, then Save the Action and then Save the Entire Workflow in the top right to save your changes.
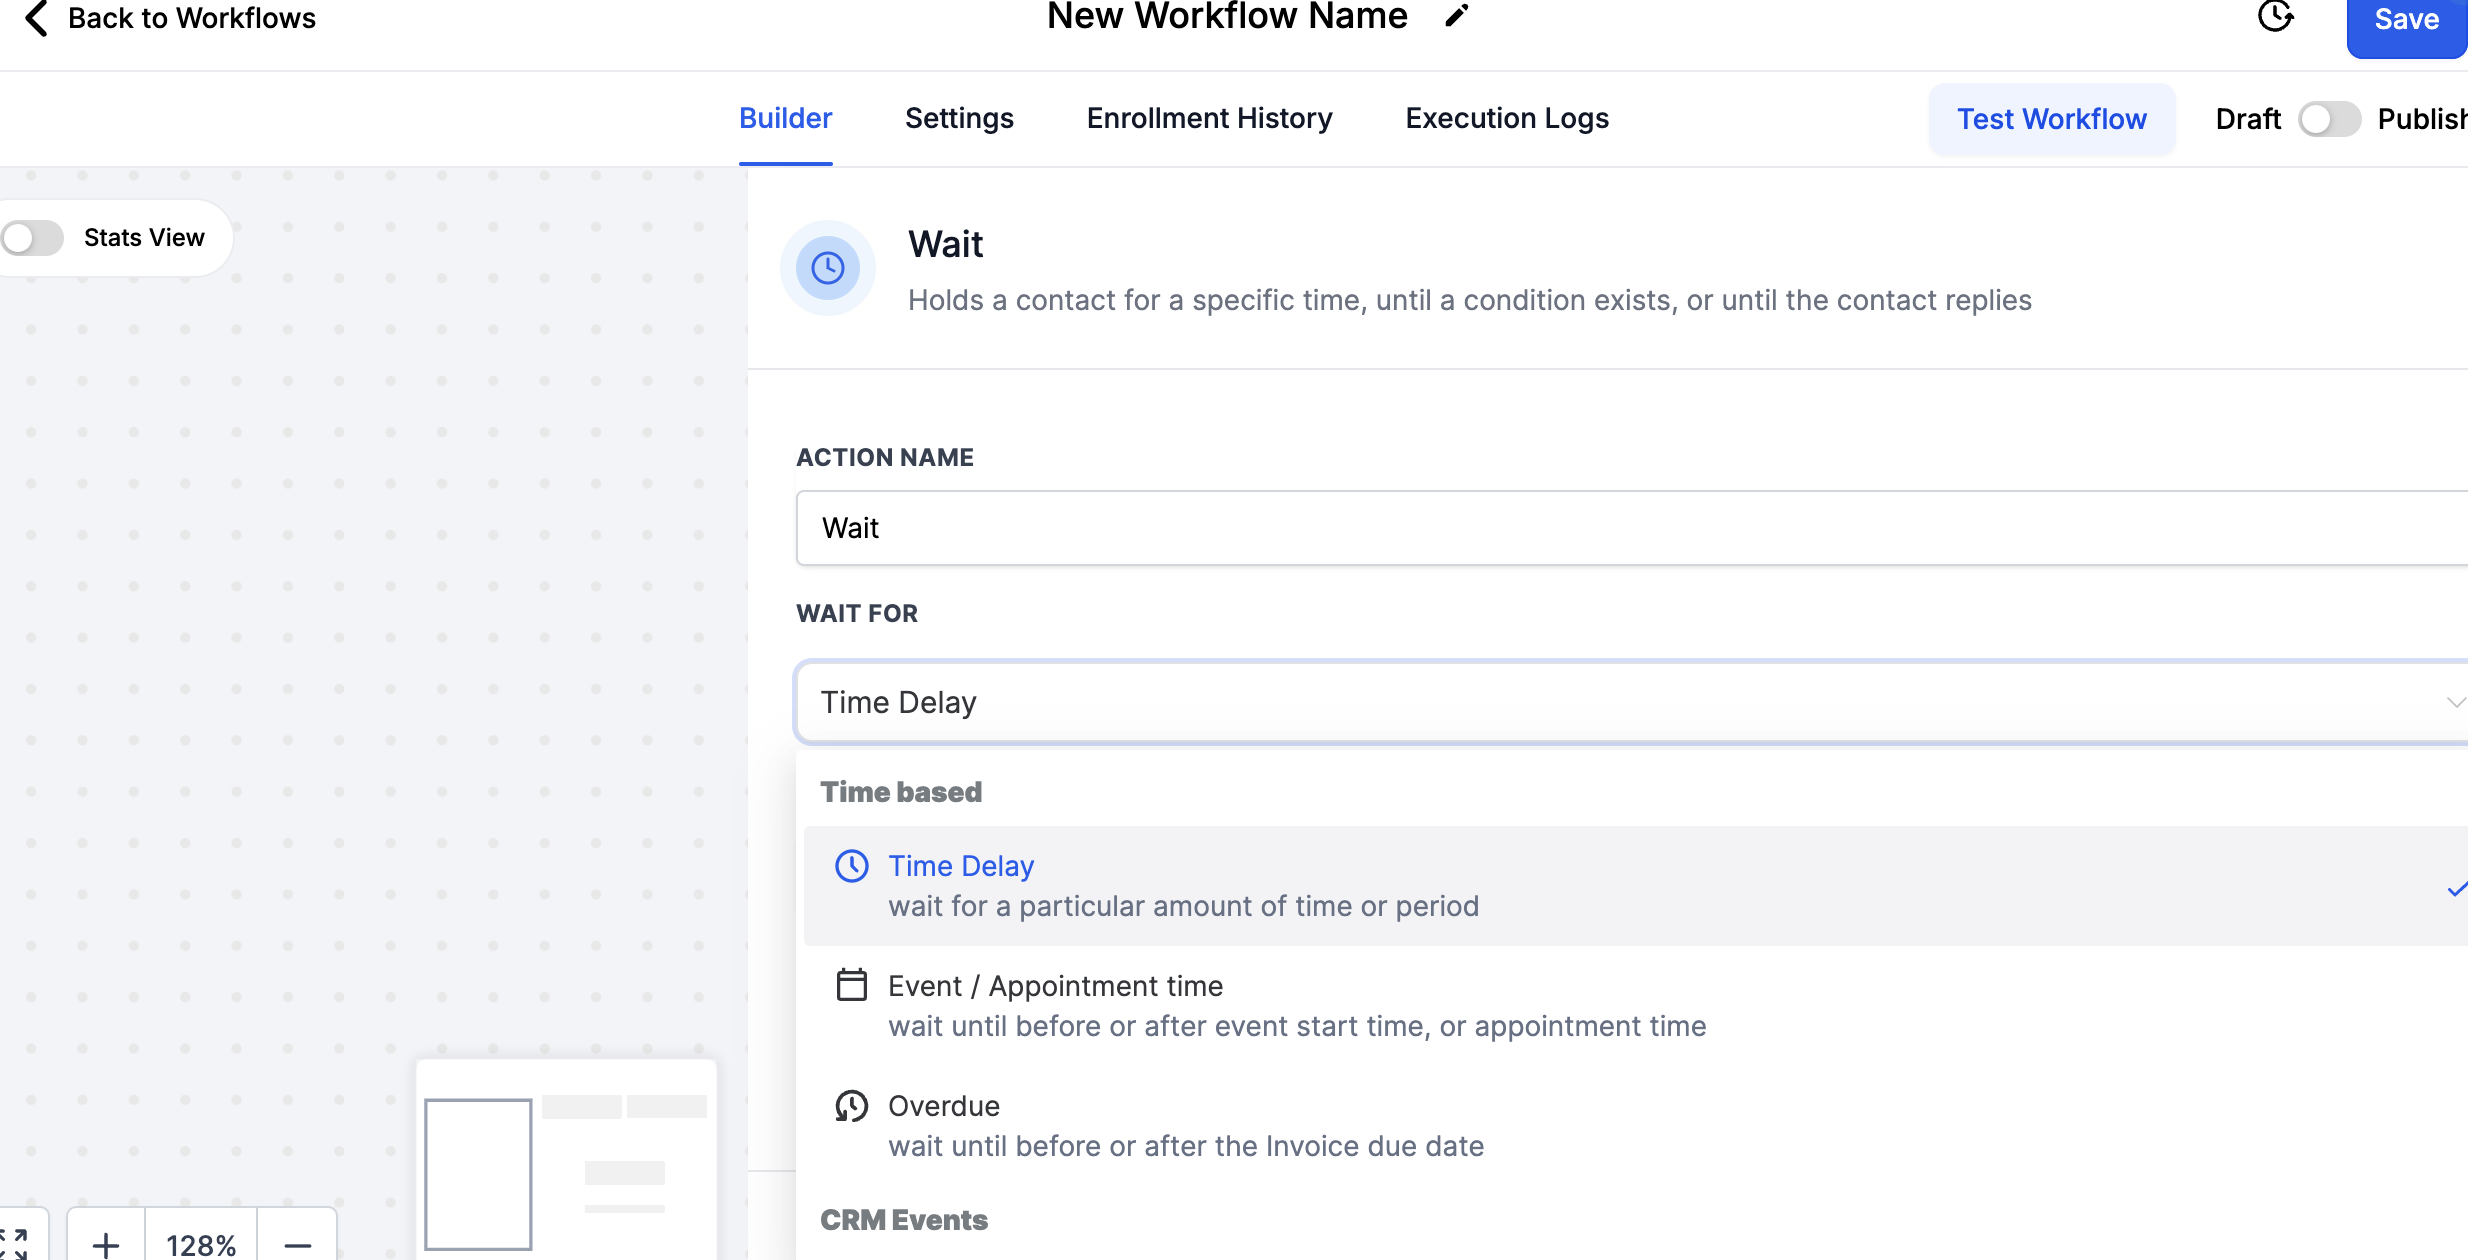
To Edit a WAIT Action: Select 'Wait' and select:
Time Delay: Select minutes, hours or days
Event Appointment: When using this action you need an wait action step below it. In the wait, select 'Event' then select 'Exact Time' for the wait step to wait for the event date and time above.
*Save the Action and then Save the Entire Workflow
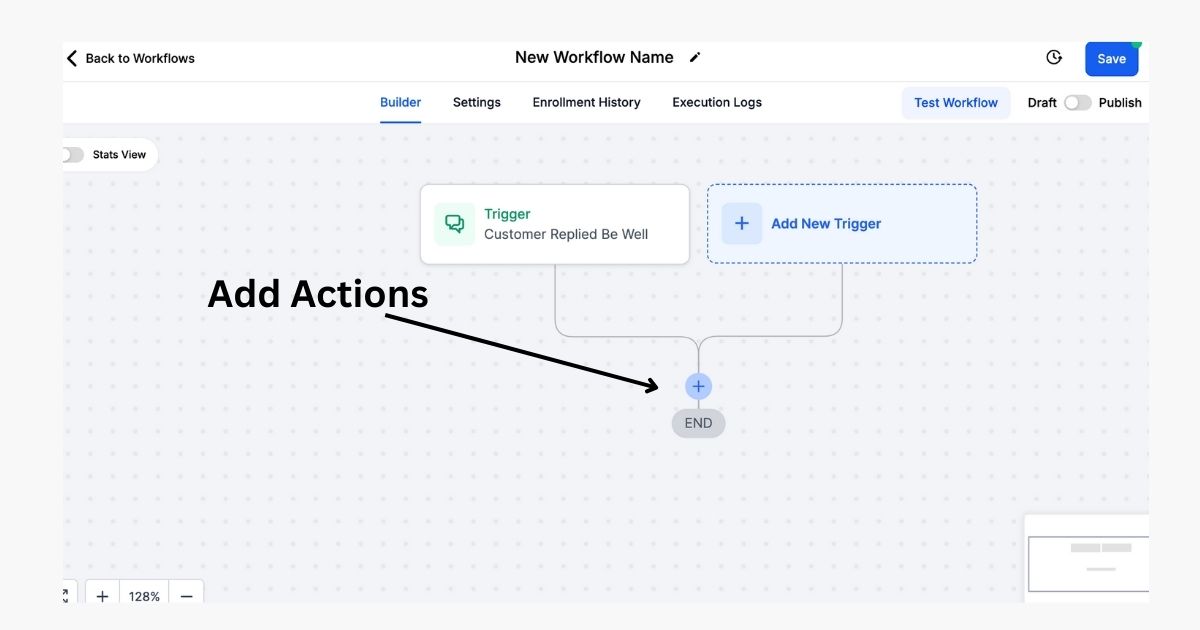
Popular Actions to Add into Your Workflow:
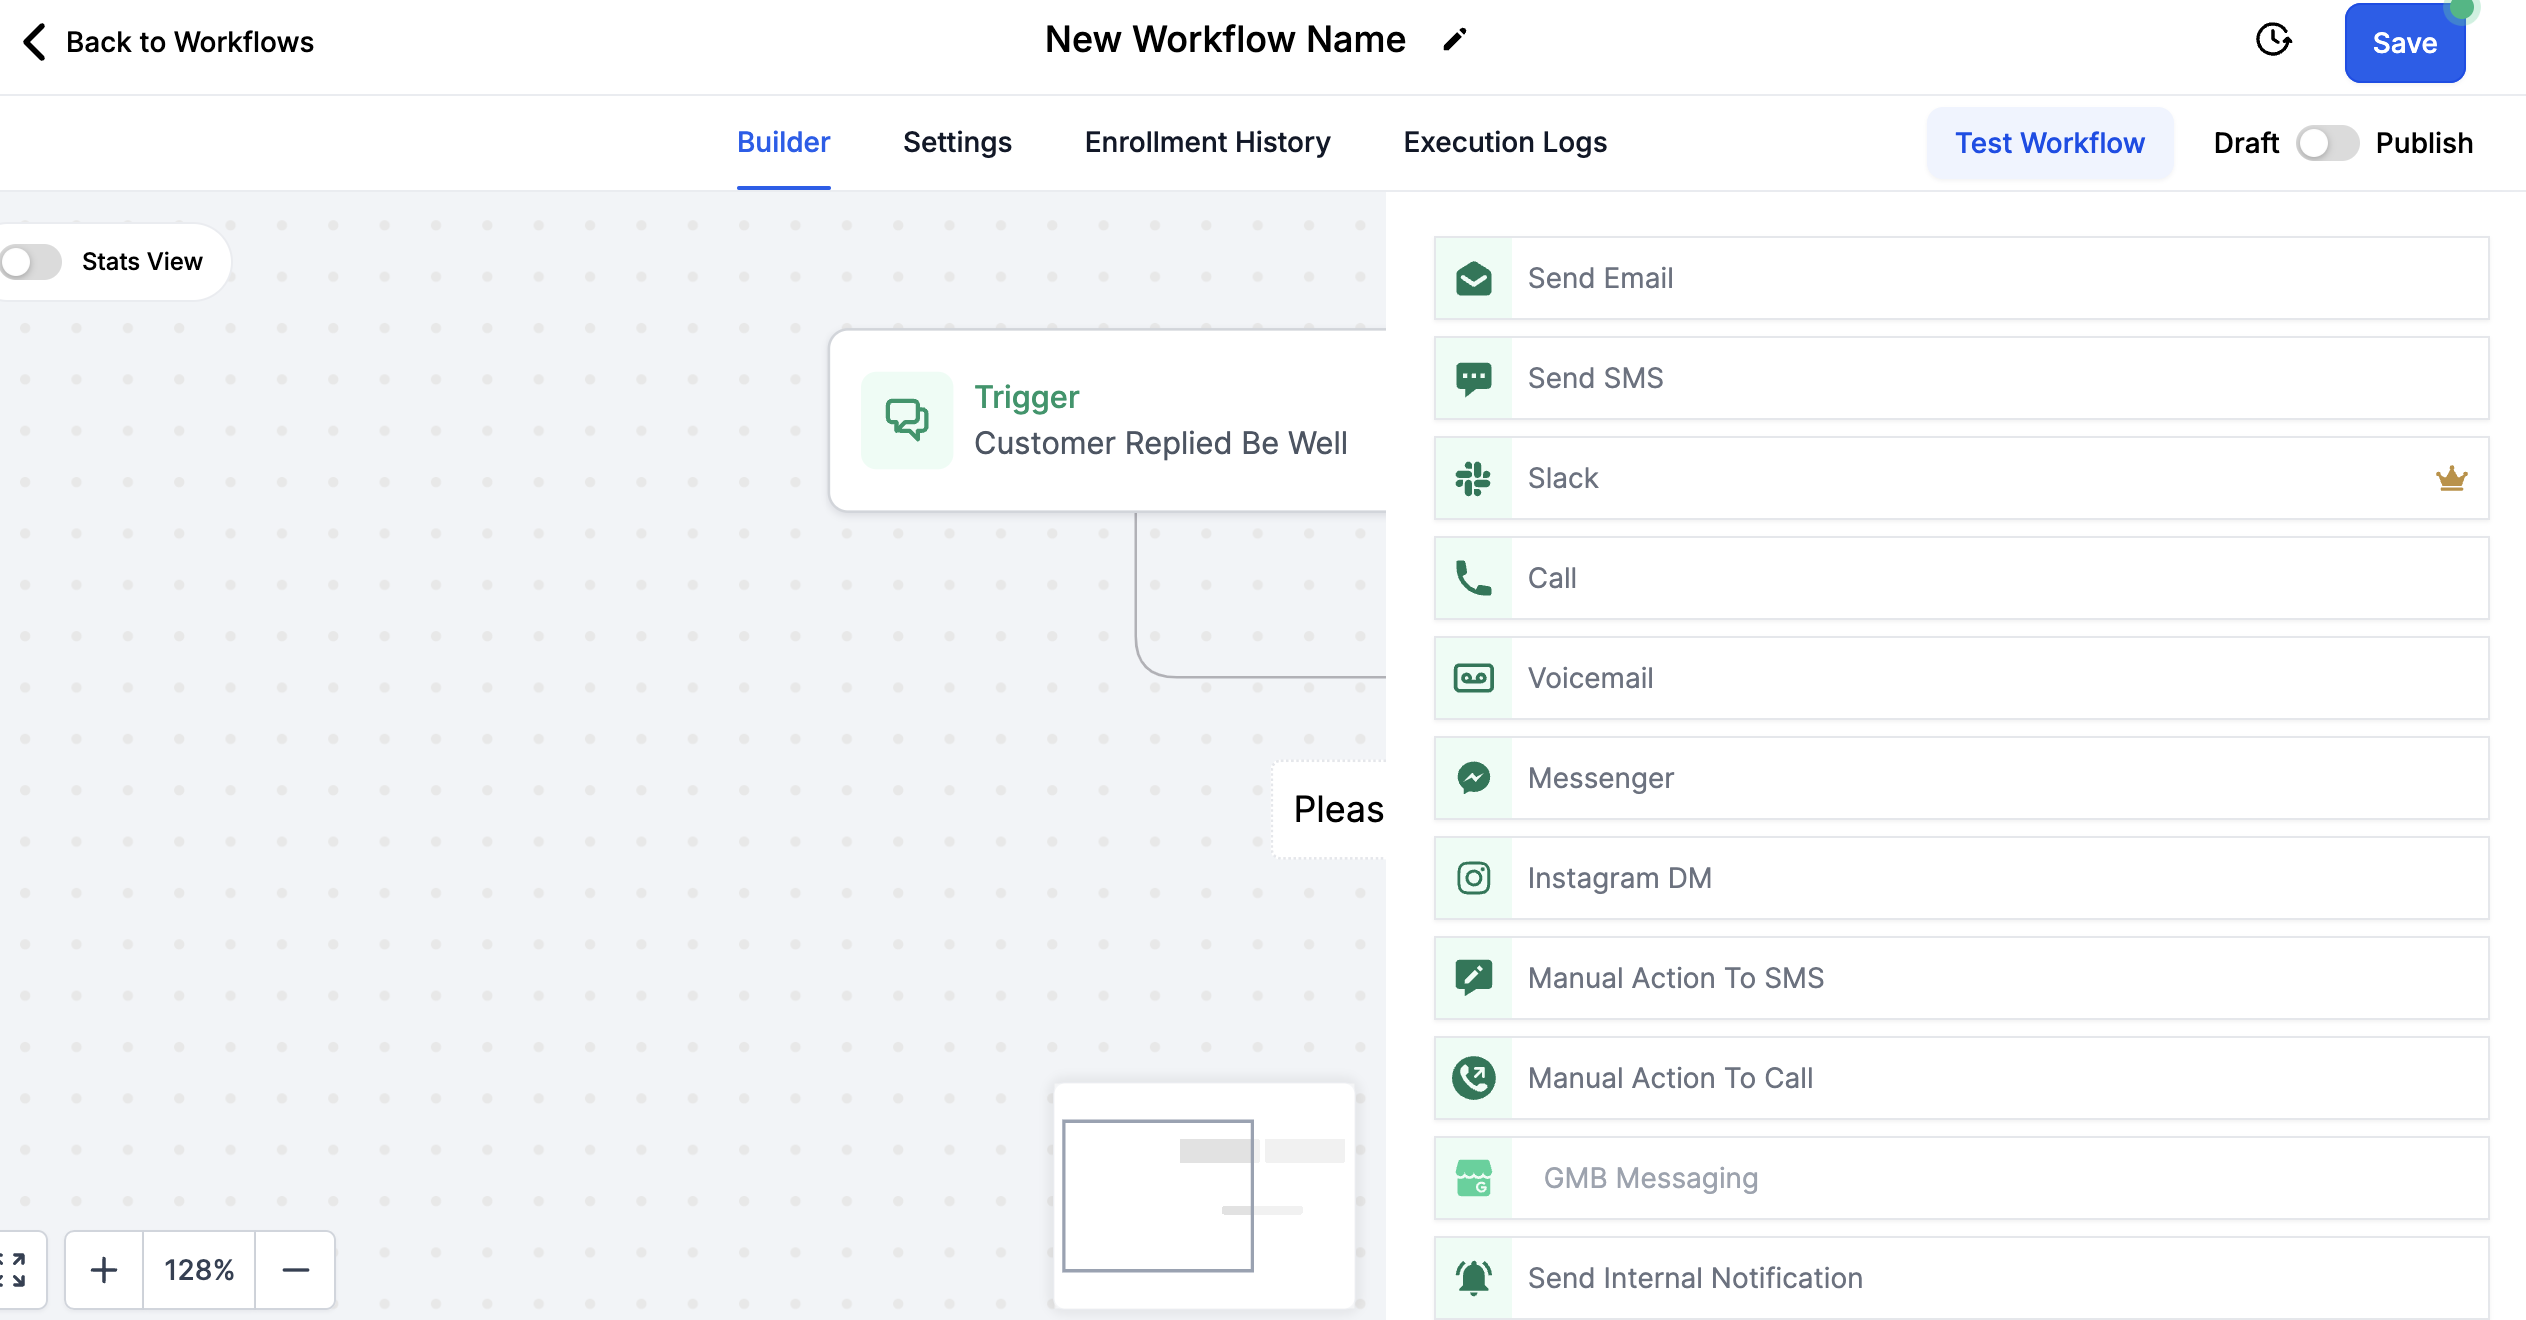
Click the PLUS icon on the workflow to add actions.
The actions are what you want to happen once a contact is in the workflow.
In Diamond Marketing, we typically will tag the contact "engaged" so you can filter for contacts who have engaged with your content. You can also tag them be more specific to the workflow or reason they entered it.
We then use text or email actions with wait steps in between.
You can also "Add to workflow", Set an Event date and time or send yourself an internal notification.
There are endless possibilities, below are the most popular.
Send Email: Allows you to select an email template to send
Send SMS: Allows you to send a text
*NOTE Texts without photos should have 160 characters or less. When adding a photo texts can have 1600 characters. Do not include shortened links or CBD content. Text Message 101 here.
Internal Notification: Allows you to send a text or email to yourslef if someone joins the workflow
*Always save the action and the workflow in the top right when adding an action
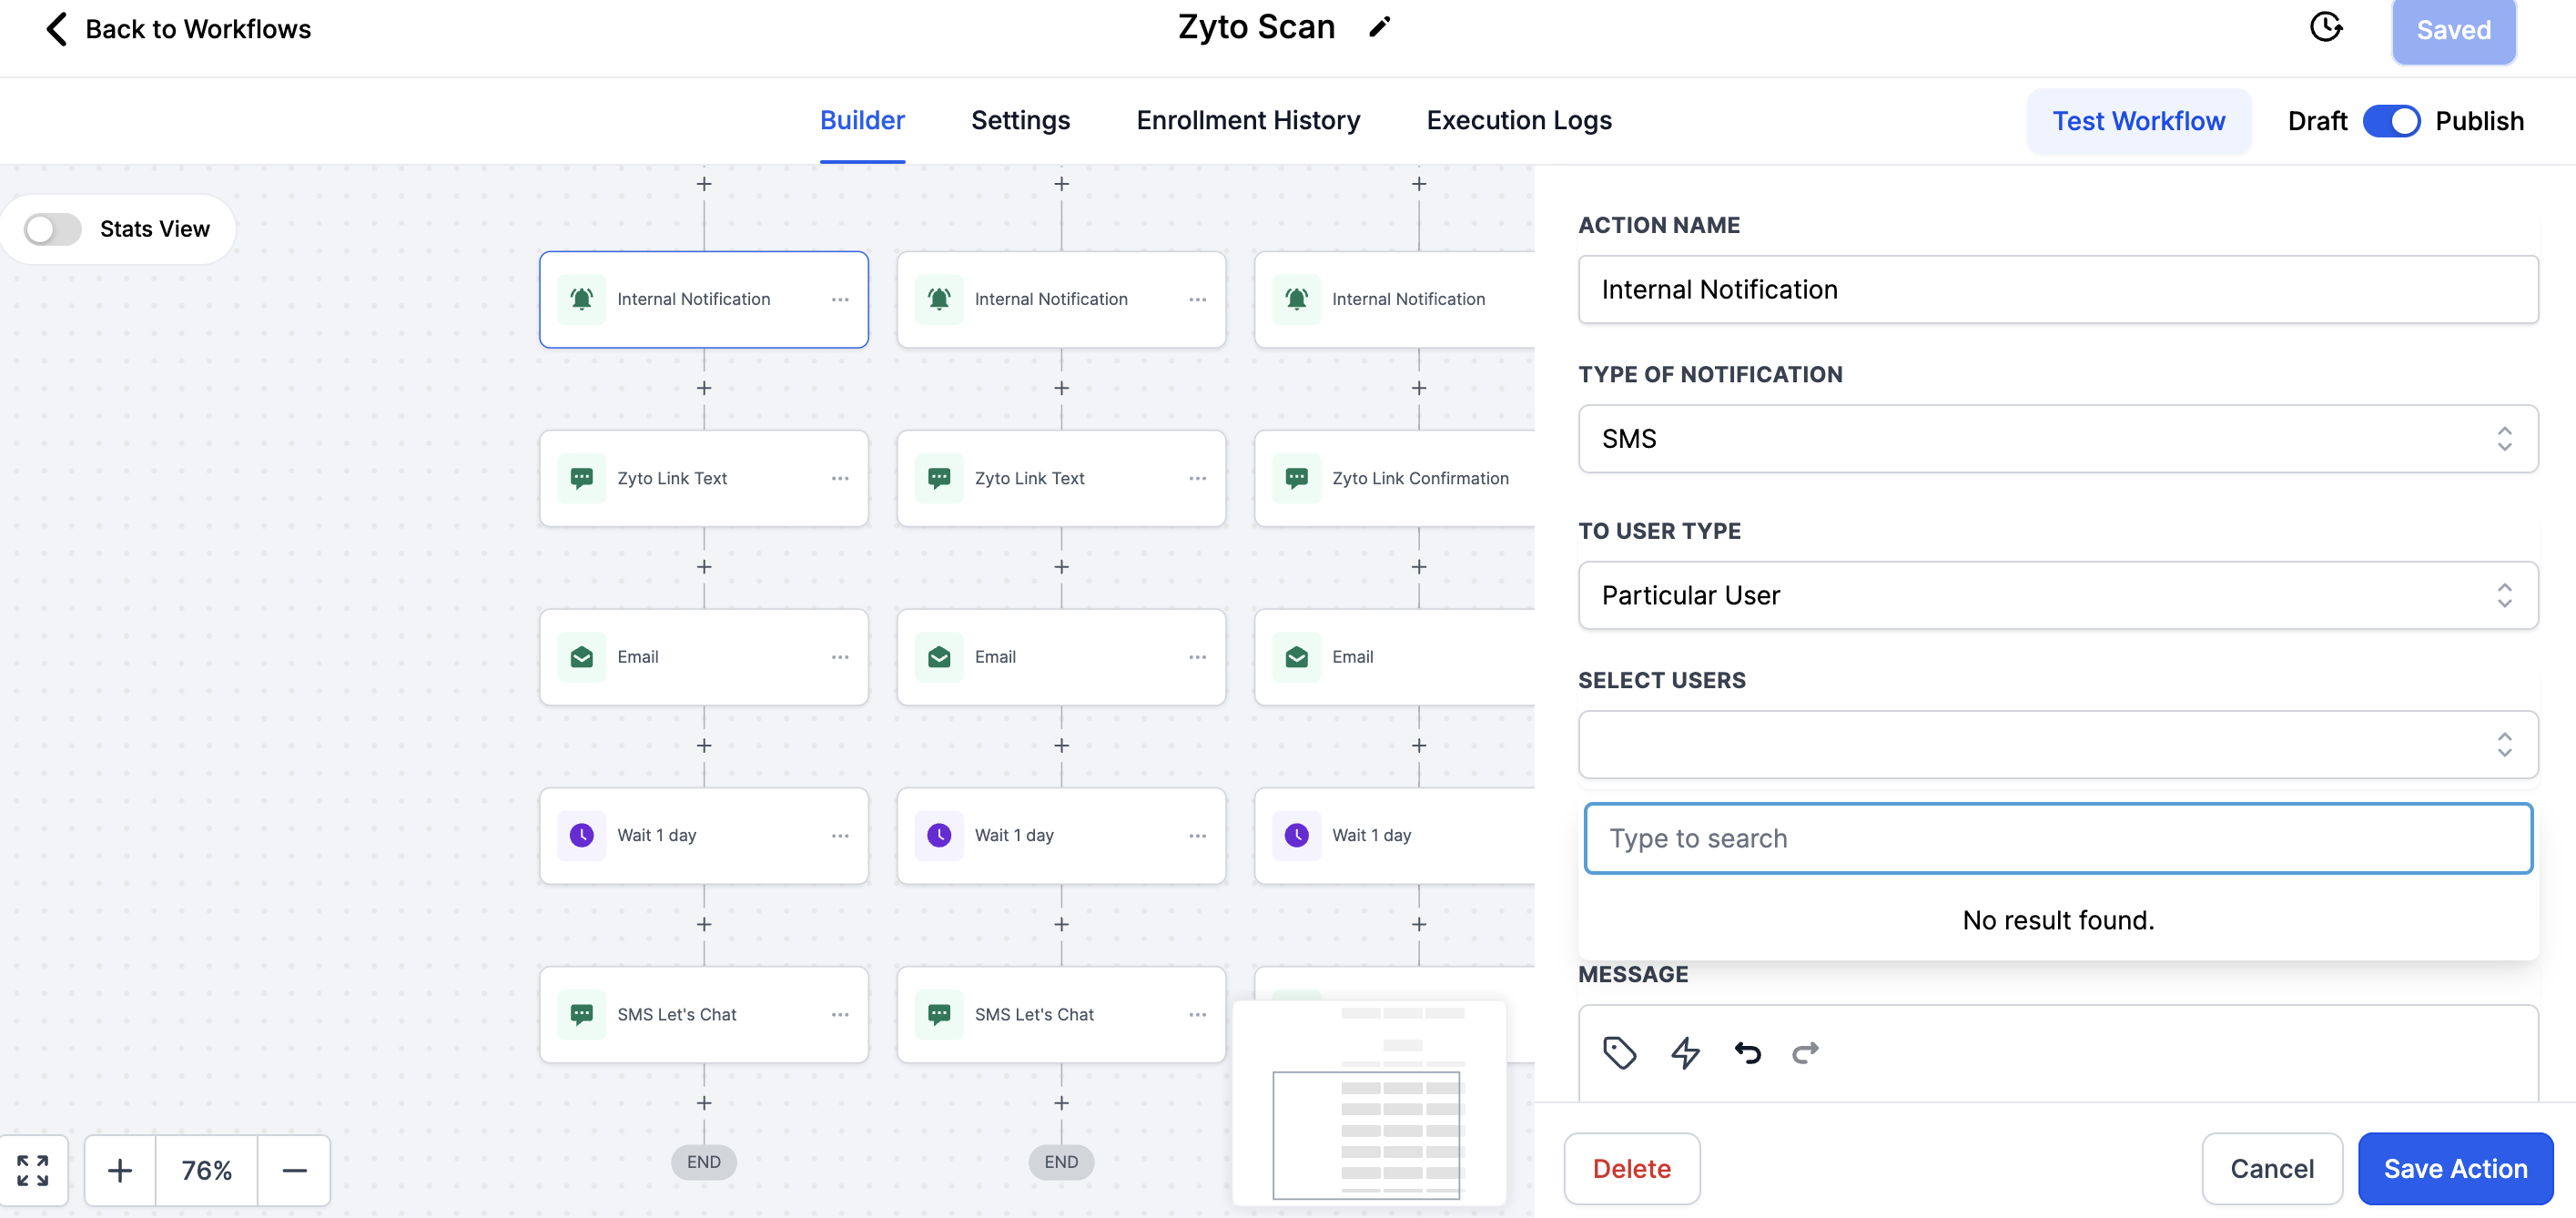
To add an Internal Notification:
Select Internal Notification
Select how you want the notification: SMS or email work great
Select 'Particular User'
Select the user you want to have the notification
Add the message: Include the custom value {contact name} so you know who entered the workflow when you get the notification.
*Save the Action and then Save the Entire Workflow
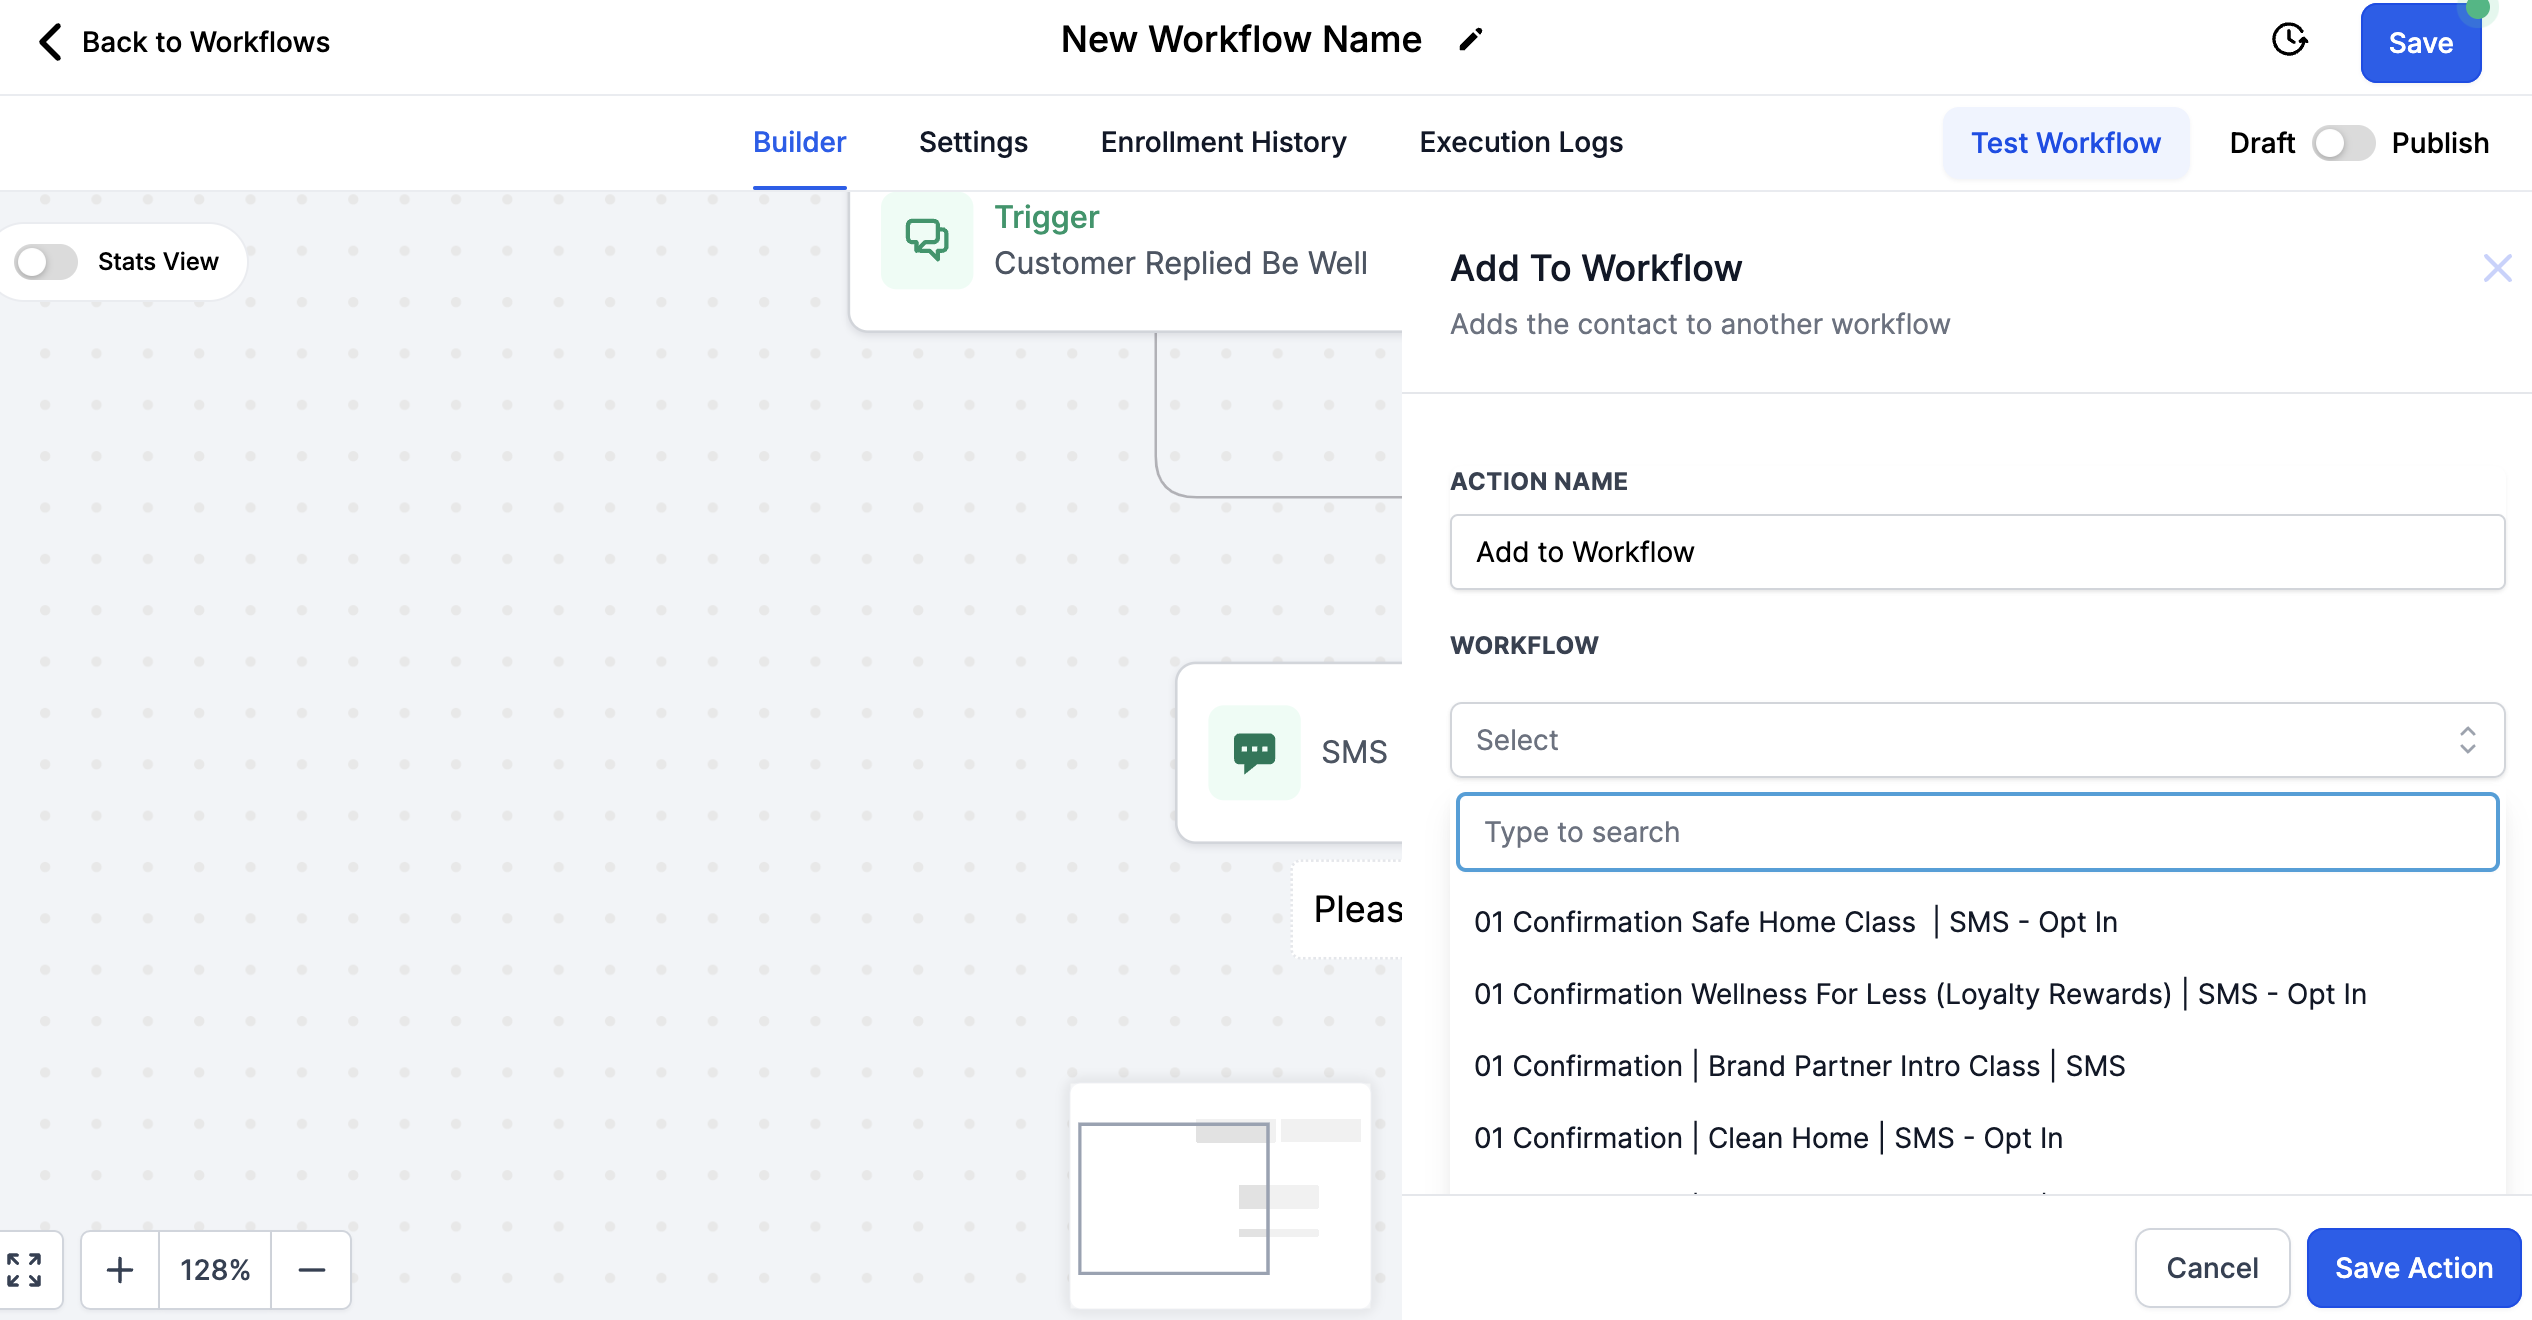
To Add a Contact to a (different) Workflow: Select 'Add to Workflow'
Select the Workflow you want them to move in to.
This option is used when you want to give an immediate response/confirmation when someone triggers a workflow, but you want the content to send at specific times of day. Having two workflows will allow you to have the settings in the 'Confirmation' workflow be 'anytime' and the settings in the content workflow (class, reminders, etc) be set to specific times.
*Save the Action and then Save the Entire Workflow
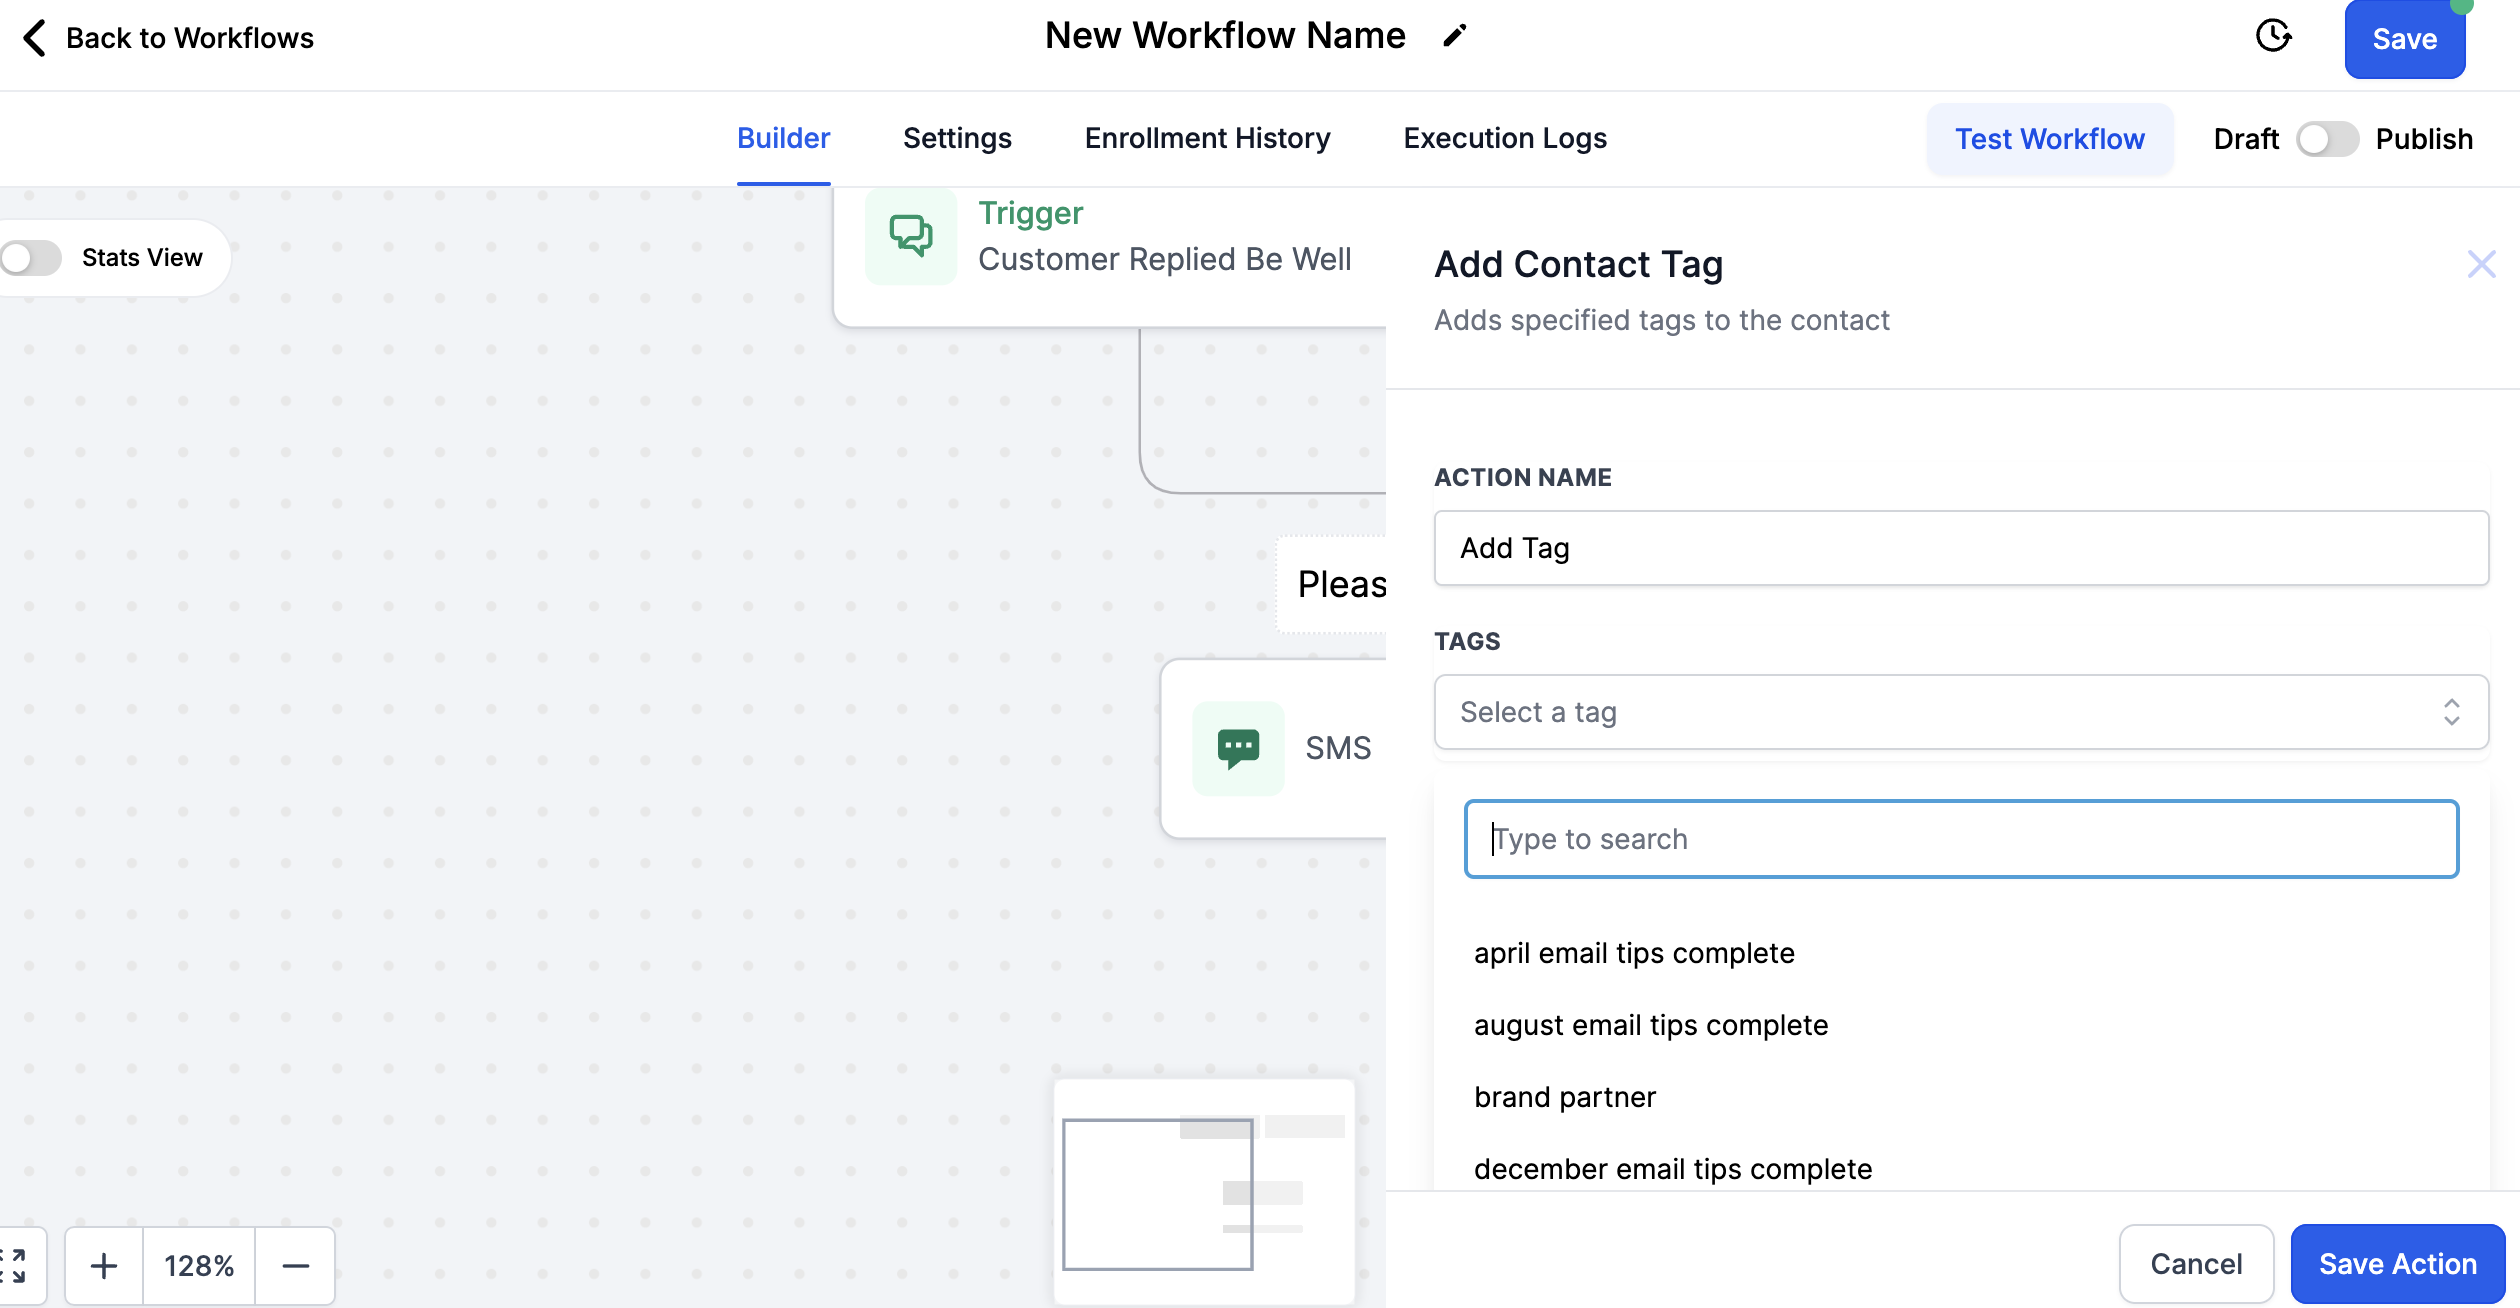
To add a contact tag to easily filter for contacts who went through this workflow:
Select Add Contact Tag
Select or add a tag you wish to give each contact
*Save the Action and then Save the Entire Workflow
When you are ready to go LIVE, Toggle over to Publish and then Save the Workflow.
If you want the class to be unavailable: toggle the Confirmation Workflow to 'draft mode'
Test the workflow on yourself and ensure it works how you want it to!
Navigating the Top Menu:
Settings, Enrollment History and Execution Logs
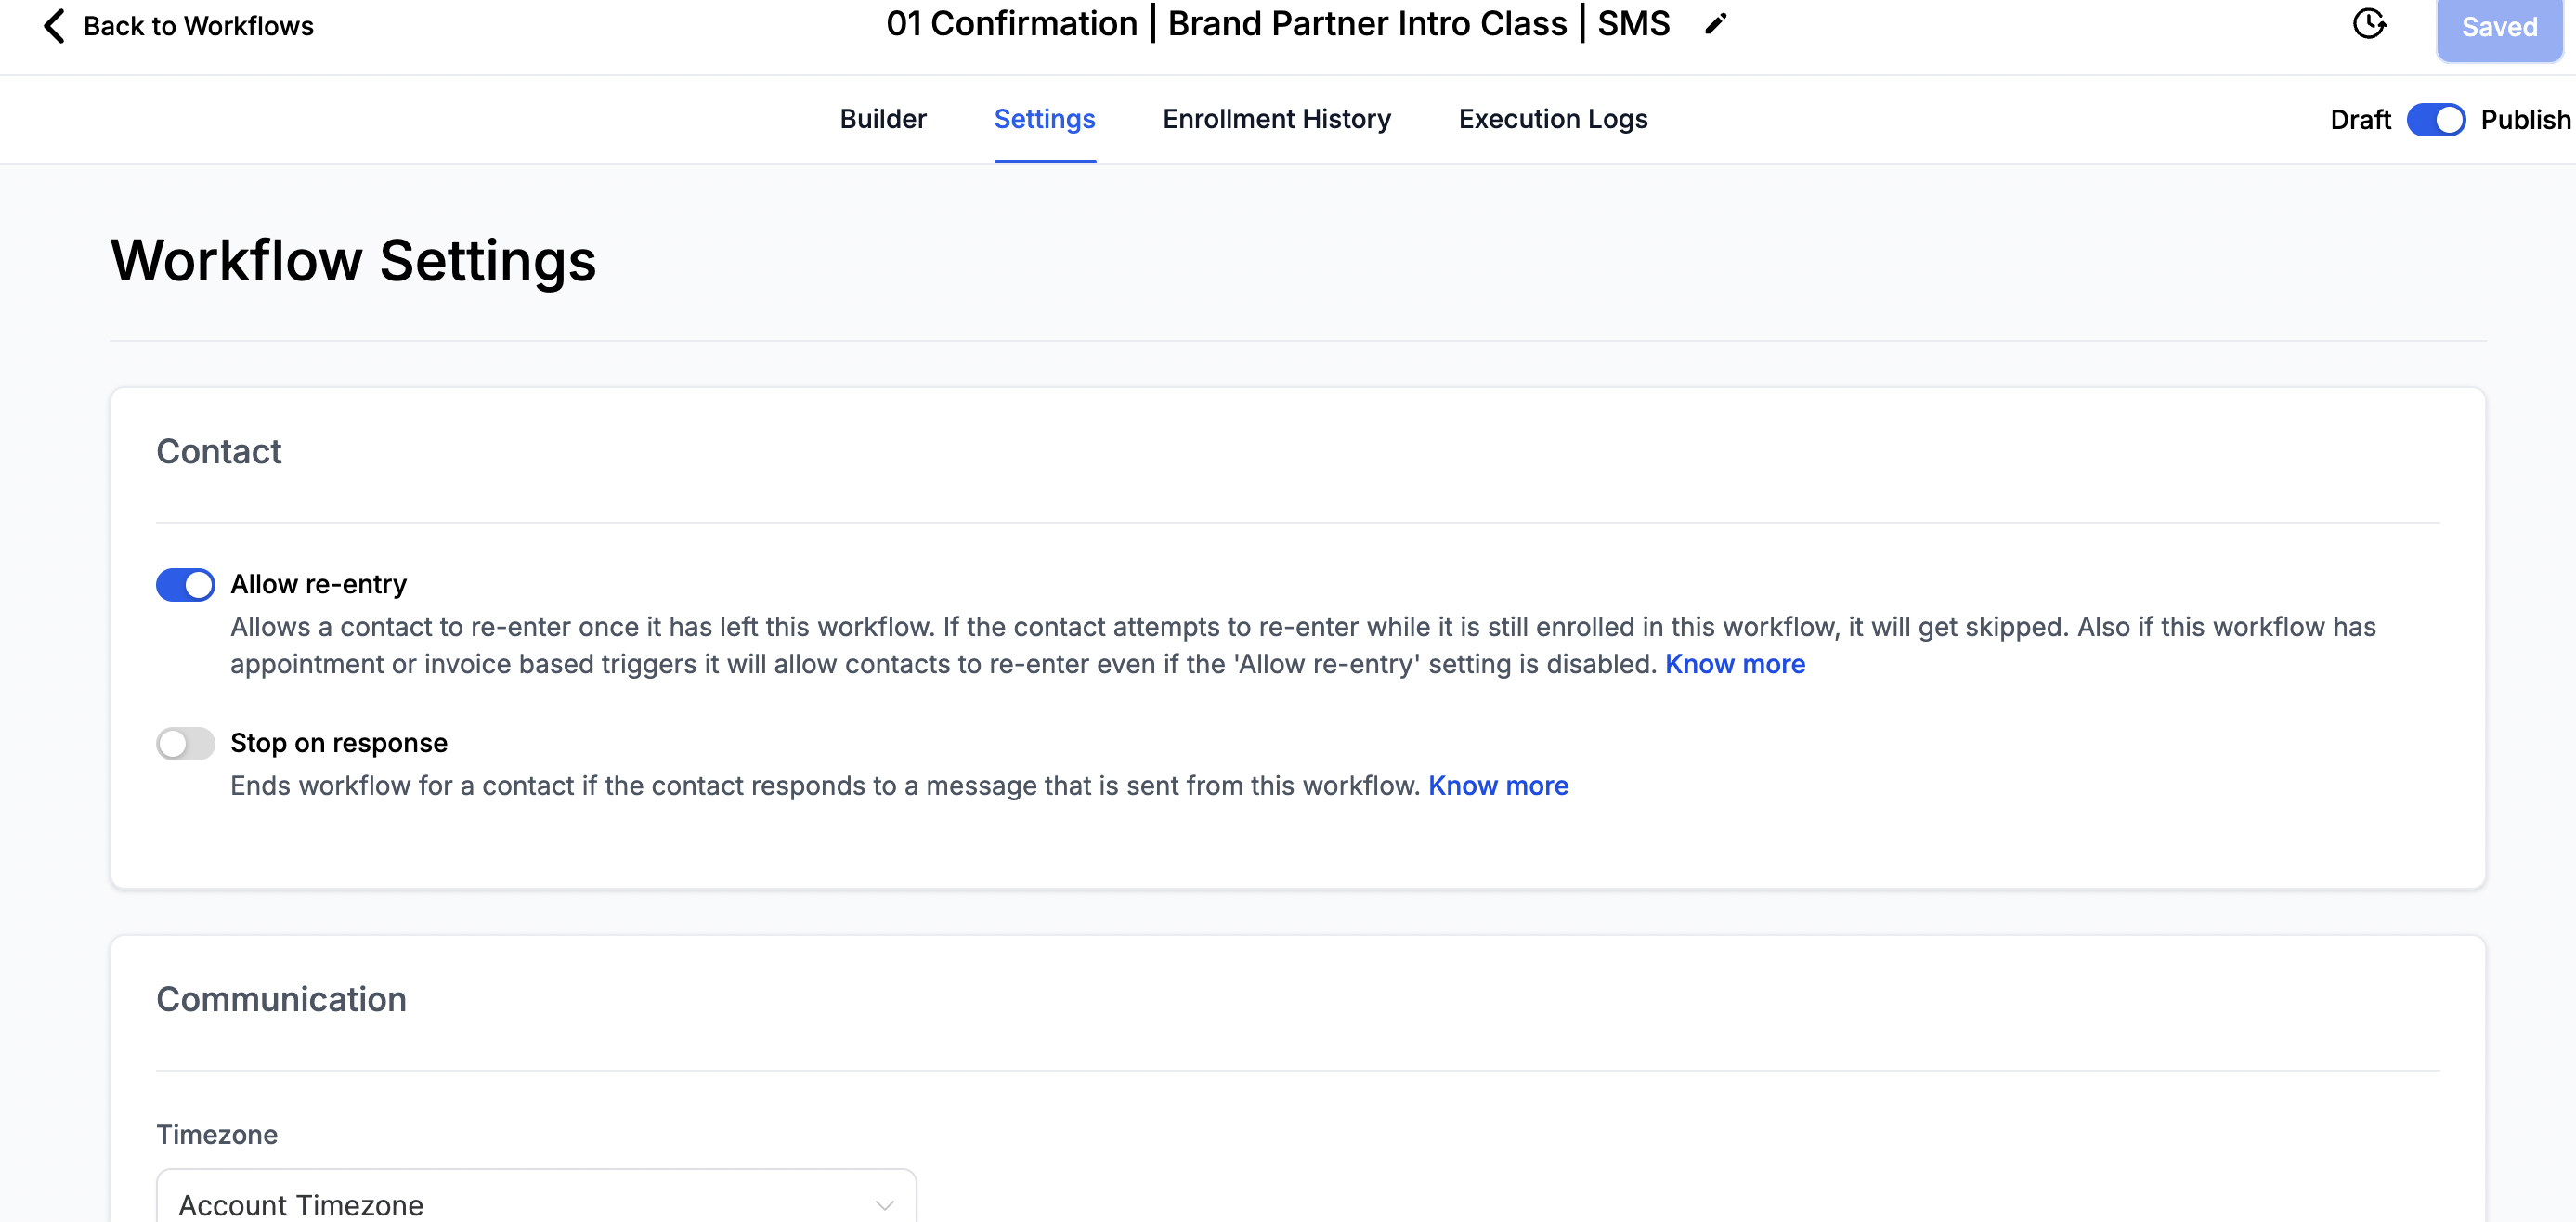
Settings
Toggle on and off Allow Re-Entry
Toggle on and off Specific Time
When this is OFF the workflow will work anytime.
When this is on, you will select the days and times it can send.
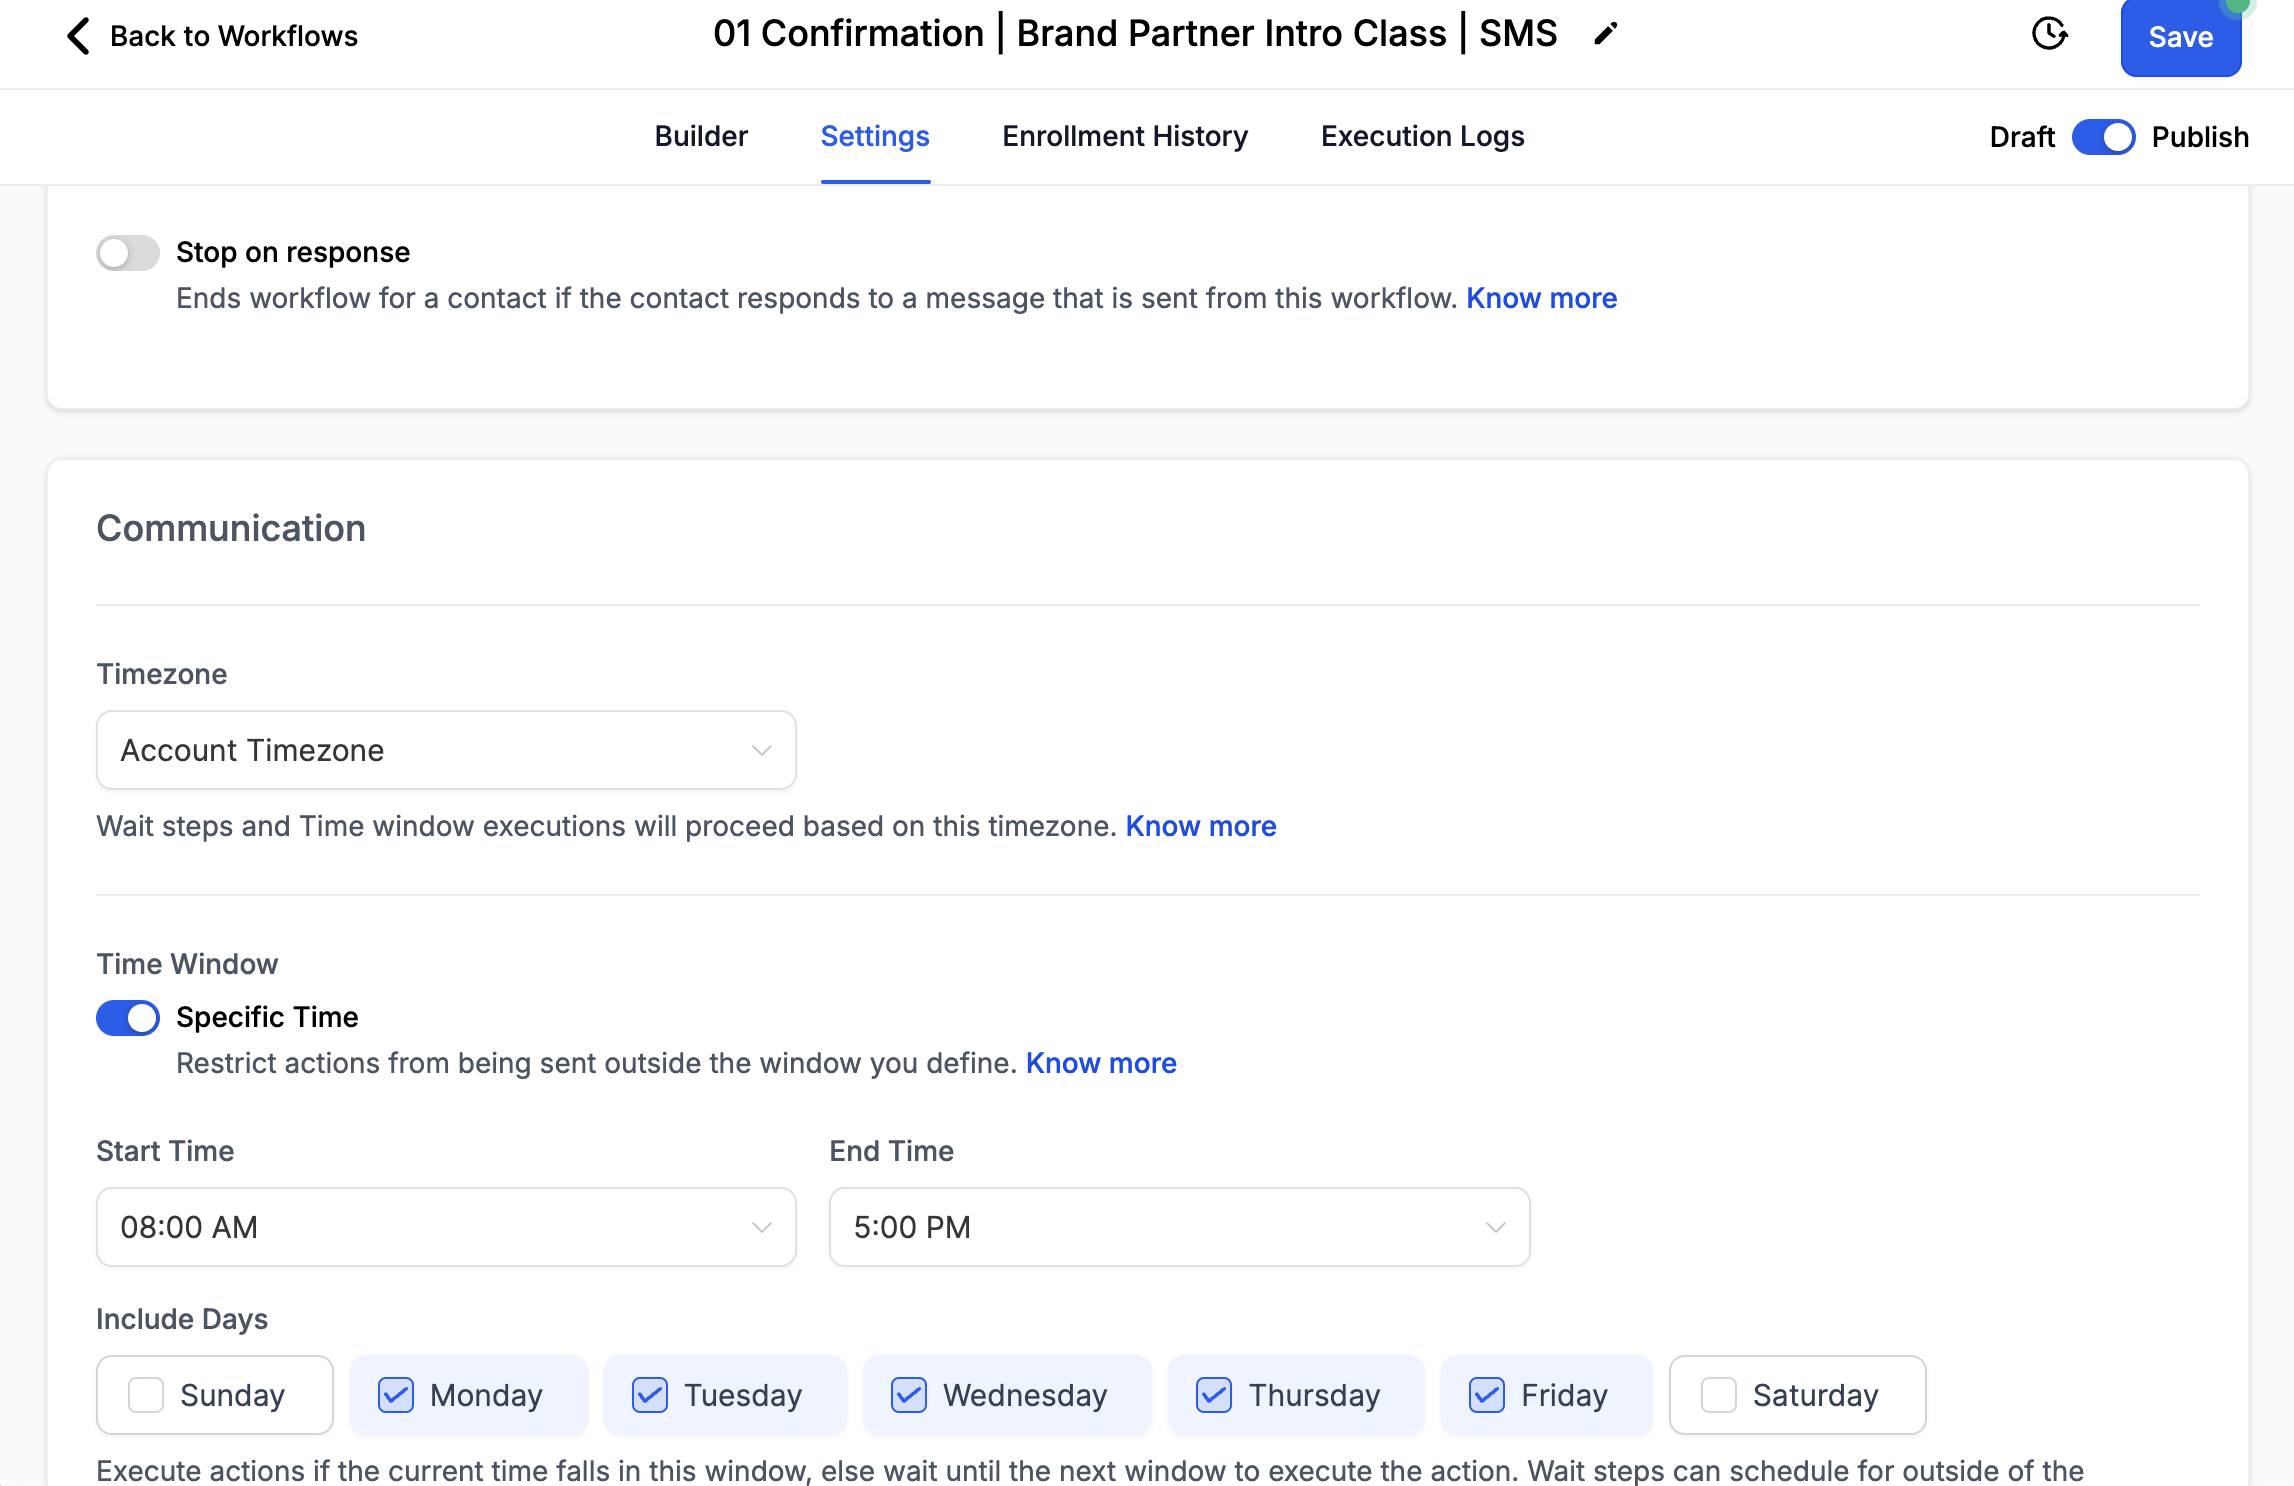
Enrollment History
Shows contacts who have entered the workflow
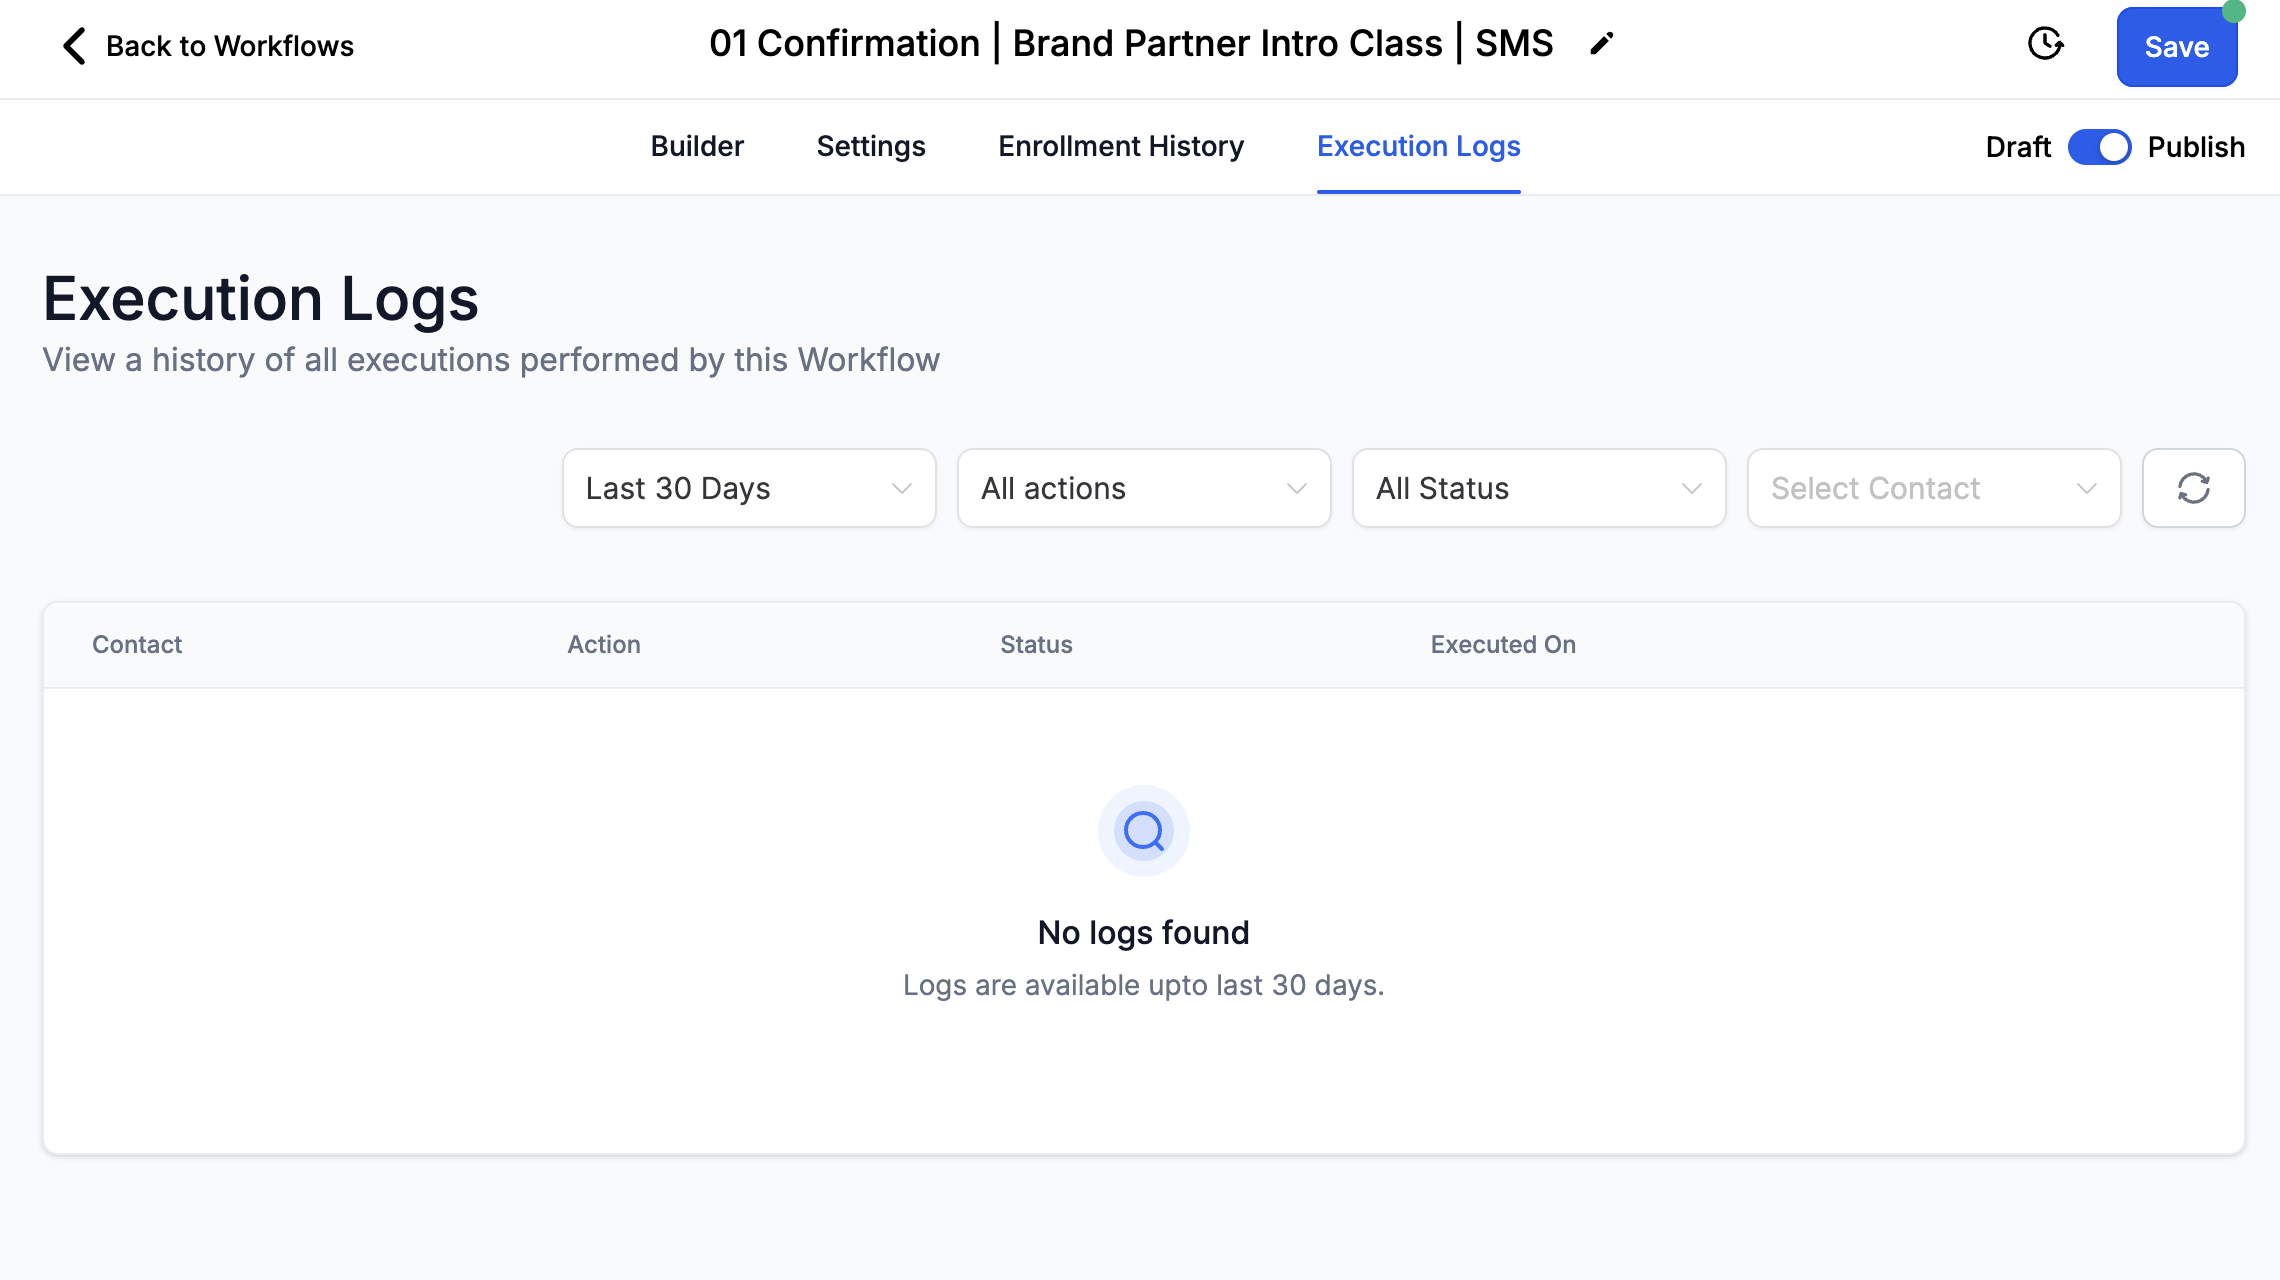
Execution Logs
Shows a detailed log of all action that have been executed
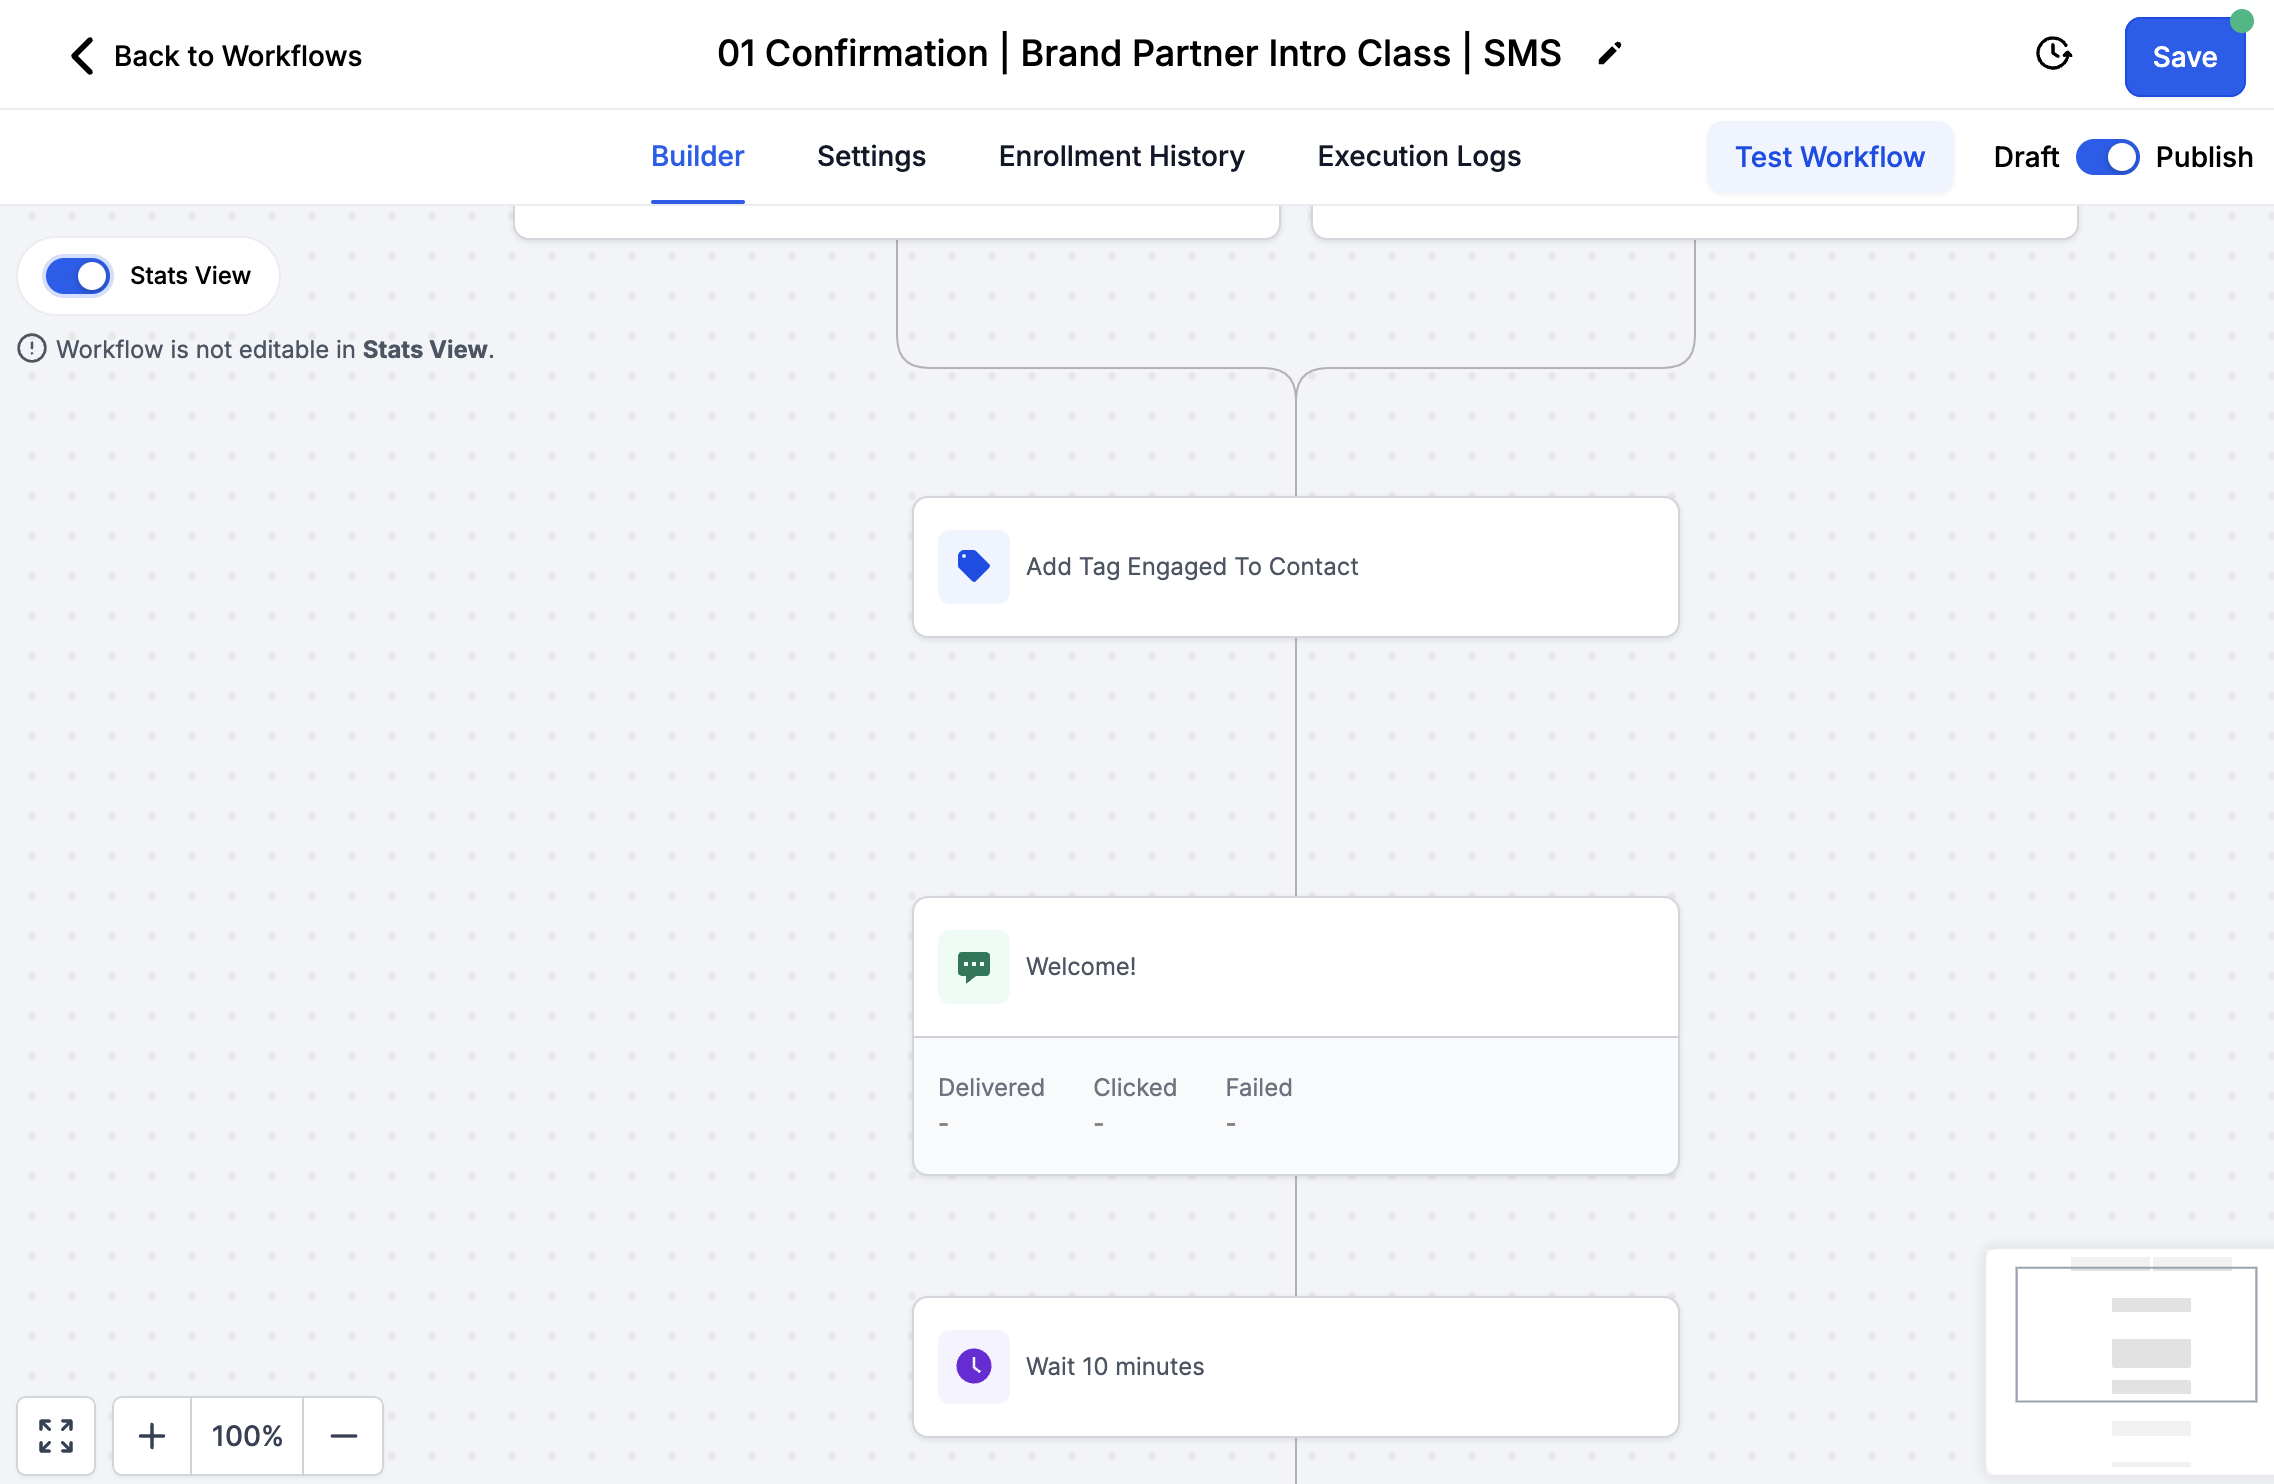
Workflow Statistics:
Toggle the Stats View in the left corner to see the statistics of each action.
Shows Delivered, clicked and failed statistics for each action.
Video Lesson:
Personalize a Workflow:
Up Next: Personalize Your Onboardings
Diamond Marketing is a customer care platform design for Young Living Brand Partners. All content provided by Diamond Marketing is the property of Diamond Marketing App LLC and cannot be copied or redistributed outside of Diamond Marketing. without prior consent.