
Create Your Own Workflows
Design custom automations that fit your business like a glove
Take full control of your customer journey by building workflows tailored to your unique strategy—from welcome sequences to follow-ups and beyond.
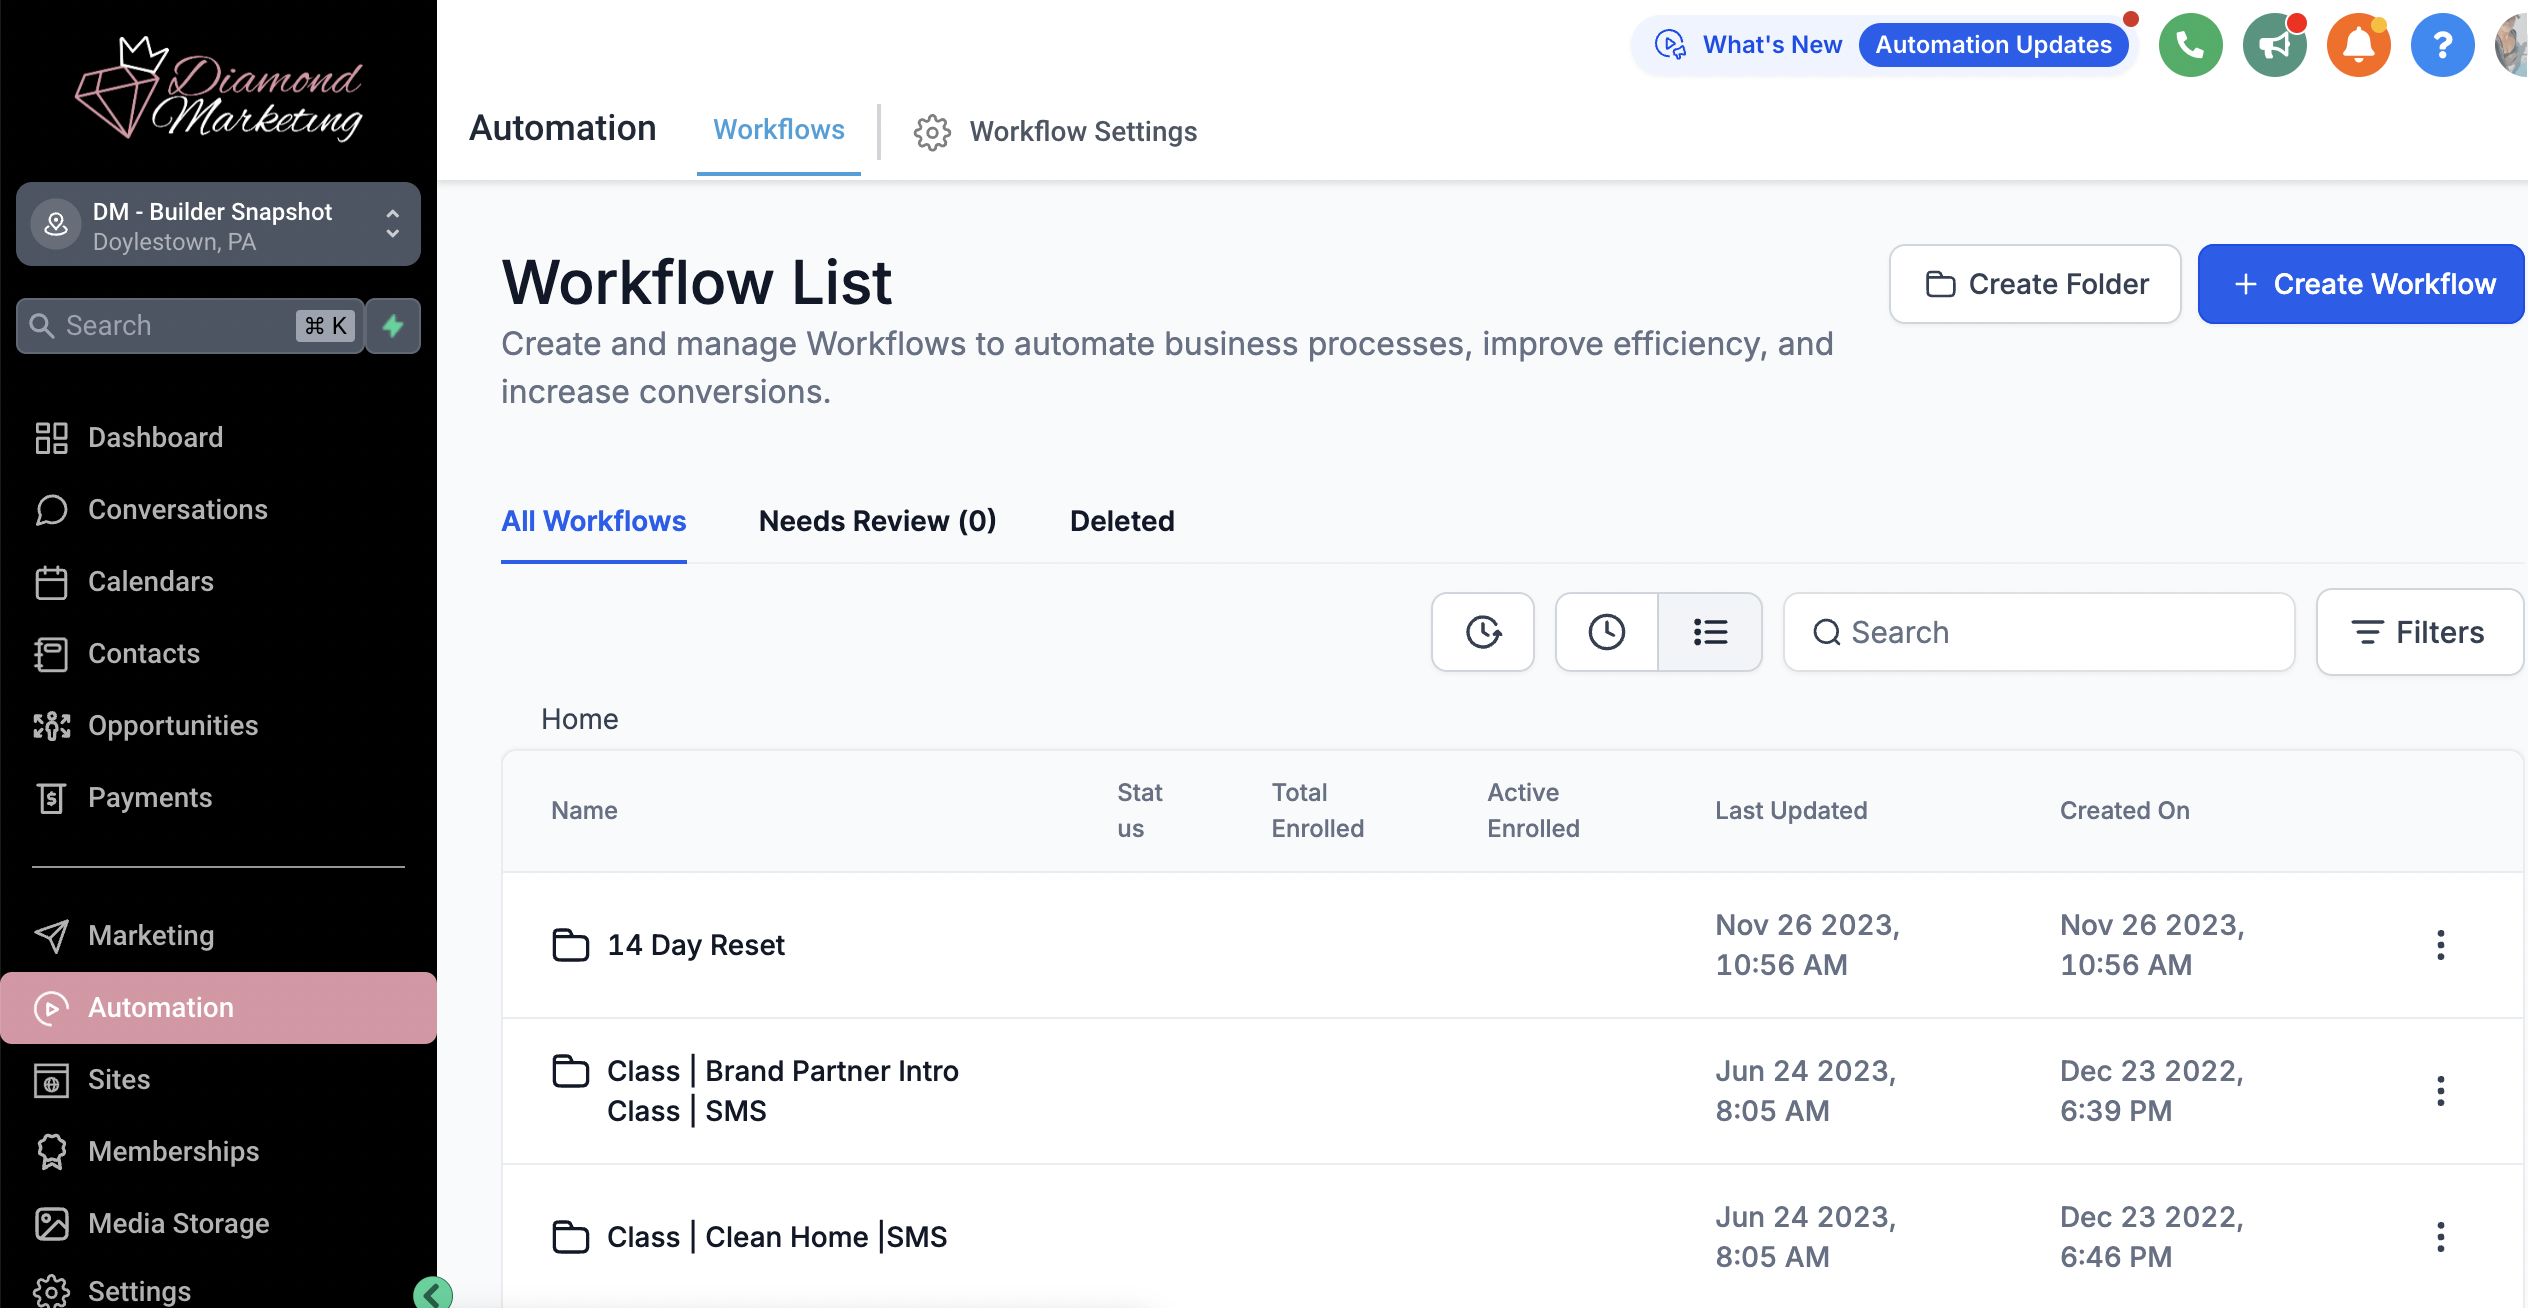
Head to the Automation Tab and Let's Create a Workflow!
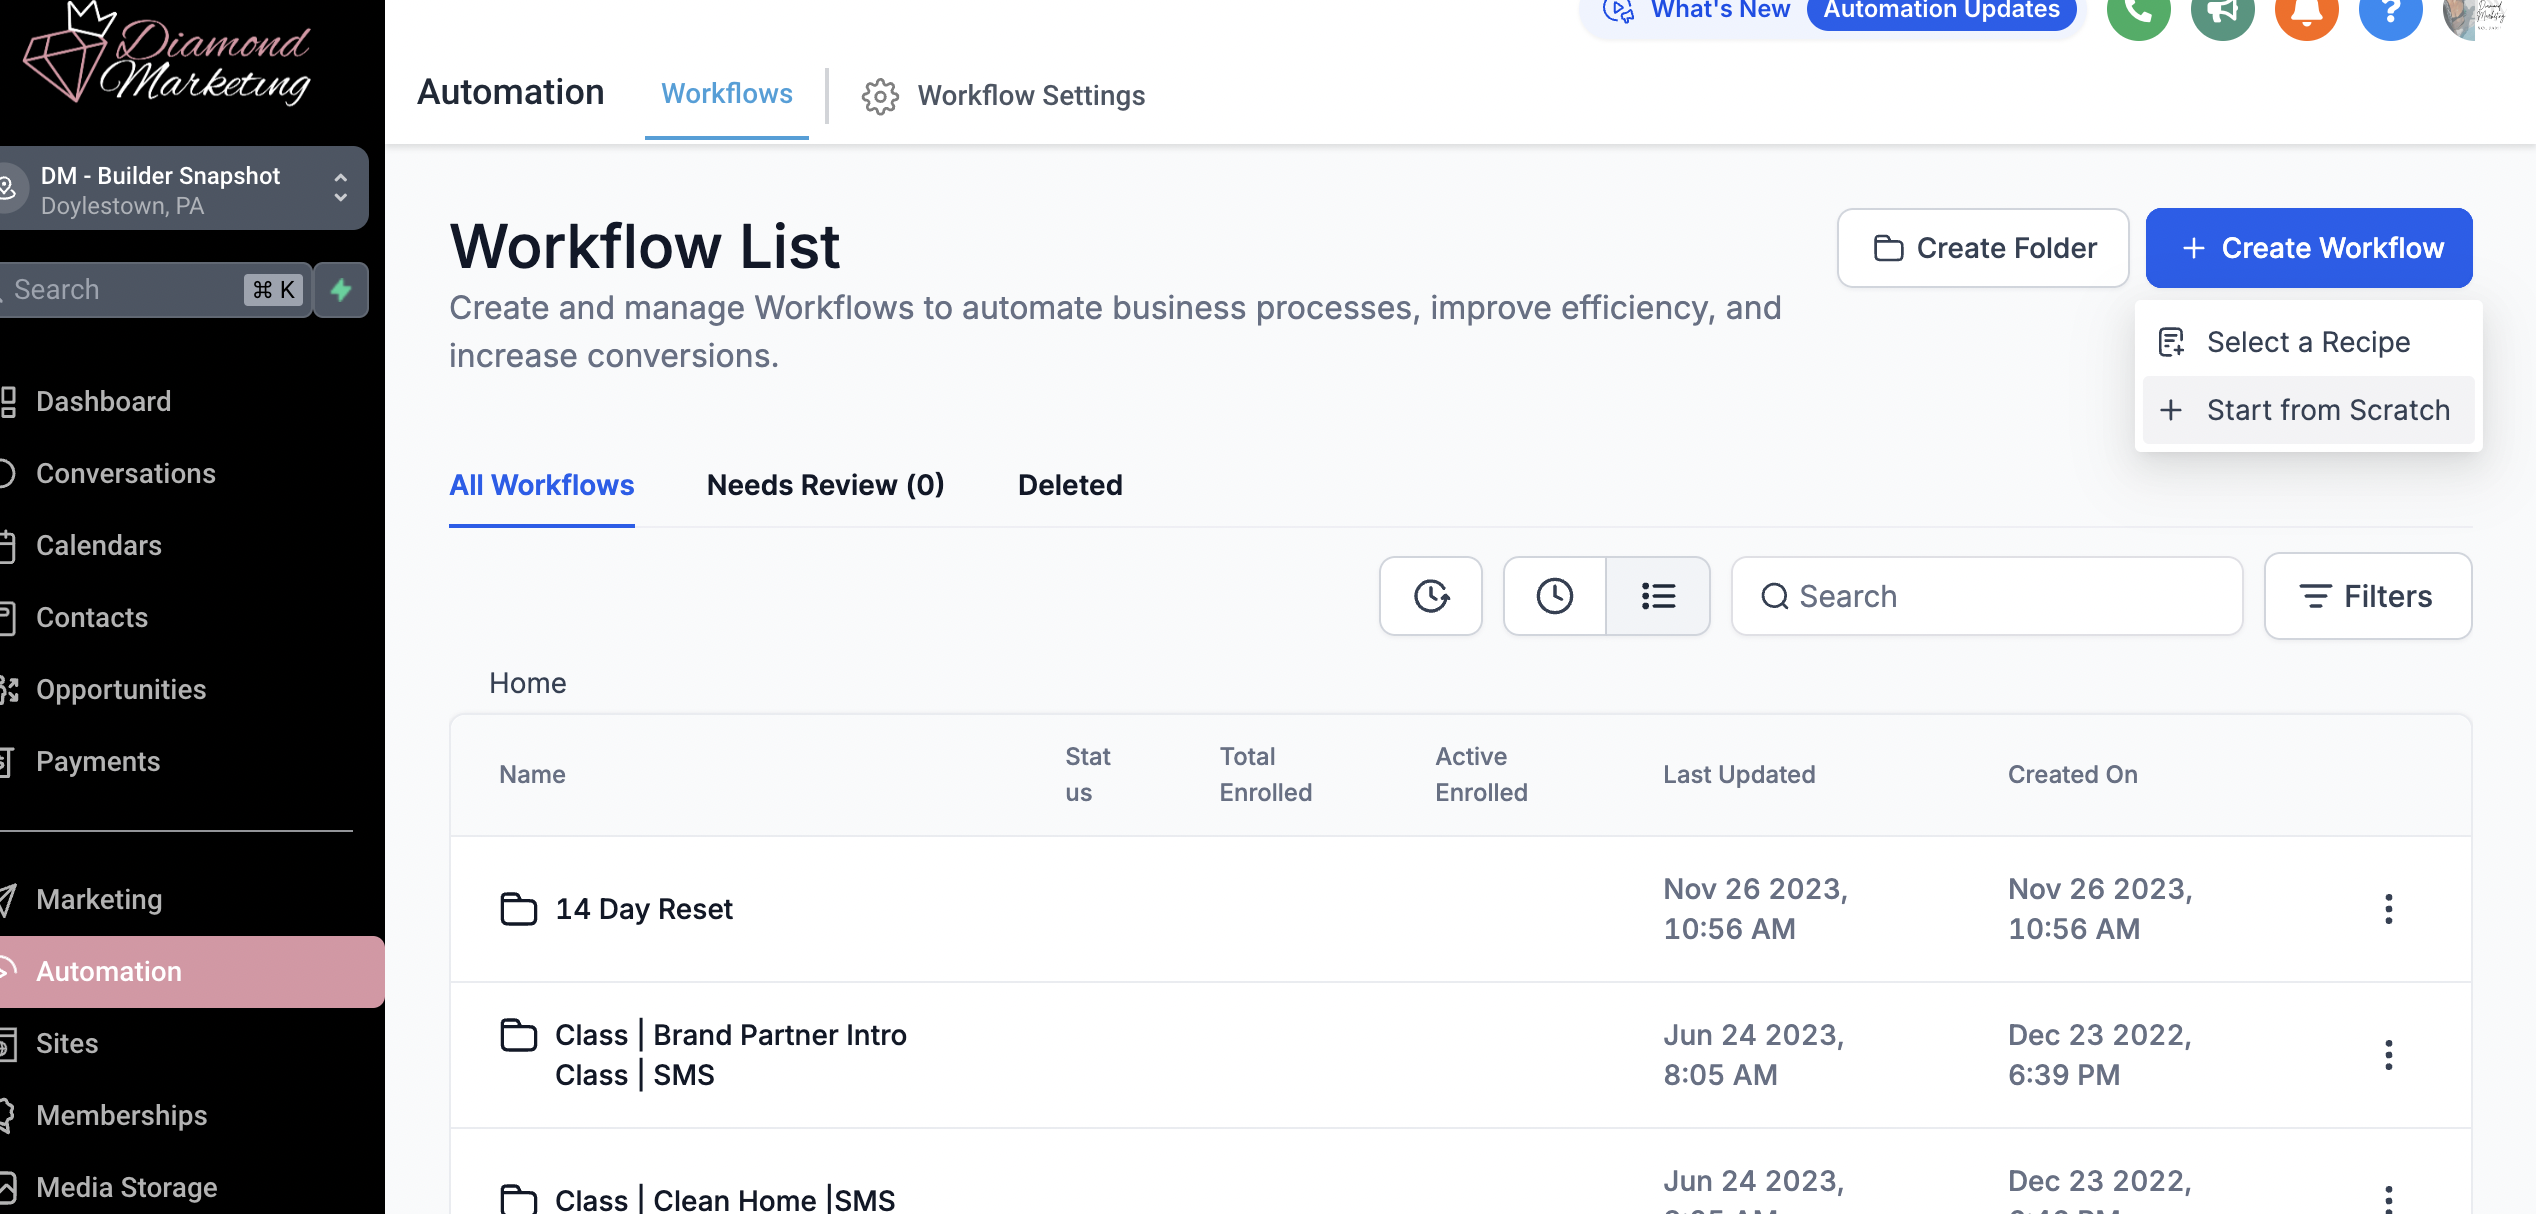
Select + Create Workflow and then + Start from Scratch
Change your Workflow Name at the top then click 'Add New Trigger'
The Trigger of the workflow will add a contact into the workflow based on an action like SMS or Email Reply, Tag Added, or a form being filled out.
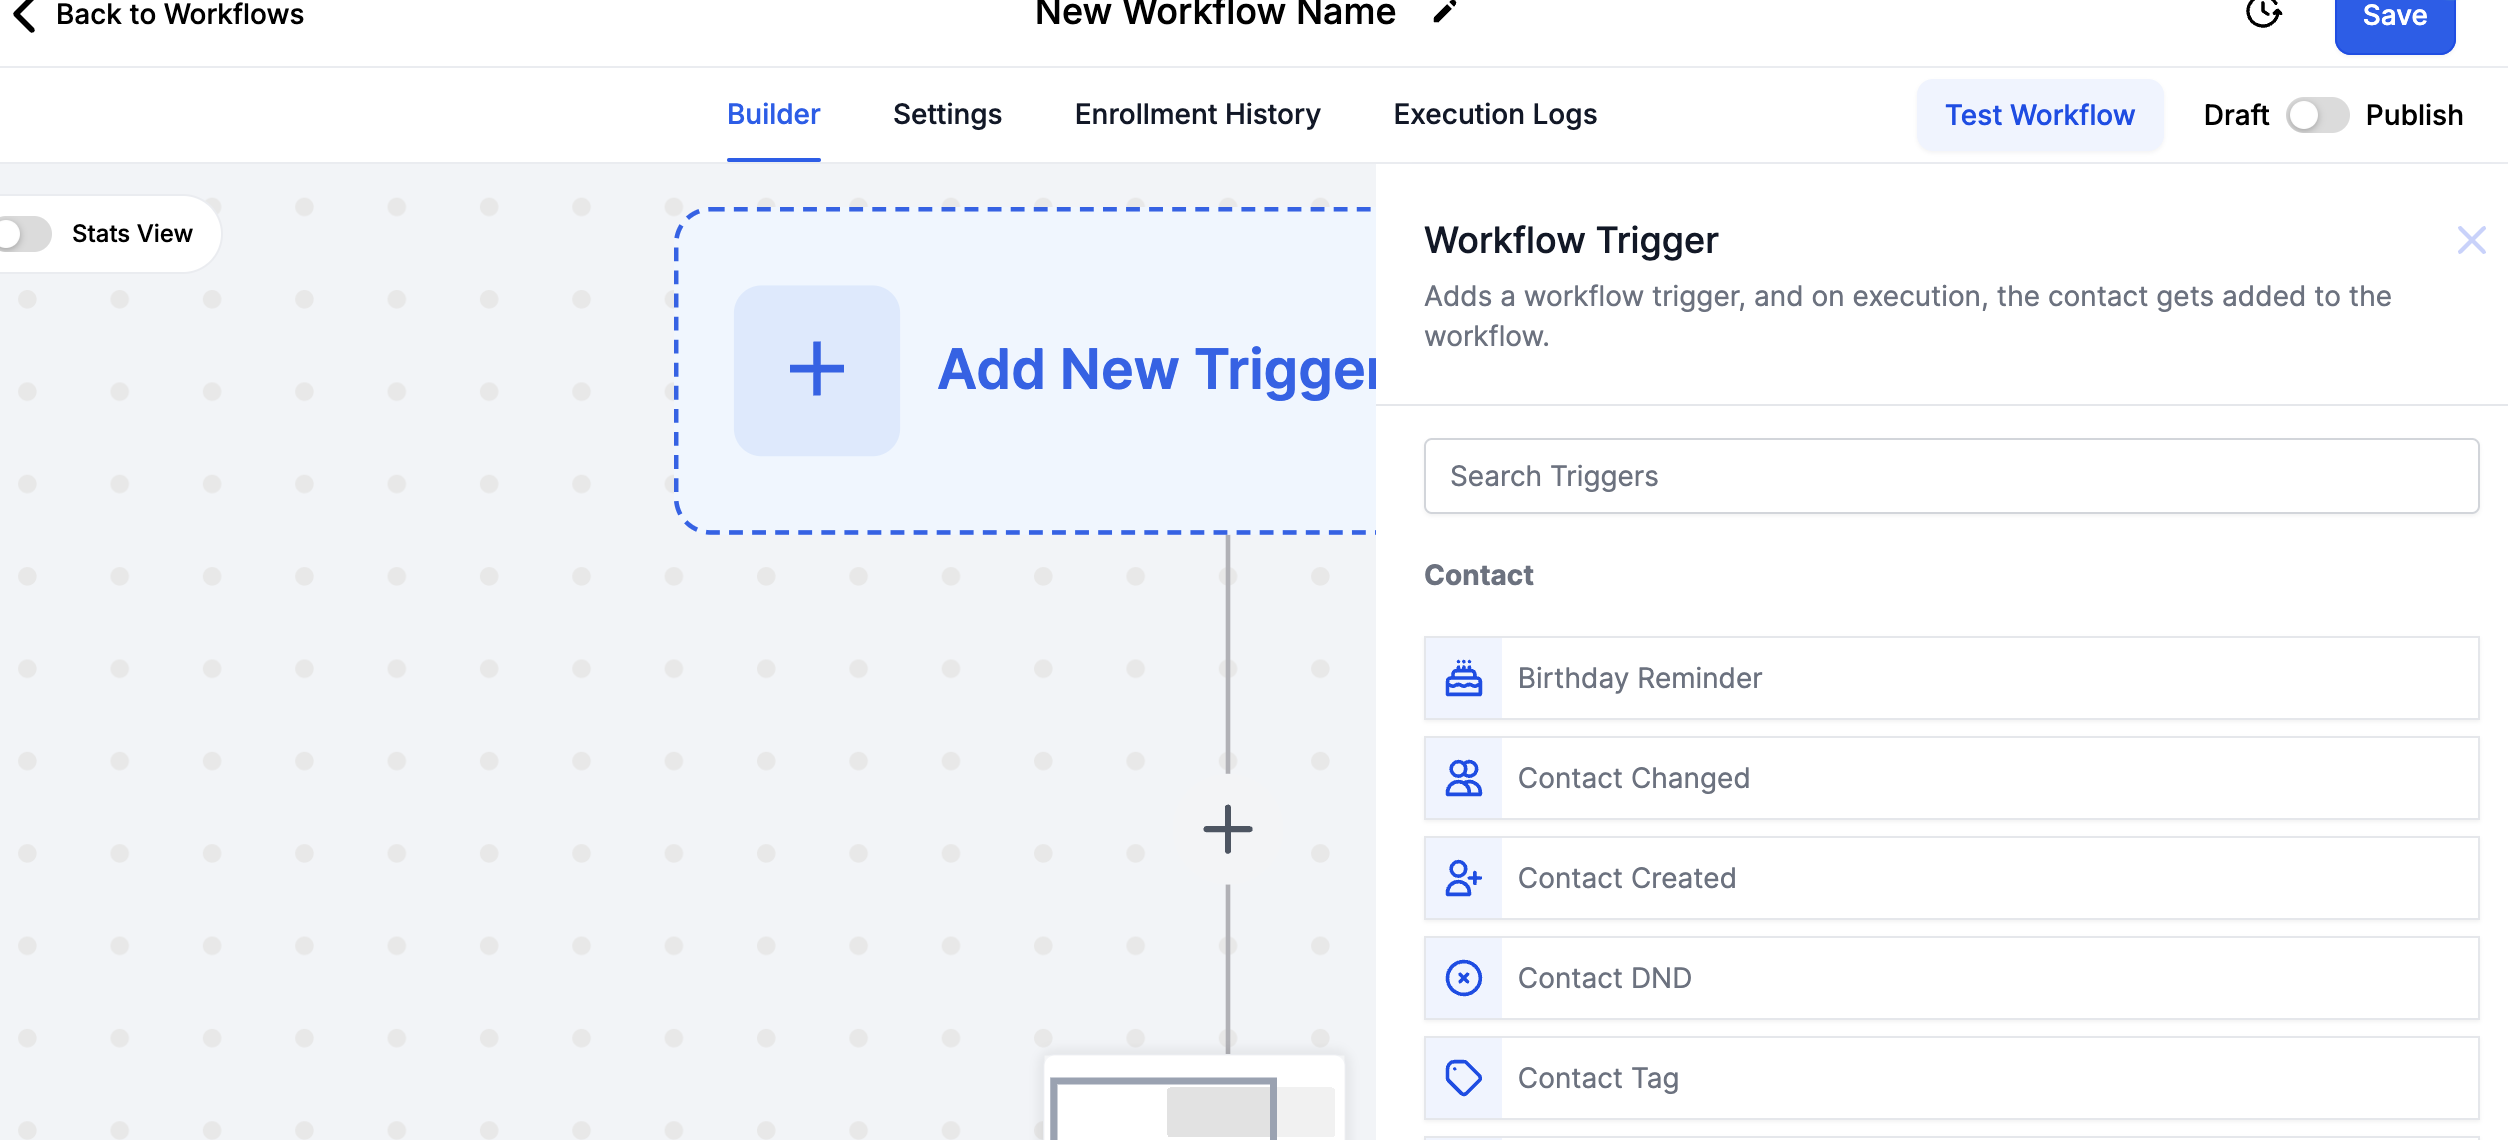
Workflow Triggers:
1. Tag Added Trigger
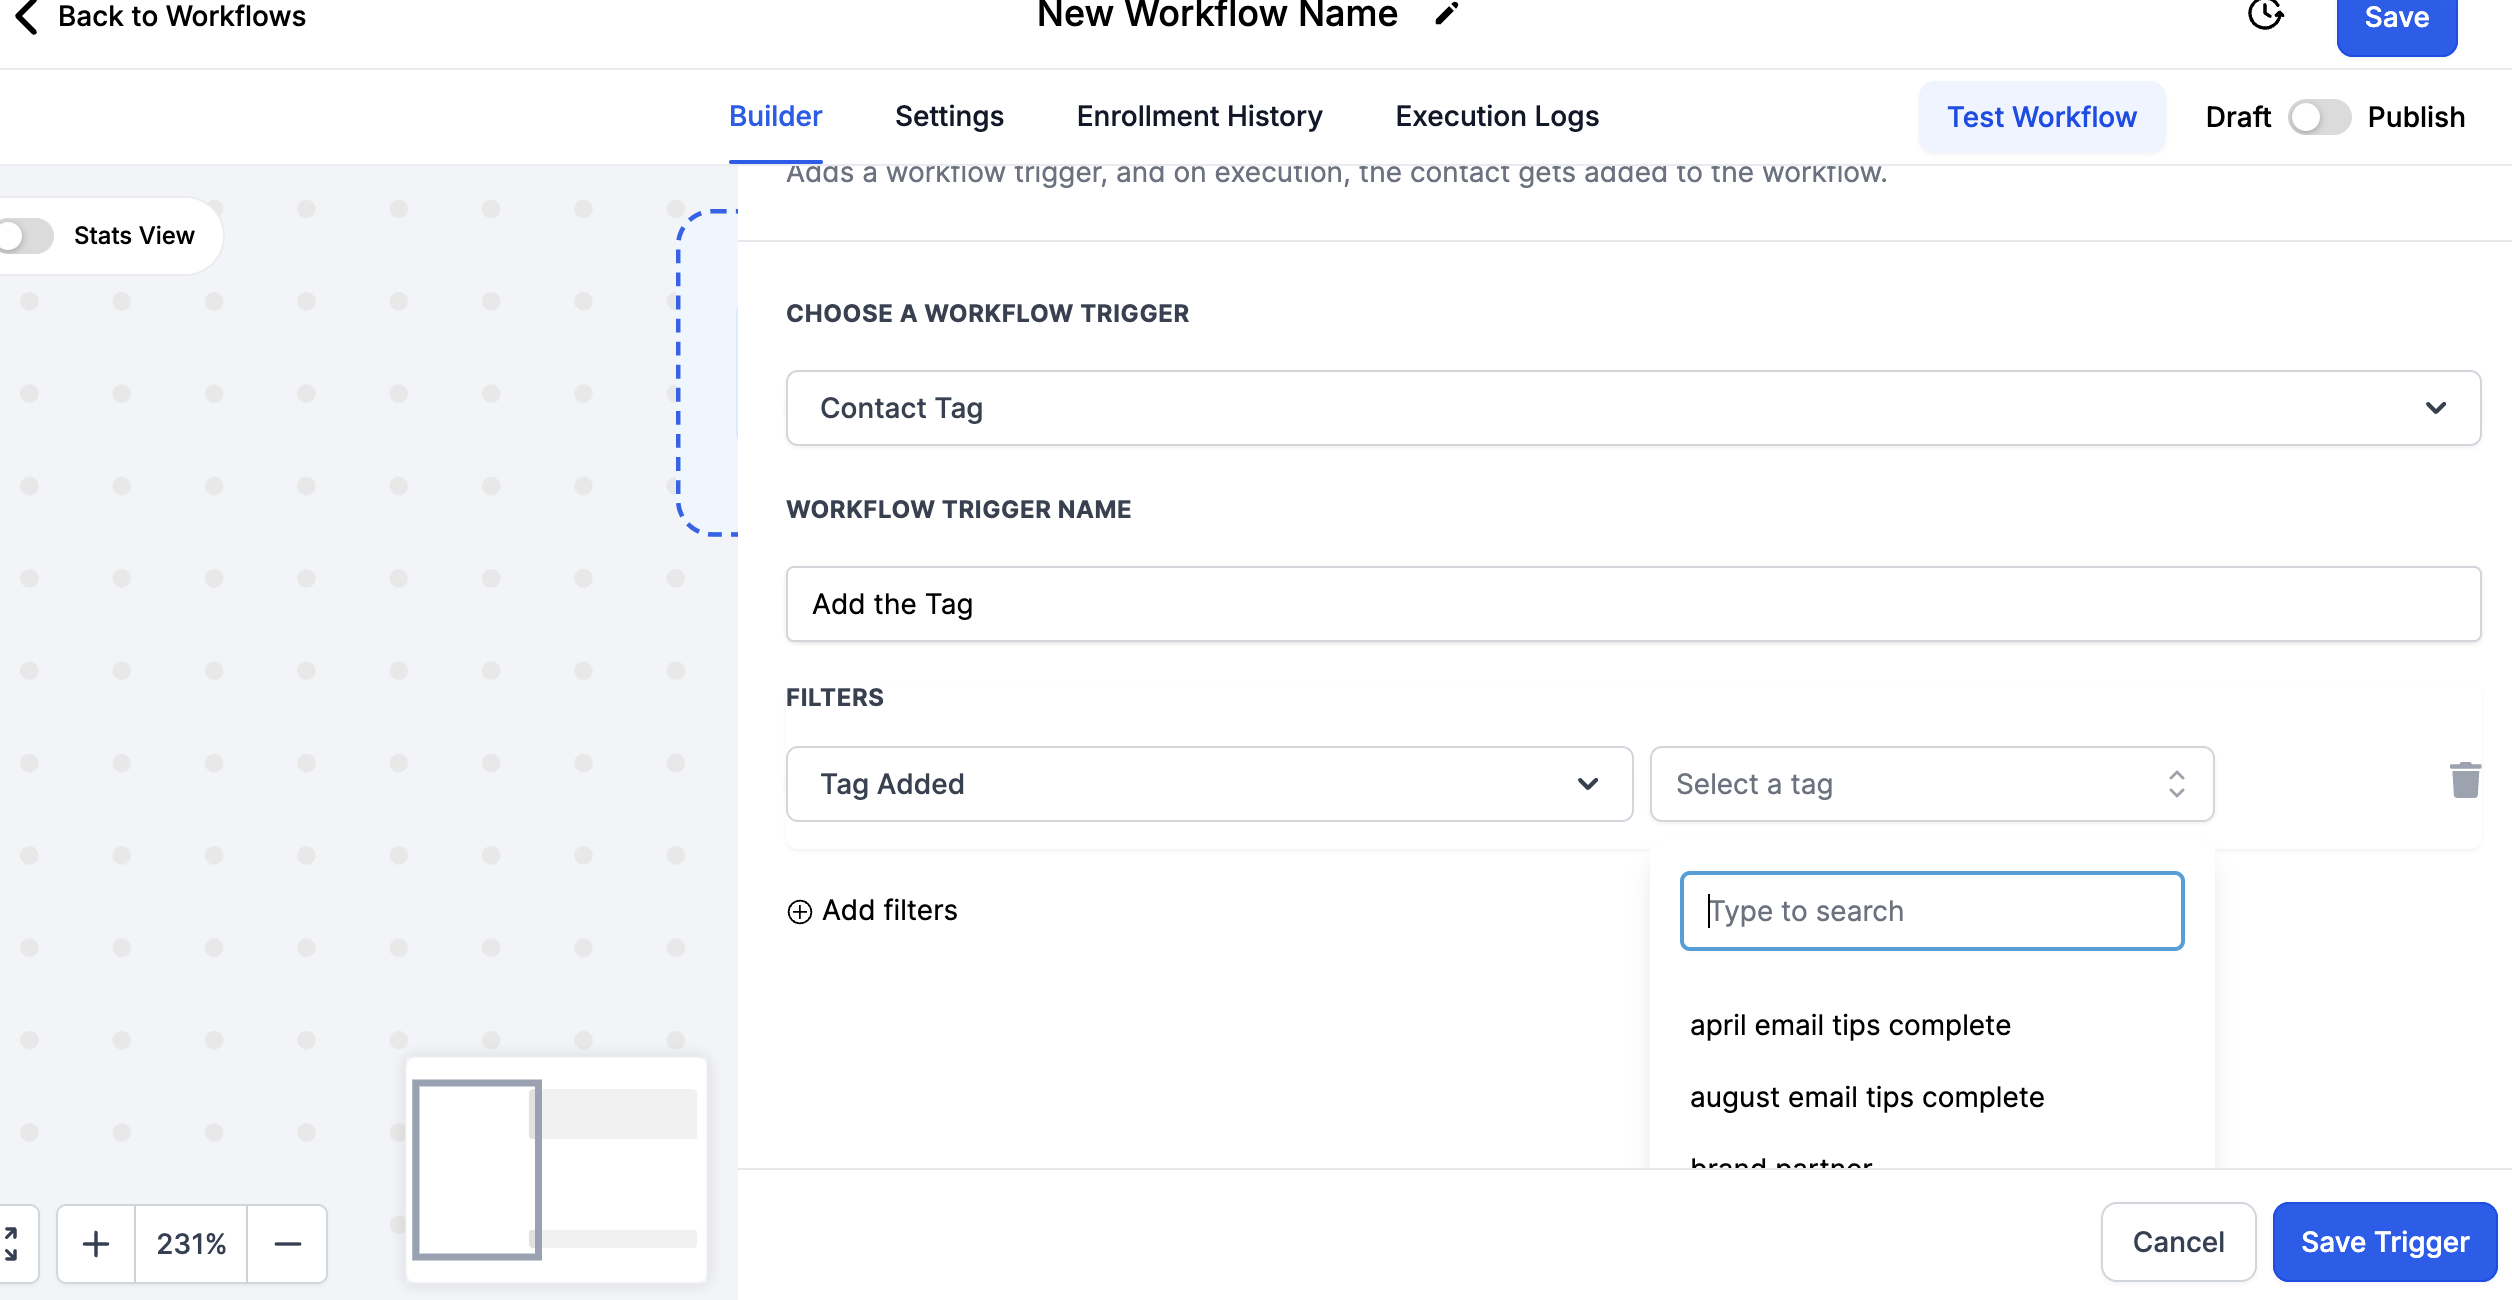
Select Contact Tag
Change the Workflow Trigger Name
Add the Filter 'Tag Added'
Select or Add a Tag
Save the Action
Save the Workflow in the top right
.
2. Customer Replied (SMS, Email)
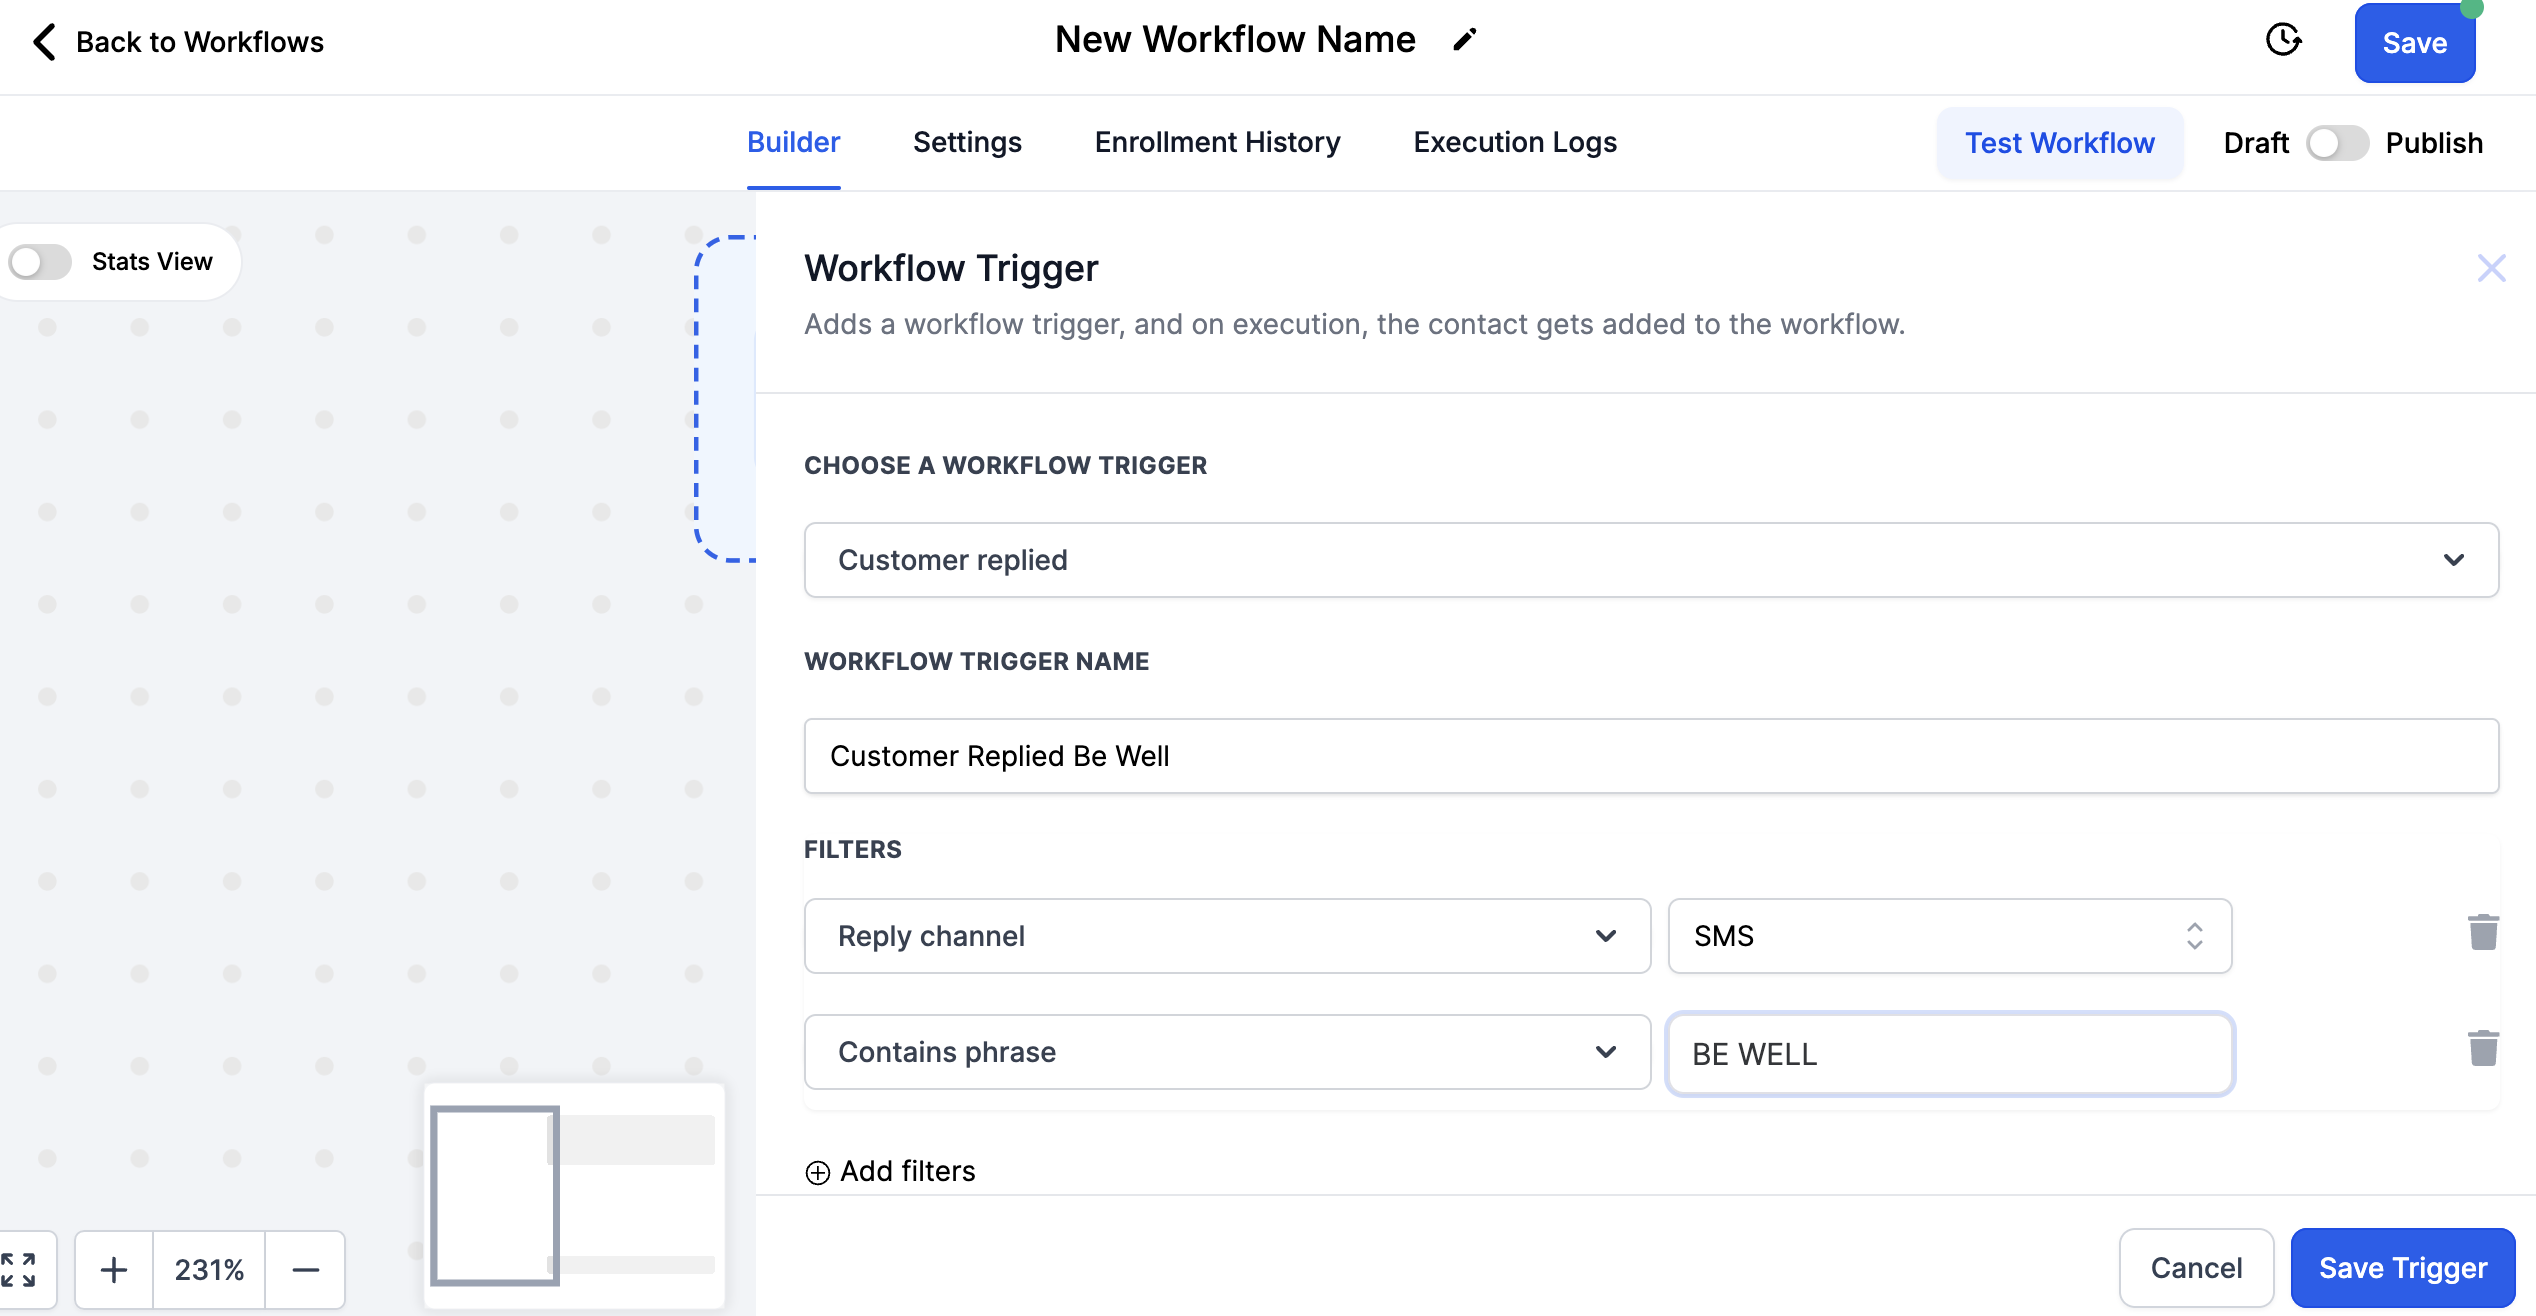
Select Customer Replied
Change the Workflow Trigger Name
Add the Filter 'Reply Channel' is
Select SMS for text and Email for email
Add the Filter 'Contains Phrase'
Add your Trigger Word
*We recommend using two words so the workflow is not accidentally triggered in conversation
Save the Action
Save the Workflow in the top right
3. Form Added (Mentor & Leader Plans Only)
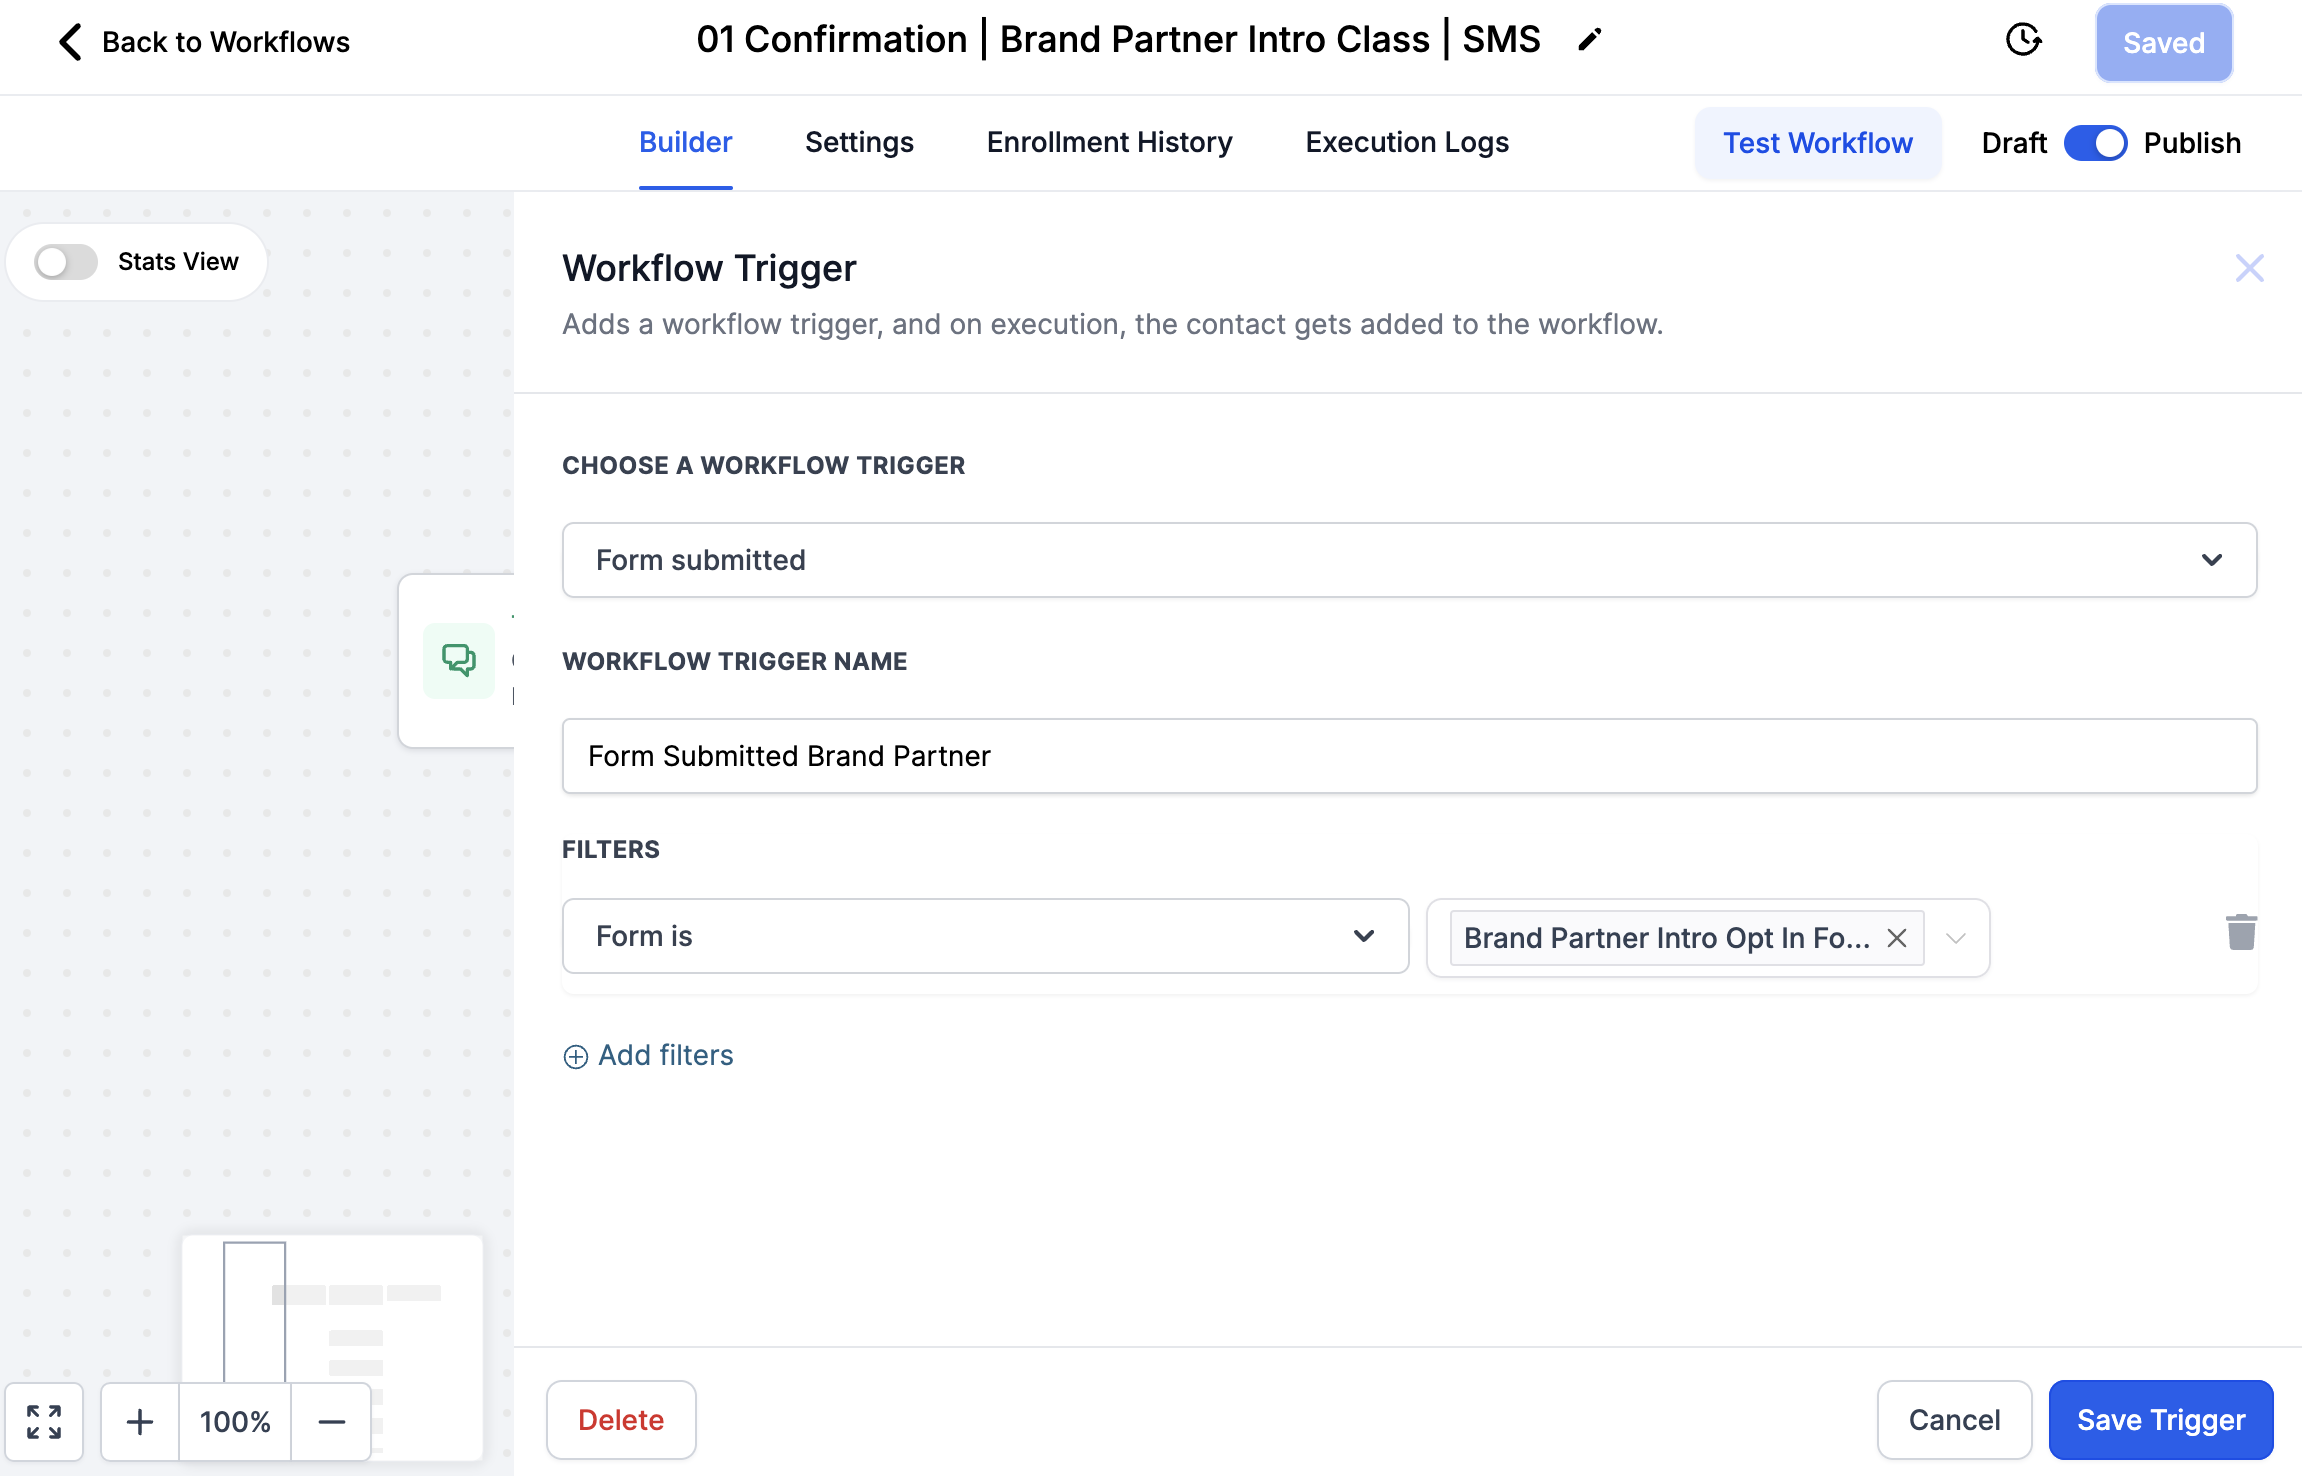
Select Form Submitted
Change the Workflow Trigger Name
Add the Filter 'Form is'
Select the form you created (Create forms in Websites in the Forms tab)
Save the Action
Save the Workflow in the top right
Add Actions to Your Workflow:
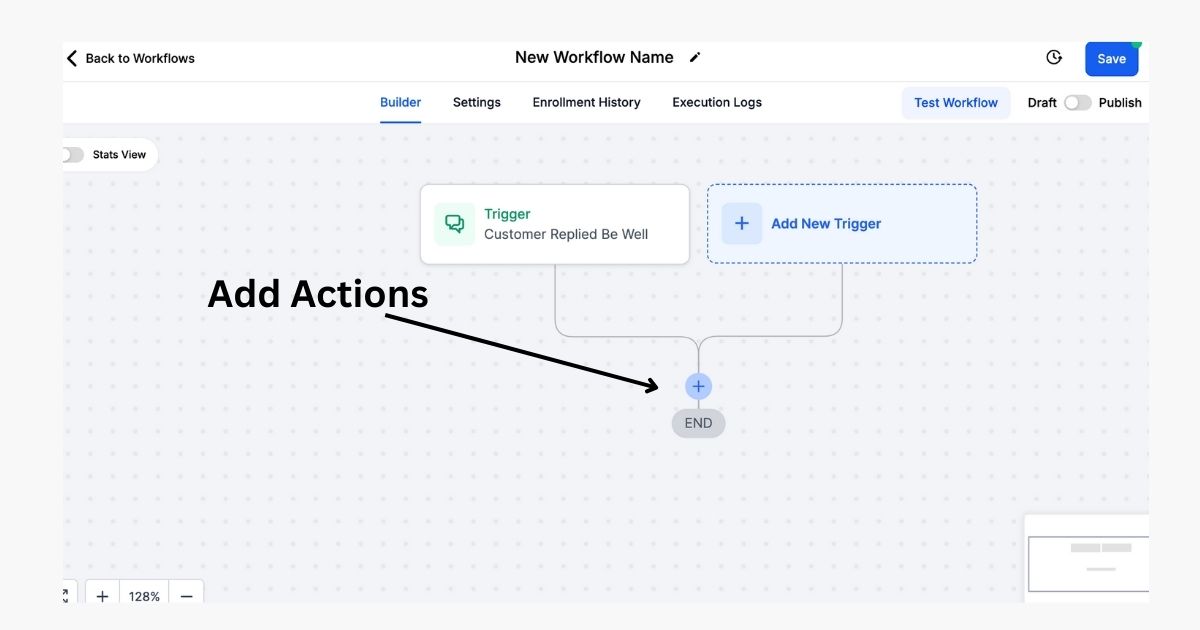
Click the PLUS icon on the workflow to add actions
The actions are what you want to happen once a contact is in the workflow.
In Diamond Marketing, we typically will tag the contact "engaged" so you can filter for contacts who have engaged with your content. You can also tag them be more specific to the workflow or reason they entered it.
We then use text or email actions with wait steps in between.
You can also "Add to workflow", Set an Event date and time or send yourself an internal notification.
There are endless possibilities, below are the most popular.
Popular Actions to Add To Your Workflow:
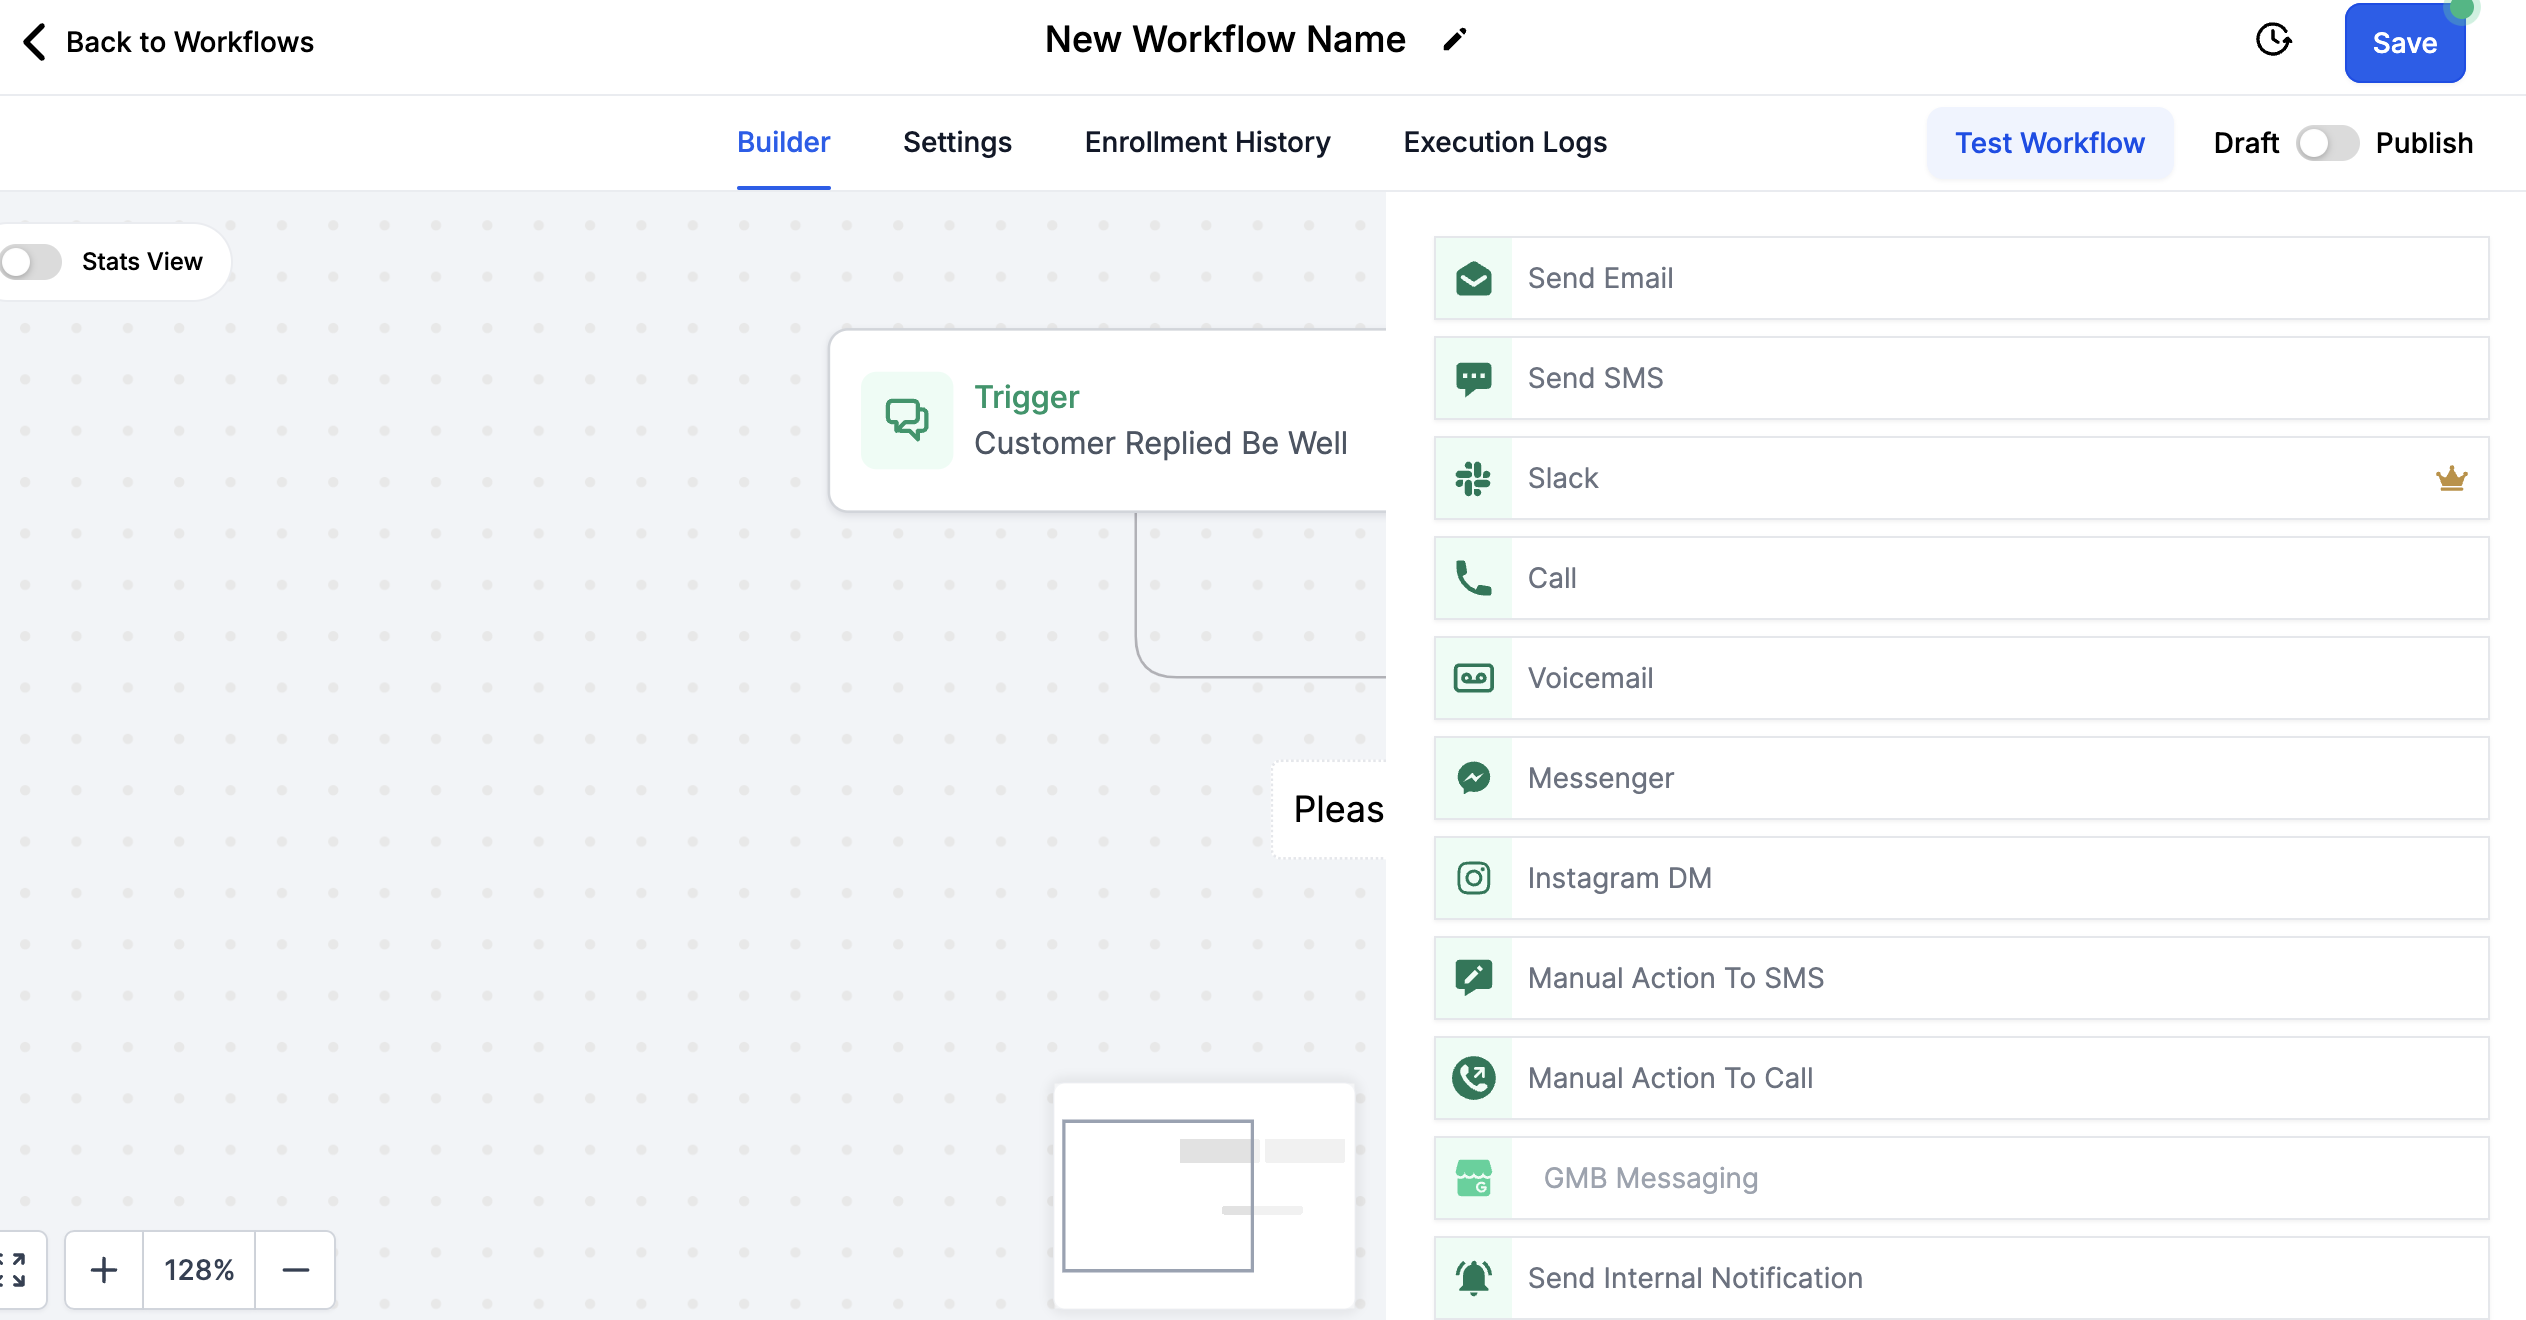
Send Email: Allows you to select an email template to send. For emails, create the templates in the Marketing tab under email templates, then select the template name in your email action.
Send SMS: Allows you to create a text to send
*NOTE Texts without photos should have 160 characters or less. When adding a photo texts can have 1600 characters. Do not include shortened links or CBD content.
Internal Notification: Allows you to send a text or email to yourslef if someone joins the workflow
*Always save the action and the workflow in the top right when adding an action
After selecting an Action, Always Save the Action and then Save the Entire Workflow
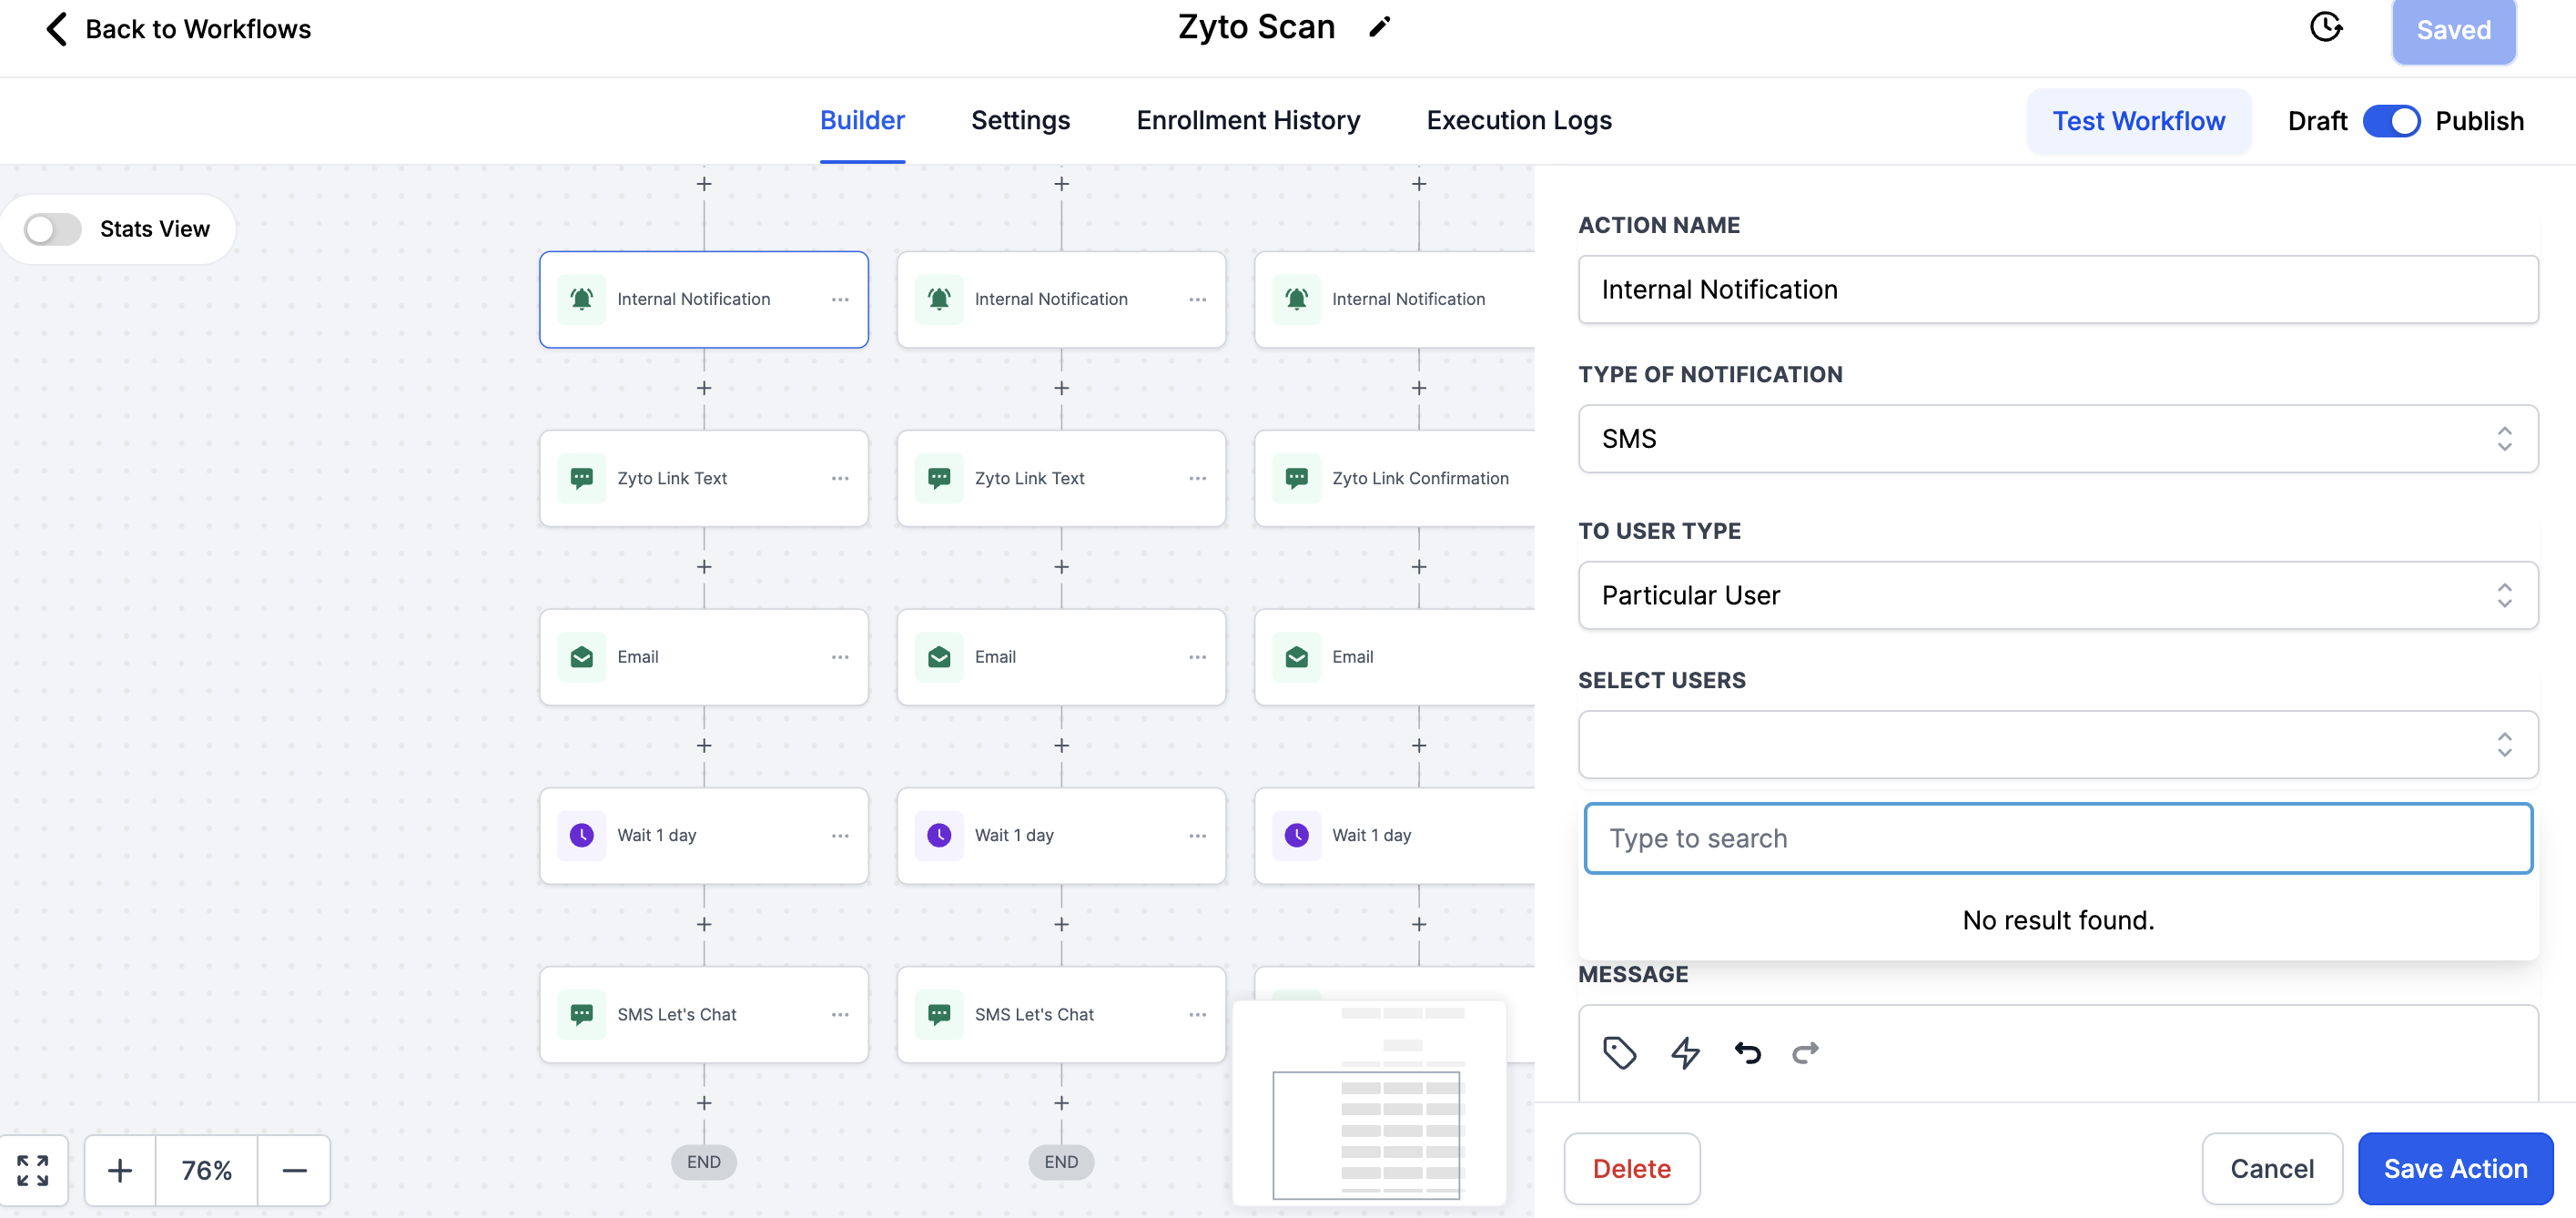
Internal Notifications
To add an Internal Notification:
Select Internal Notification
Select how you want the notification: SMS or email work great
Select 'Particular User'
Select the user you want to have the notification
Add the message: Include the custom value {contact name} so you know who entered the workflow when you get the notification.
*Save the Action and then Save the Entire Workflow
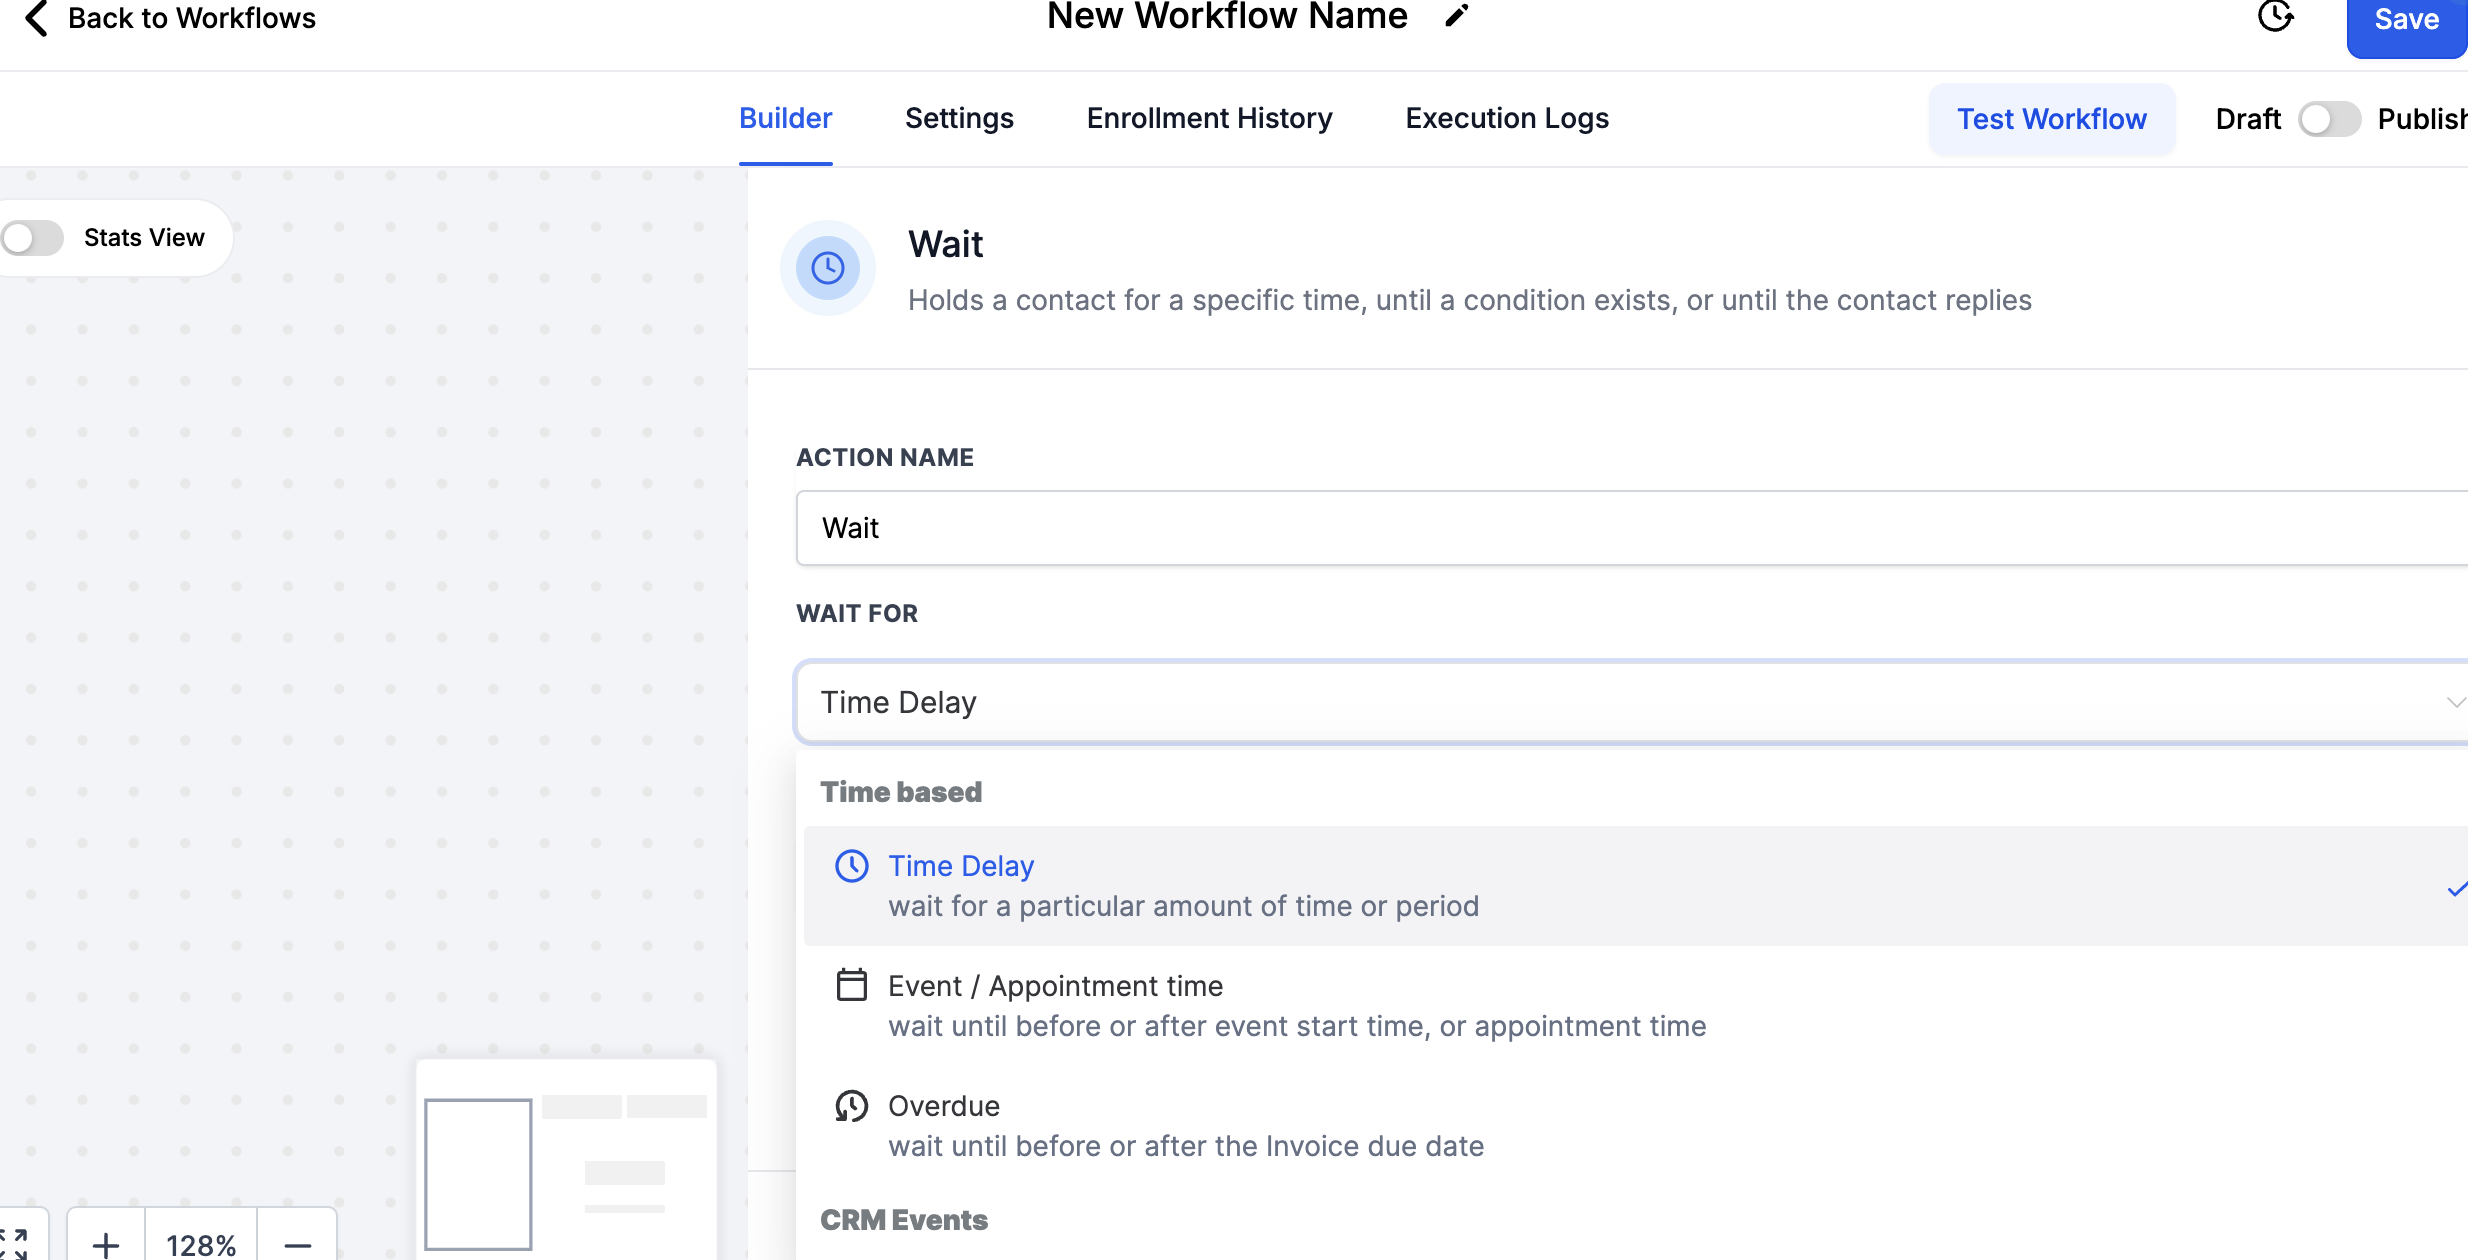
Wait Actions
To add a WAIT Action: Select 'Wait' and select:
Time Delay: Select minutes, hours or days
Event Appointment: When using this action you need an wait action step below it. In the wait, select 'Event' then select 'Exact Time' for the wait step to wait for the event date and time above.
*Save the Action and then Save the Entire Workflow
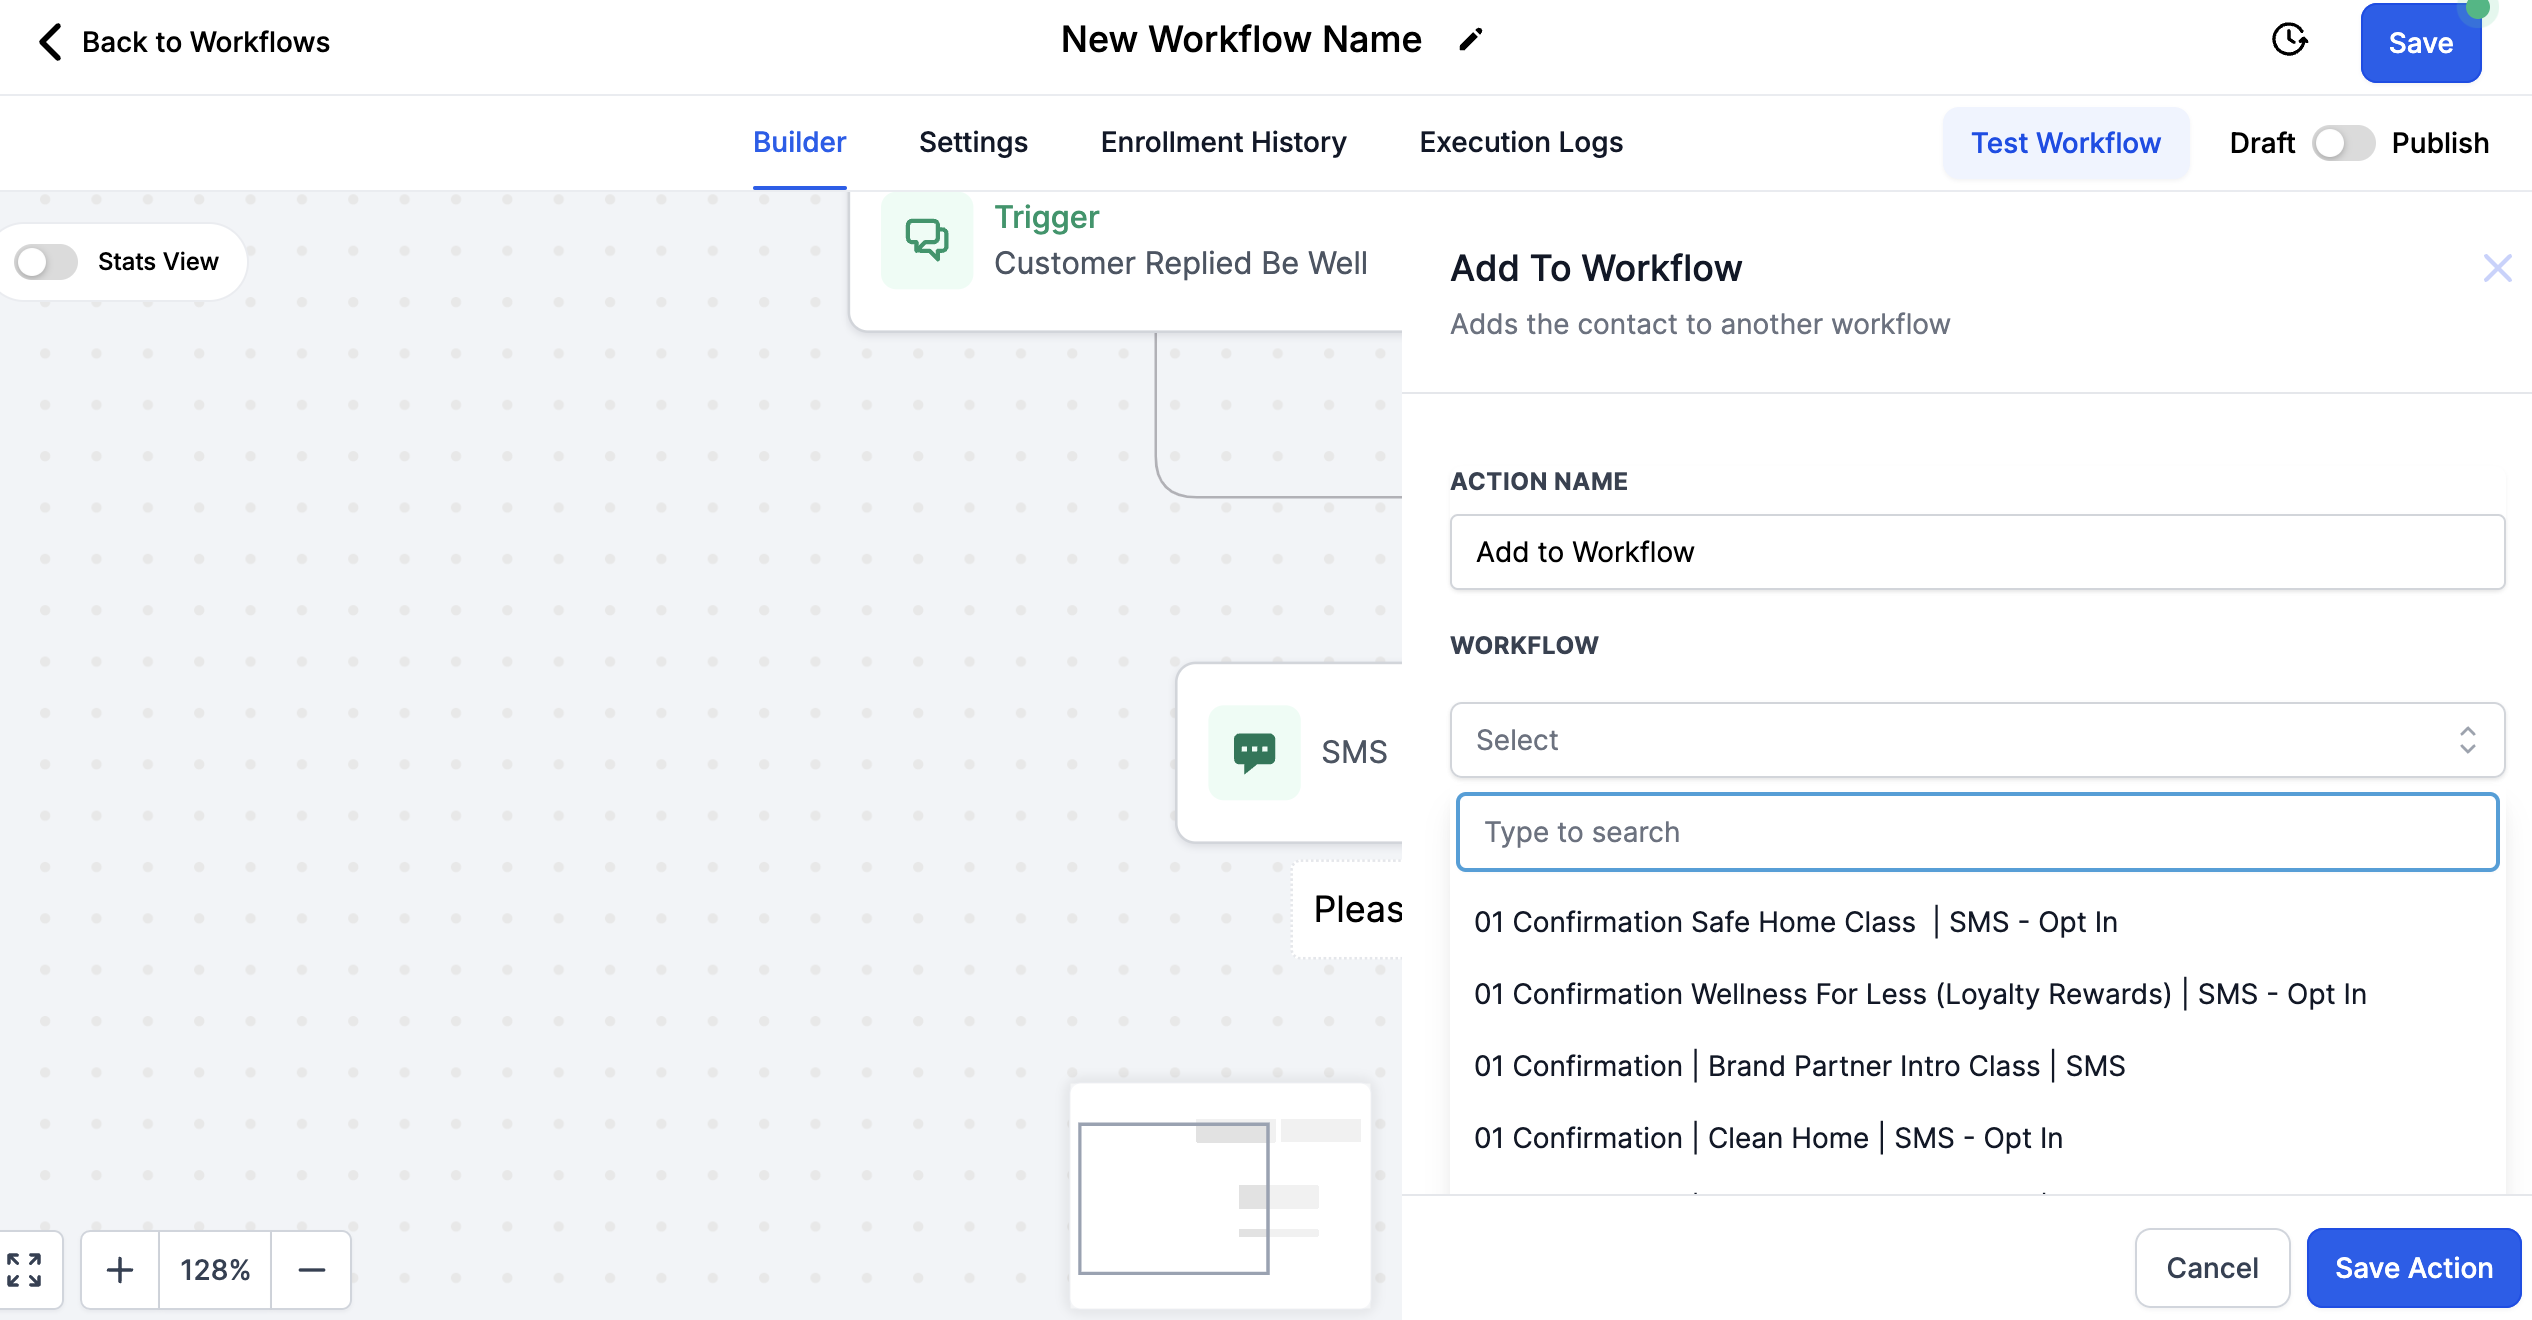
Add Contacts to Your Workflow
To Add a Contact to a Workflow: Select 'Add to Workflow'
Select the Workflow you want them to move in to.
This option is used when you want to give an immediate response/confirmation when someone triggers a workflow, but you want the content to send at specific times of day. Having two workflows will allow you to have the settings in the 'Confirmation' workflow be 'anytime' and the settings in the content workflow (class, reminders, etc) be set to specific times.
*Save the Action and then Save the Entire Workflow
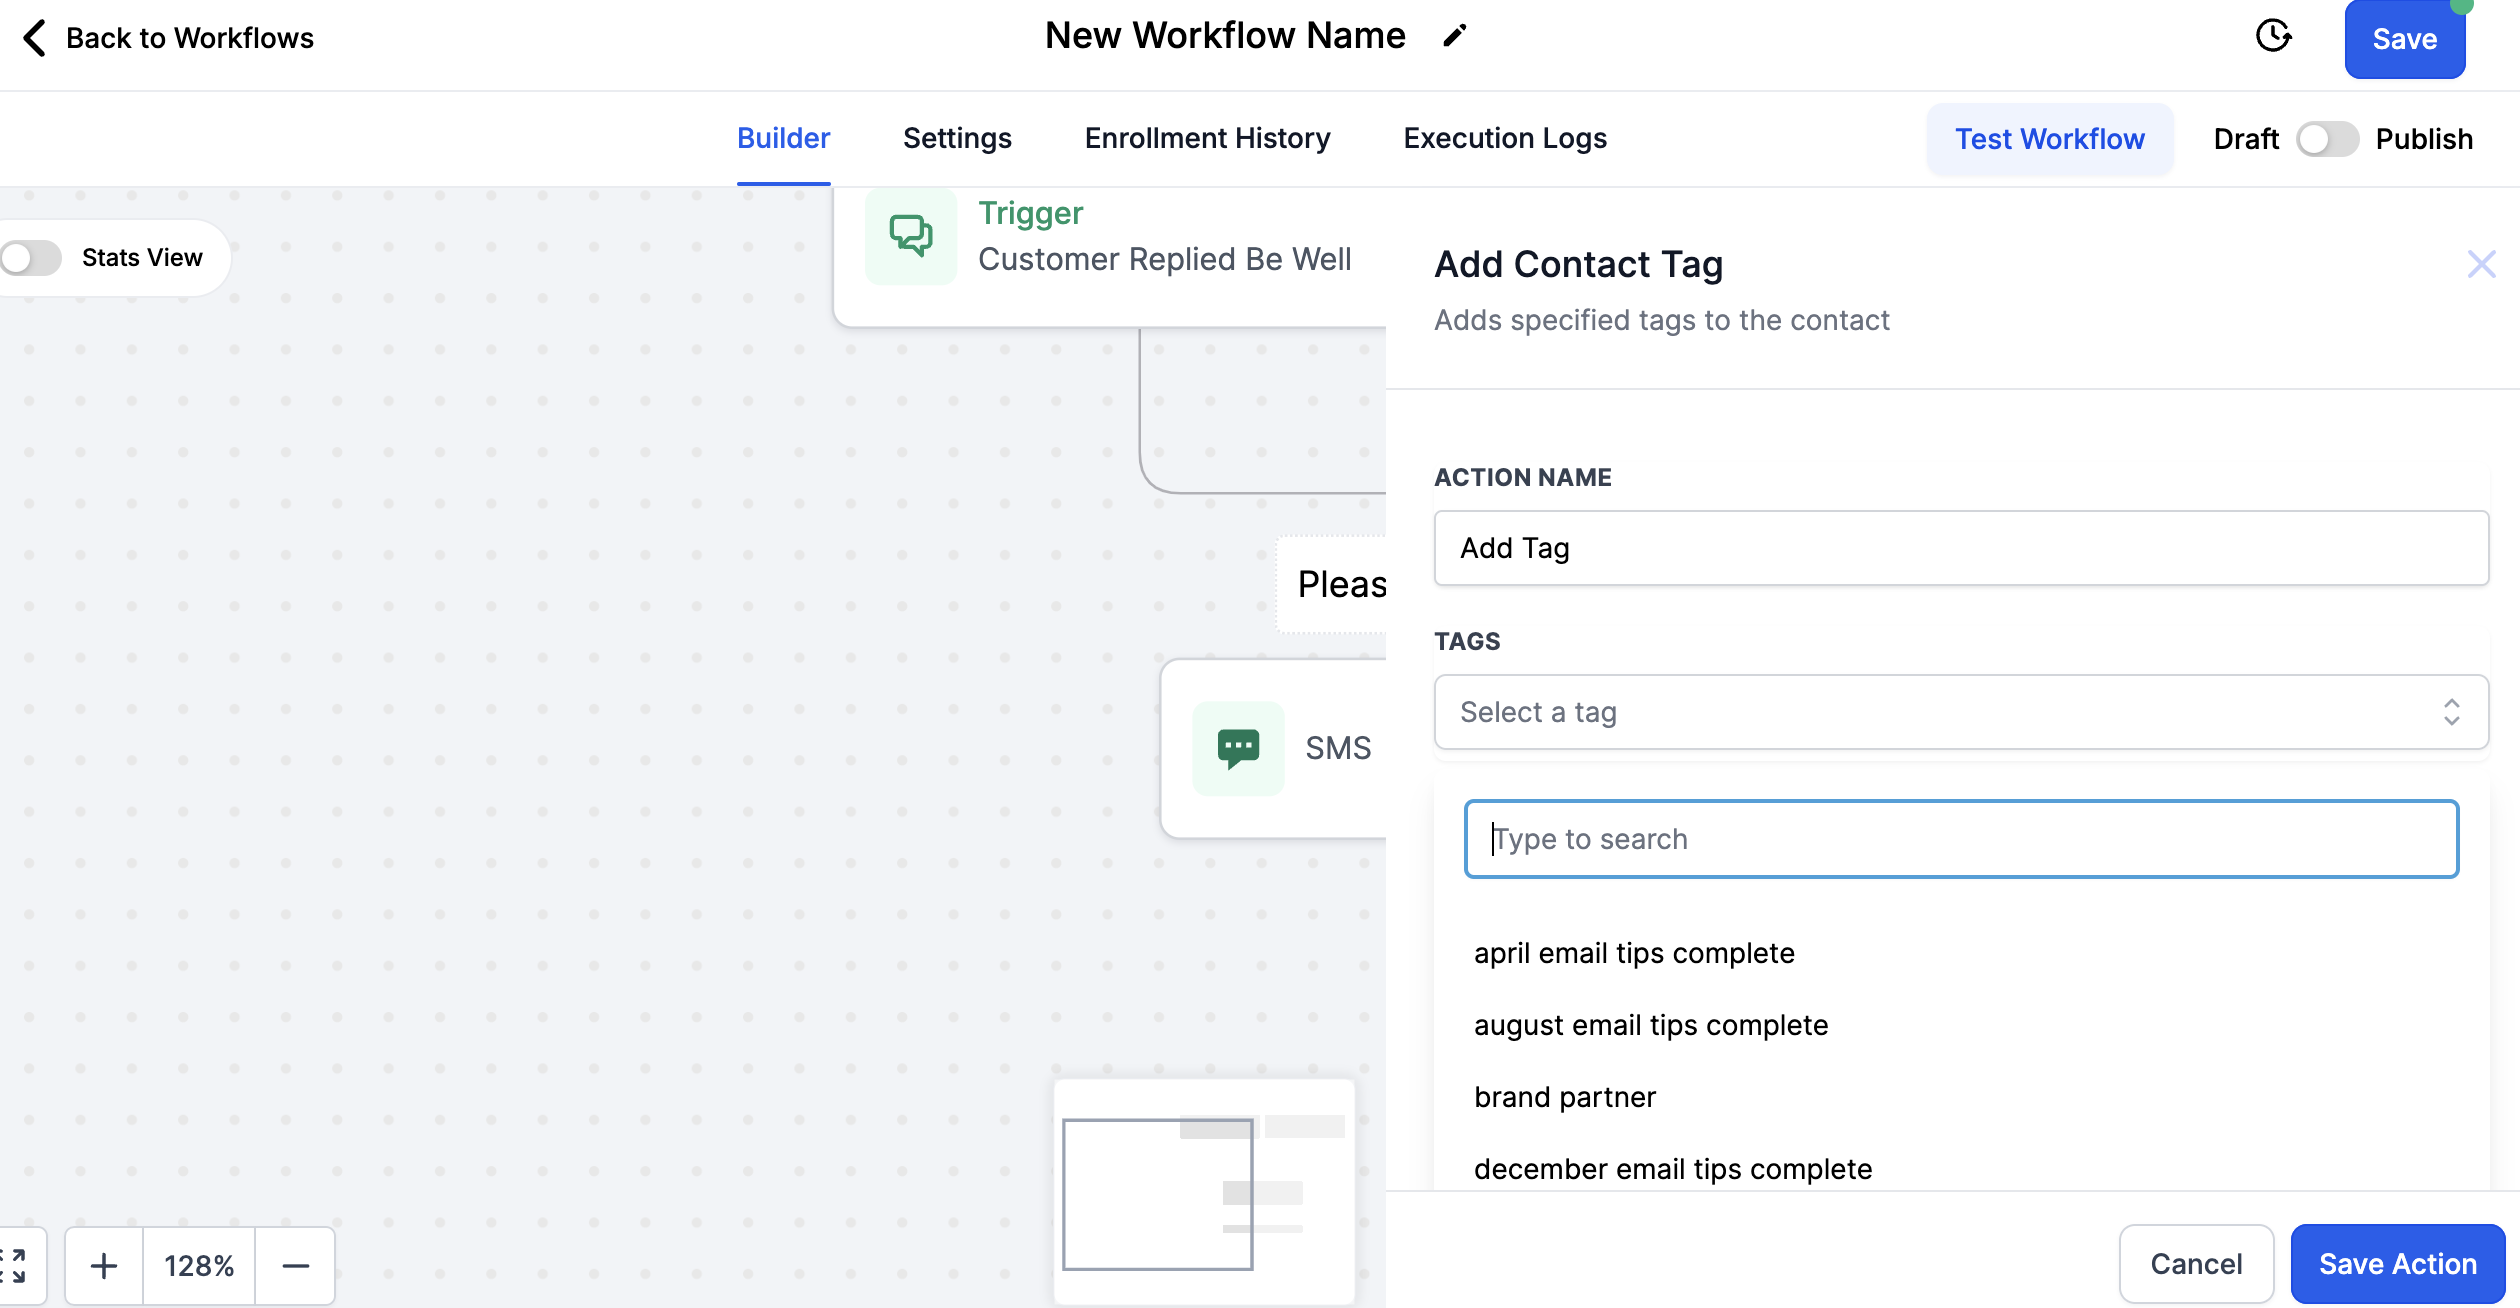
Add a Tag:
Add a contact tag to easily filter for contacts who went through this workflow:
Select Add Contact Tag
Select or add a tag you wish to give each contact
*Save the Action and then Save the Entire Workflow
Don't forget contacts MUST OPT IN to text workflows. You can send an email or make a social media post with a CTA(Call to Action) to opt-in!
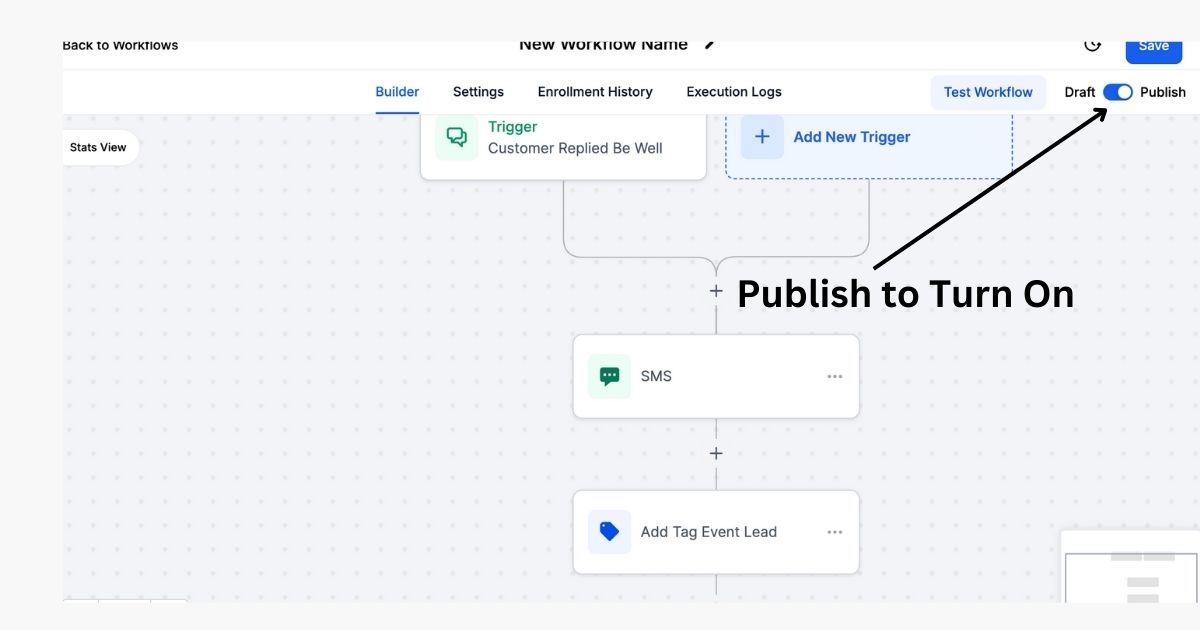
When you are ready to go LIVE, Toggle over to Publish and then Save the Workflow.
Test the workflow on yourself and ensure it works how you want it to!
Navigating the Top Menu:
Settings, Enrollment History and Execution Logs
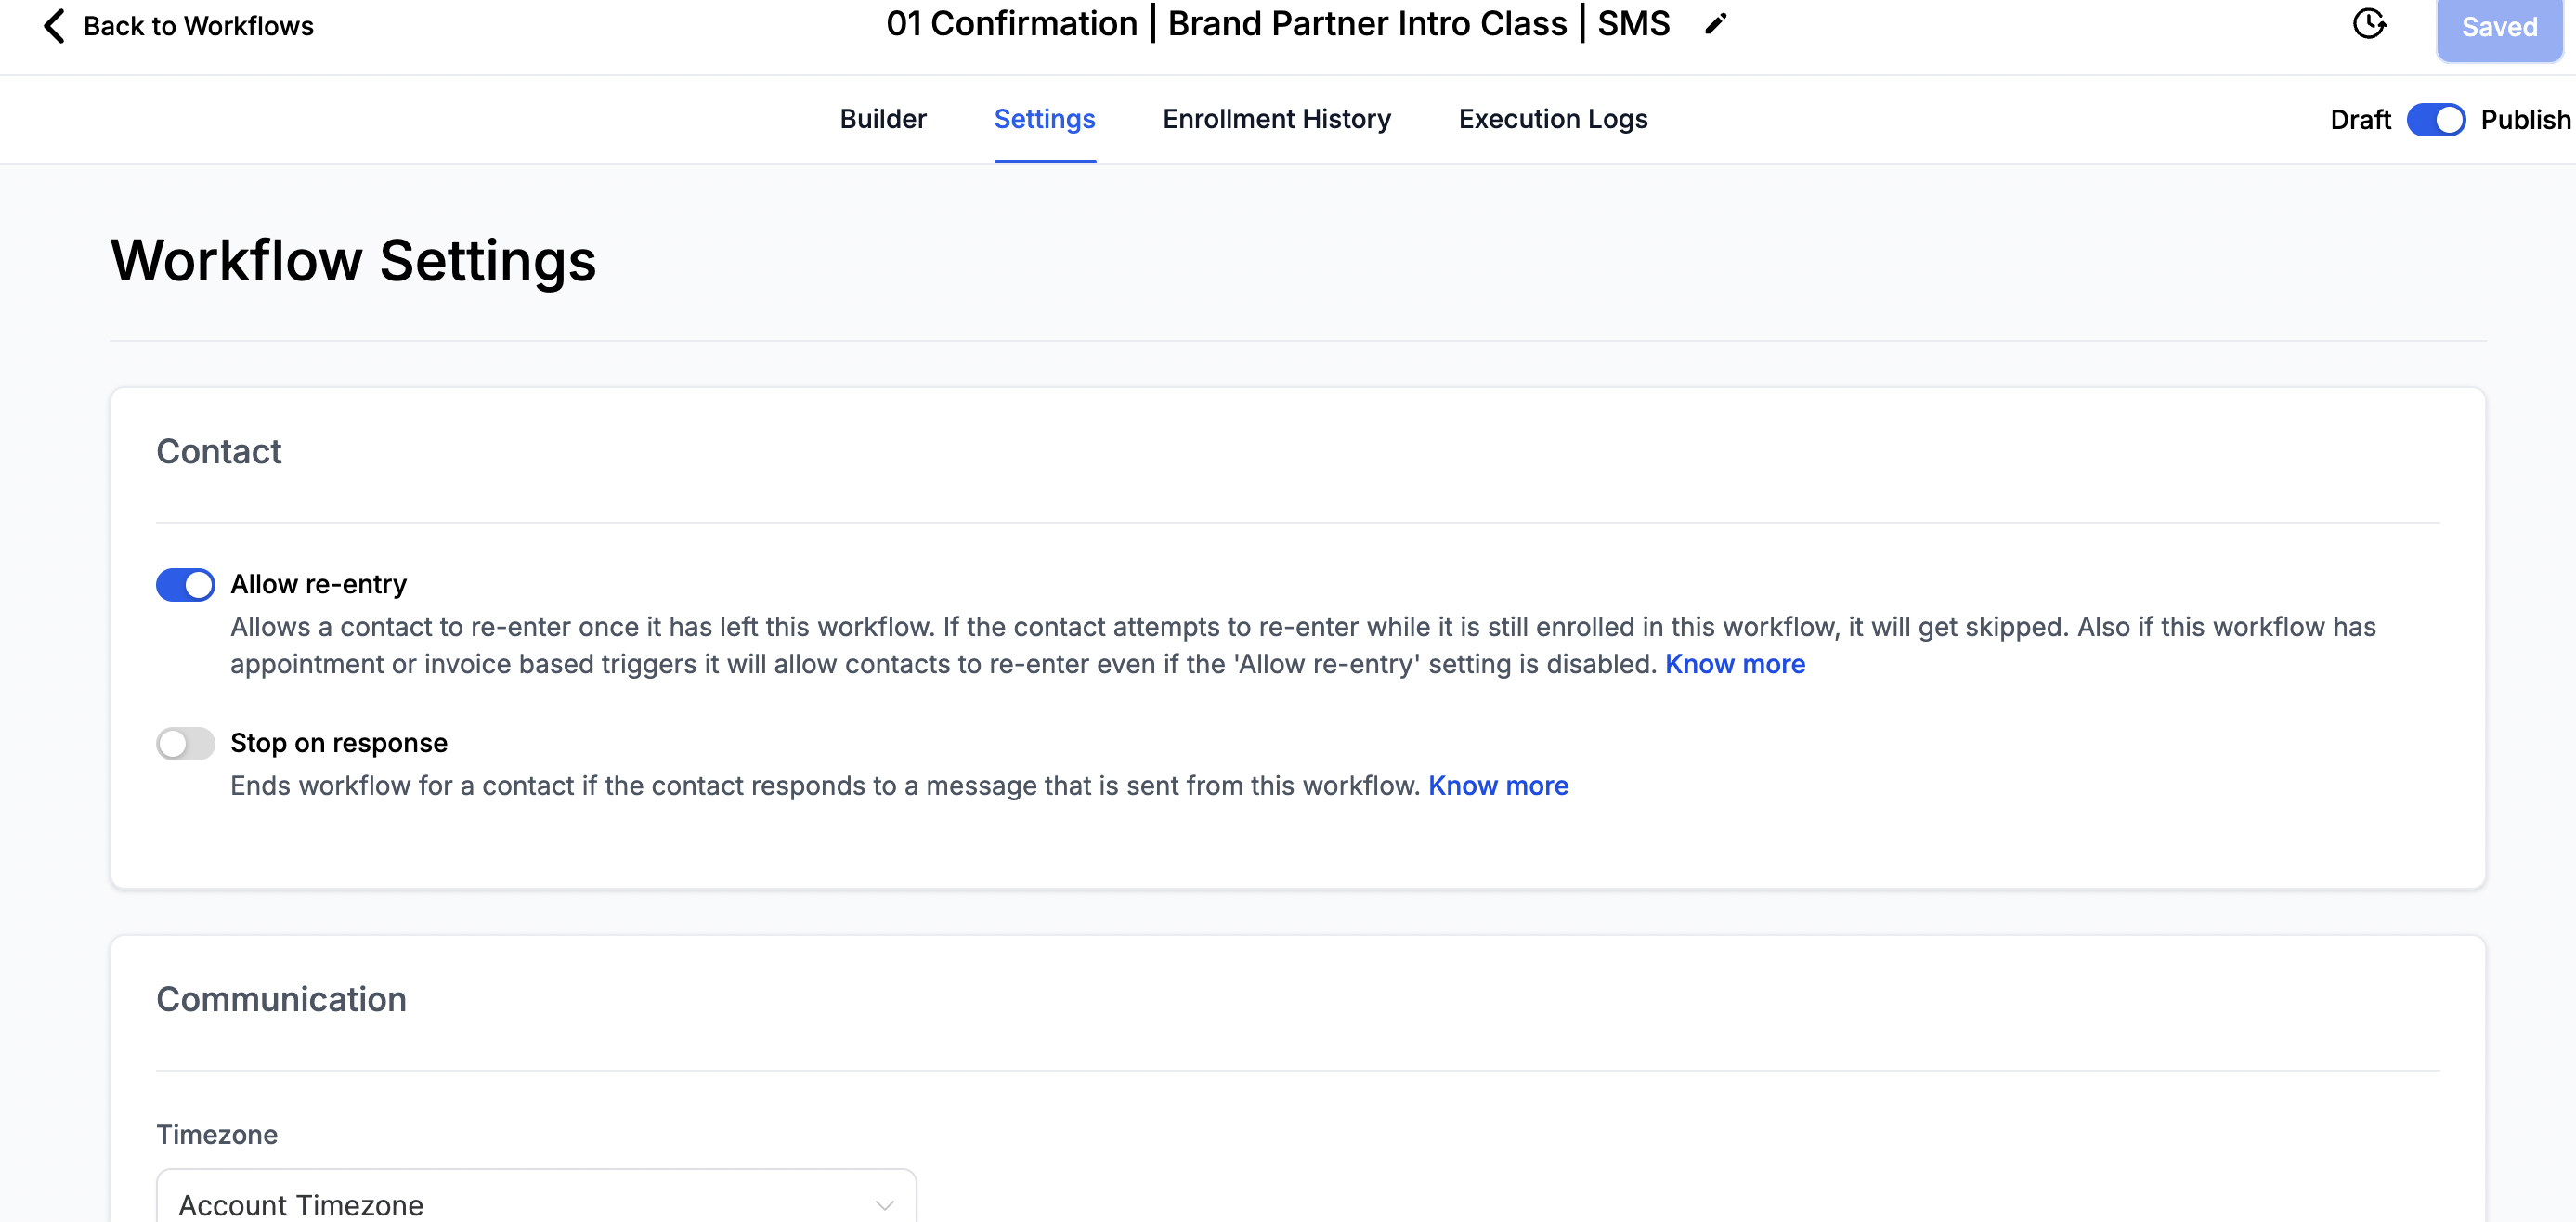
Settings
Toggle on and off Allow Re-Entry
Toggle on and off Specific Time
When this is OFF the workflow will work anytime.
When this is on, you will select the days and times it can send.
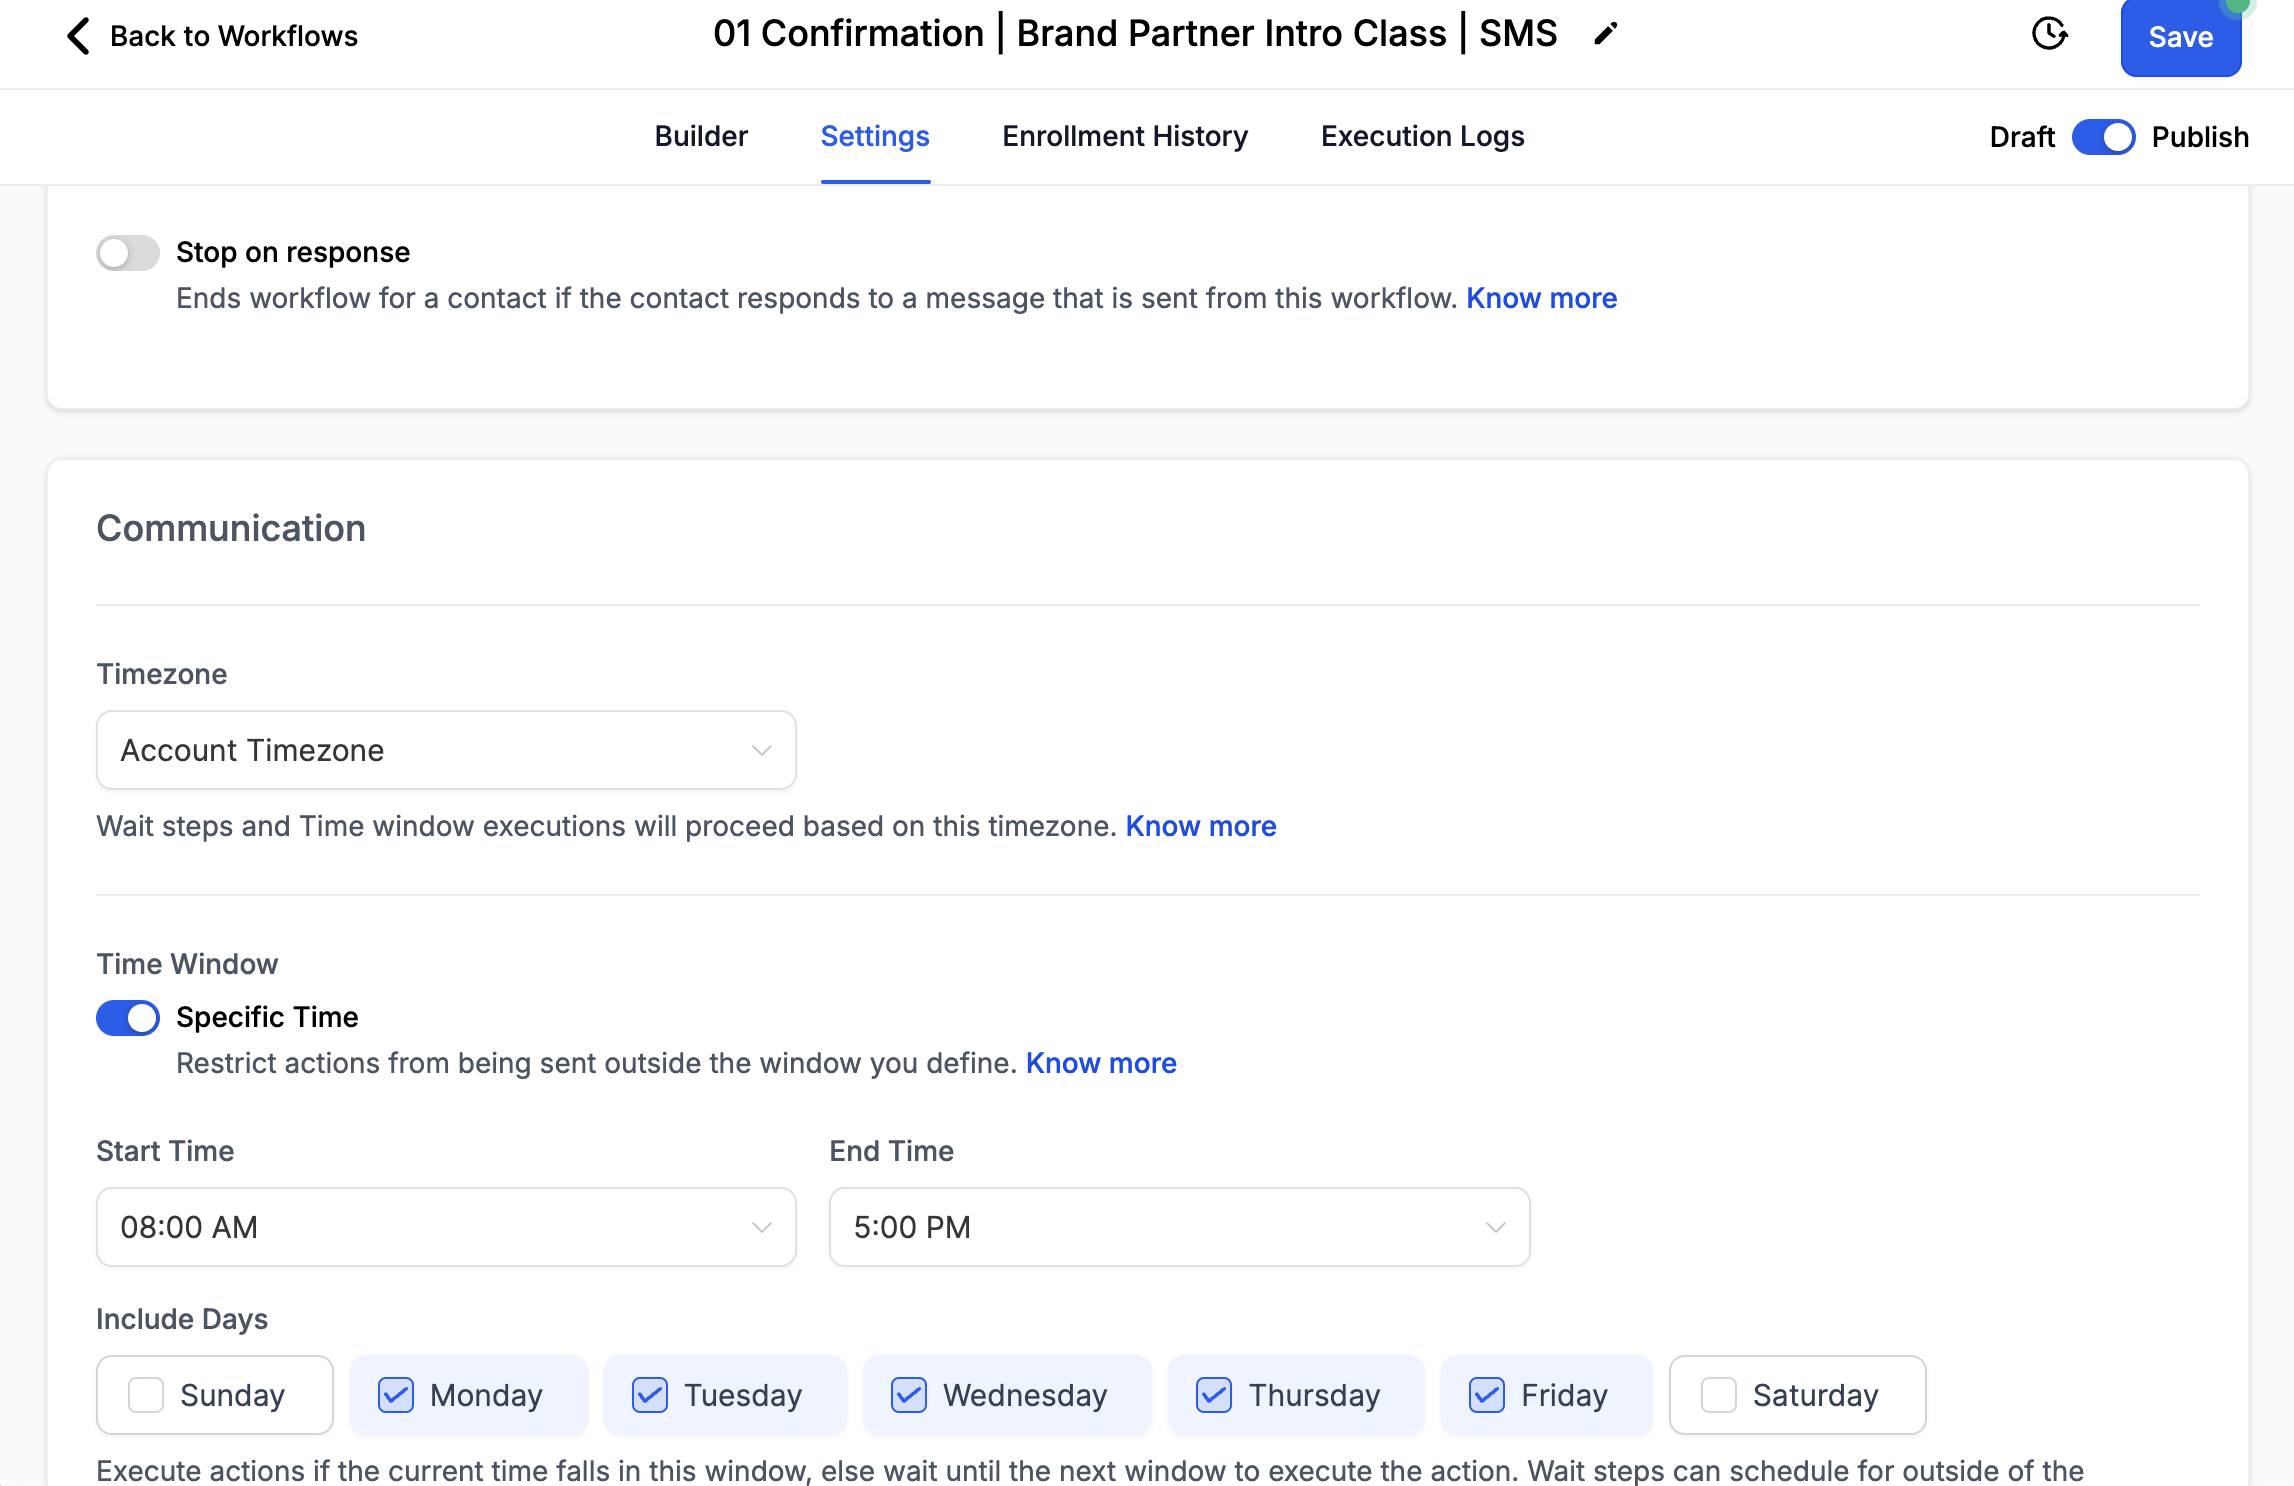
Enrollment History
Shows contacts who have entered the workflow.
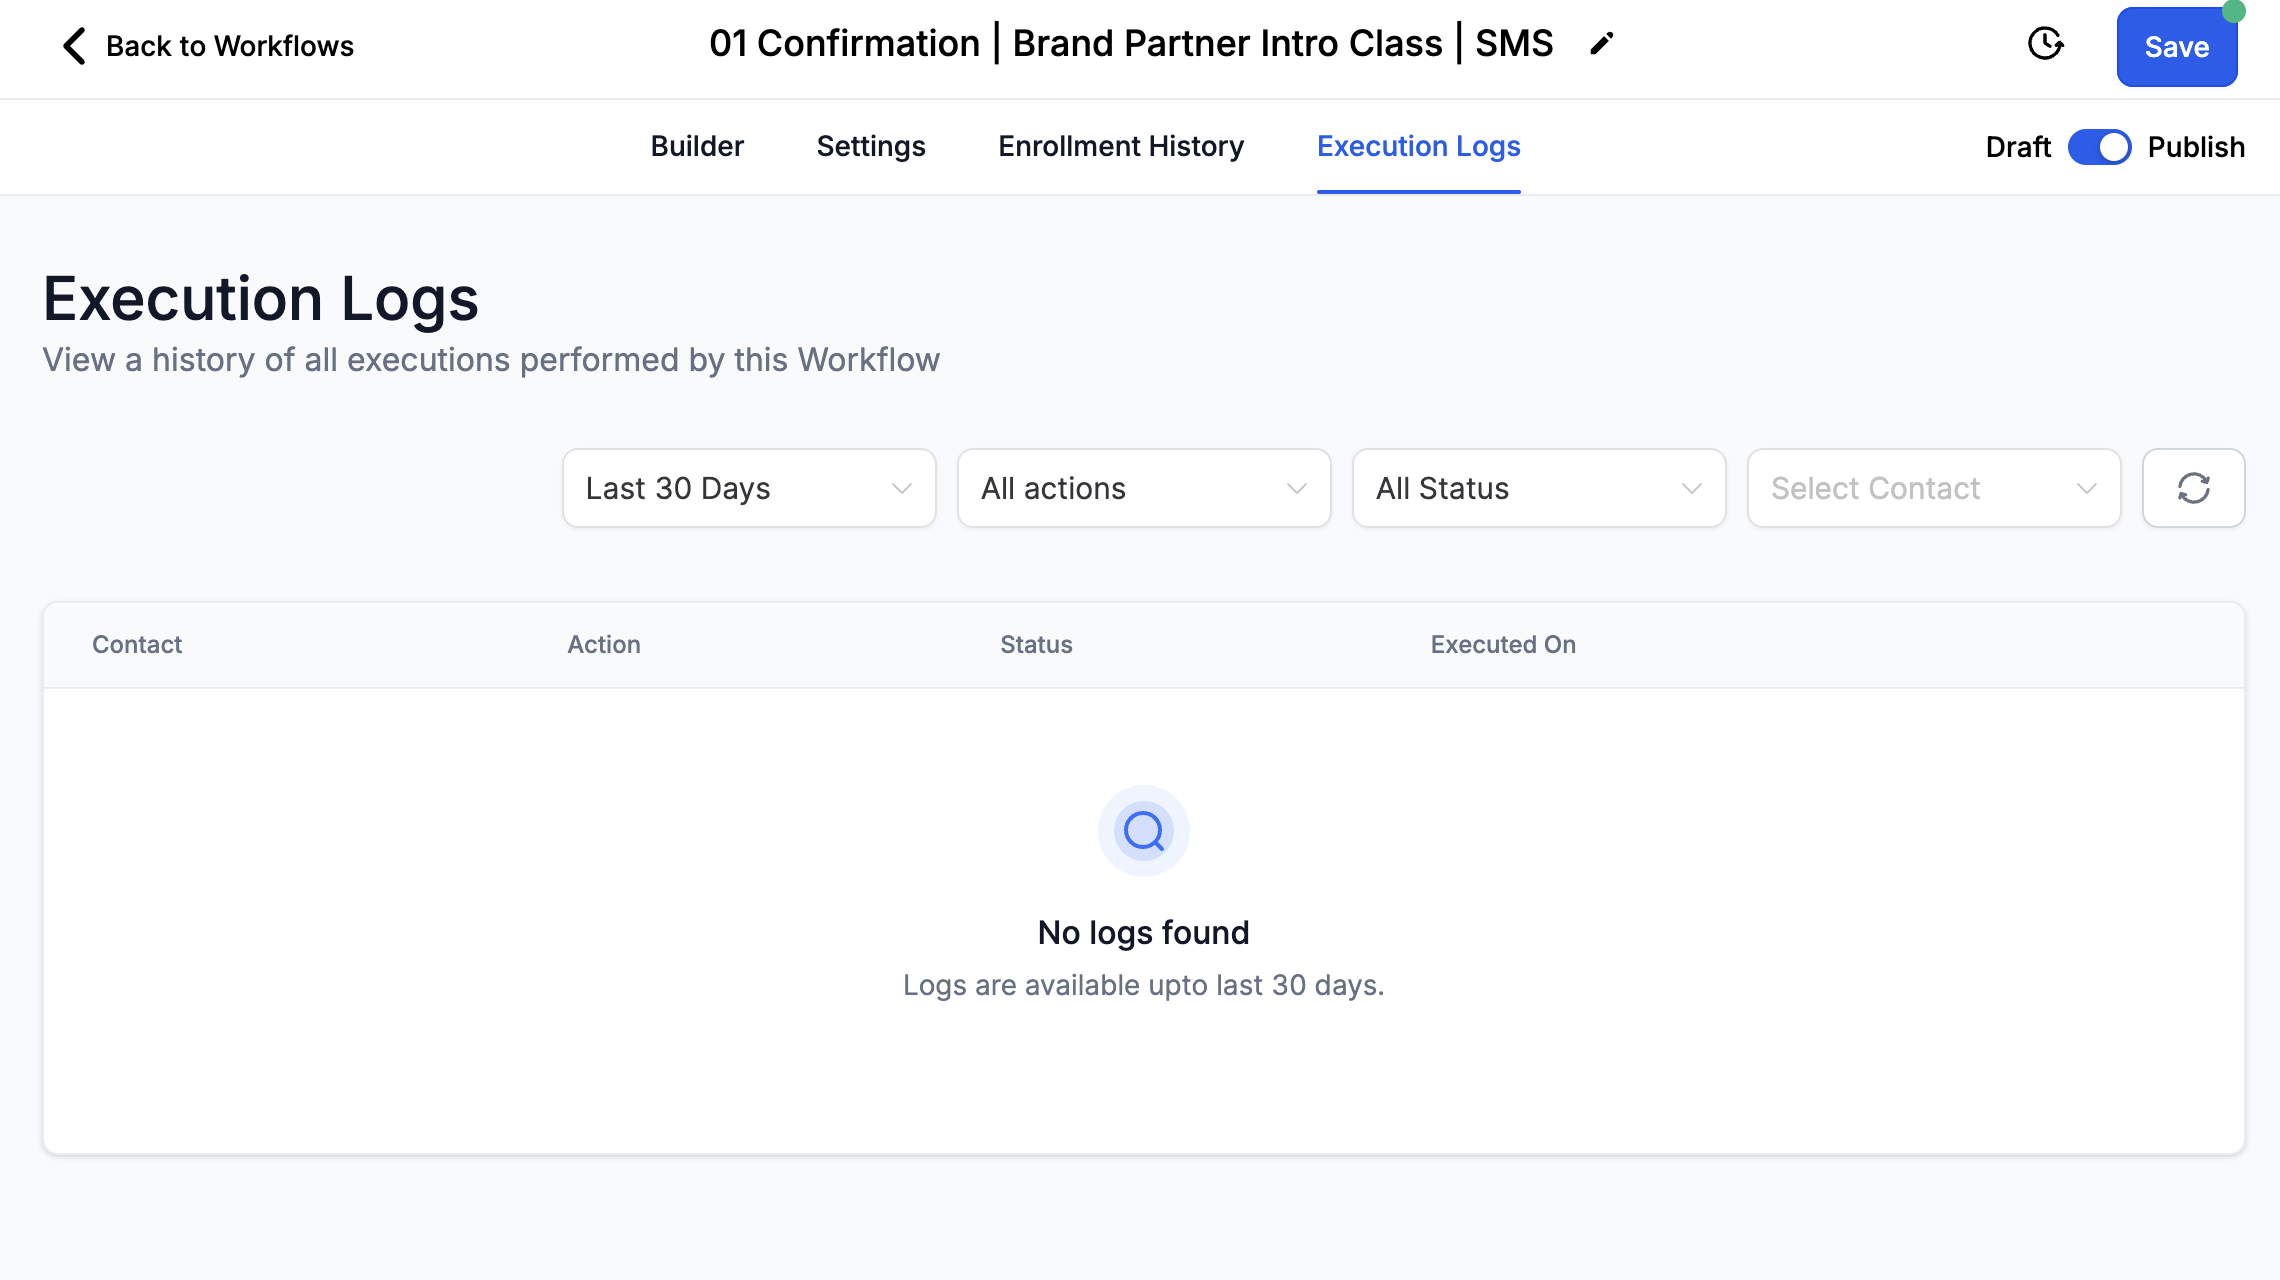
Execution Logs
Shows a detailed log of all actions that have been executed.
Workflow Statistics:
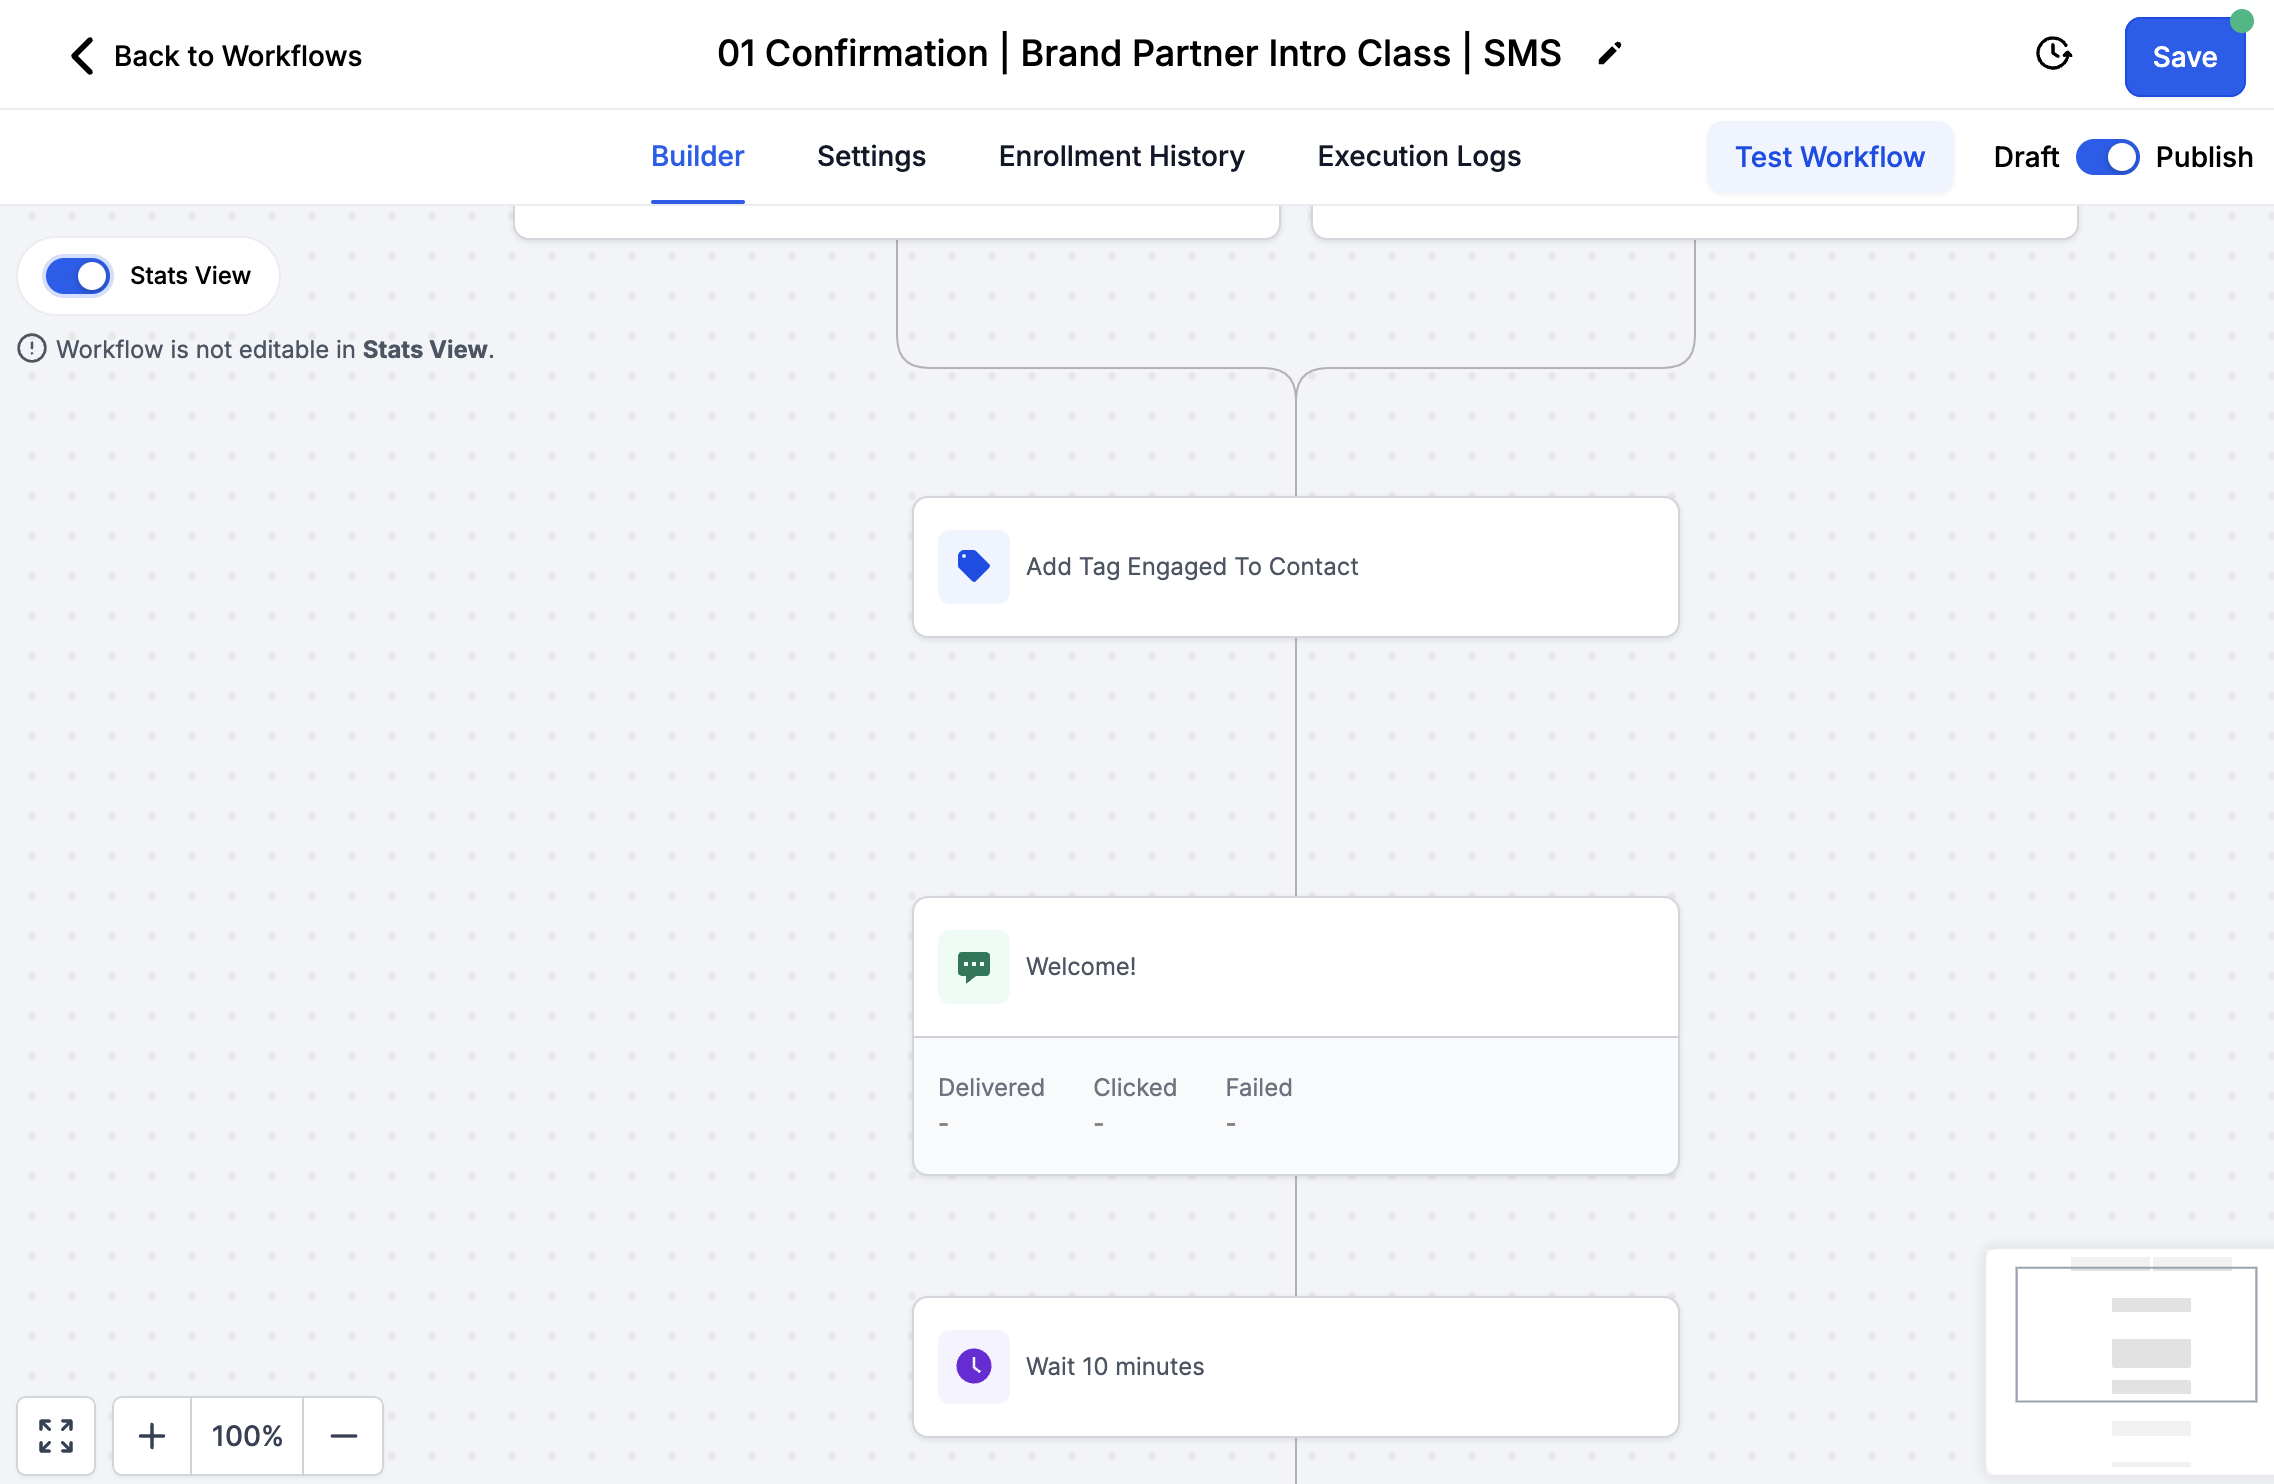
Toggle the Stats View in the left corner to see the statistics of each action.
Shows delivered, clicked, and failed statistics for each action.
What's Next: Personalize the Content:

Diamond Marketing is a customer care platform design for Young Living Brand Partners. All content provided by Diamond Marketing is the property of Diamond Marketing App LLC and cannot be copied or redistributed outside of Diamond Marketing. without prior consent.