
Social Media Integration-Our ManyChat Feature
Connect Your Instagram & Facebook
Automate DMs, share opt-ins, and boost engagement—directly from Diamond Marketing!

Whether you're answering common questions, sharing exclusive content, or guiding followers to your education and shopping links, our Social Media Integration ensures that your brand's voice is always present and responsive in the digital realm!
This lesson will show you how to integrate your social media into Diamond Marketing, use our pre-made trigger words to send links to your class opt-in forms and shopping pages via DM and create your own social media responses via DM and comment response.
Social Media Integration Set Up:
Step 1: You will need a facebook business page and a "Creator" account on Instagram.
Step 2: Link your Instagram to your facebook business page.
Go to your business page and select "settings"
Click on Instagram
Click connect account
Follow the log-in prompts
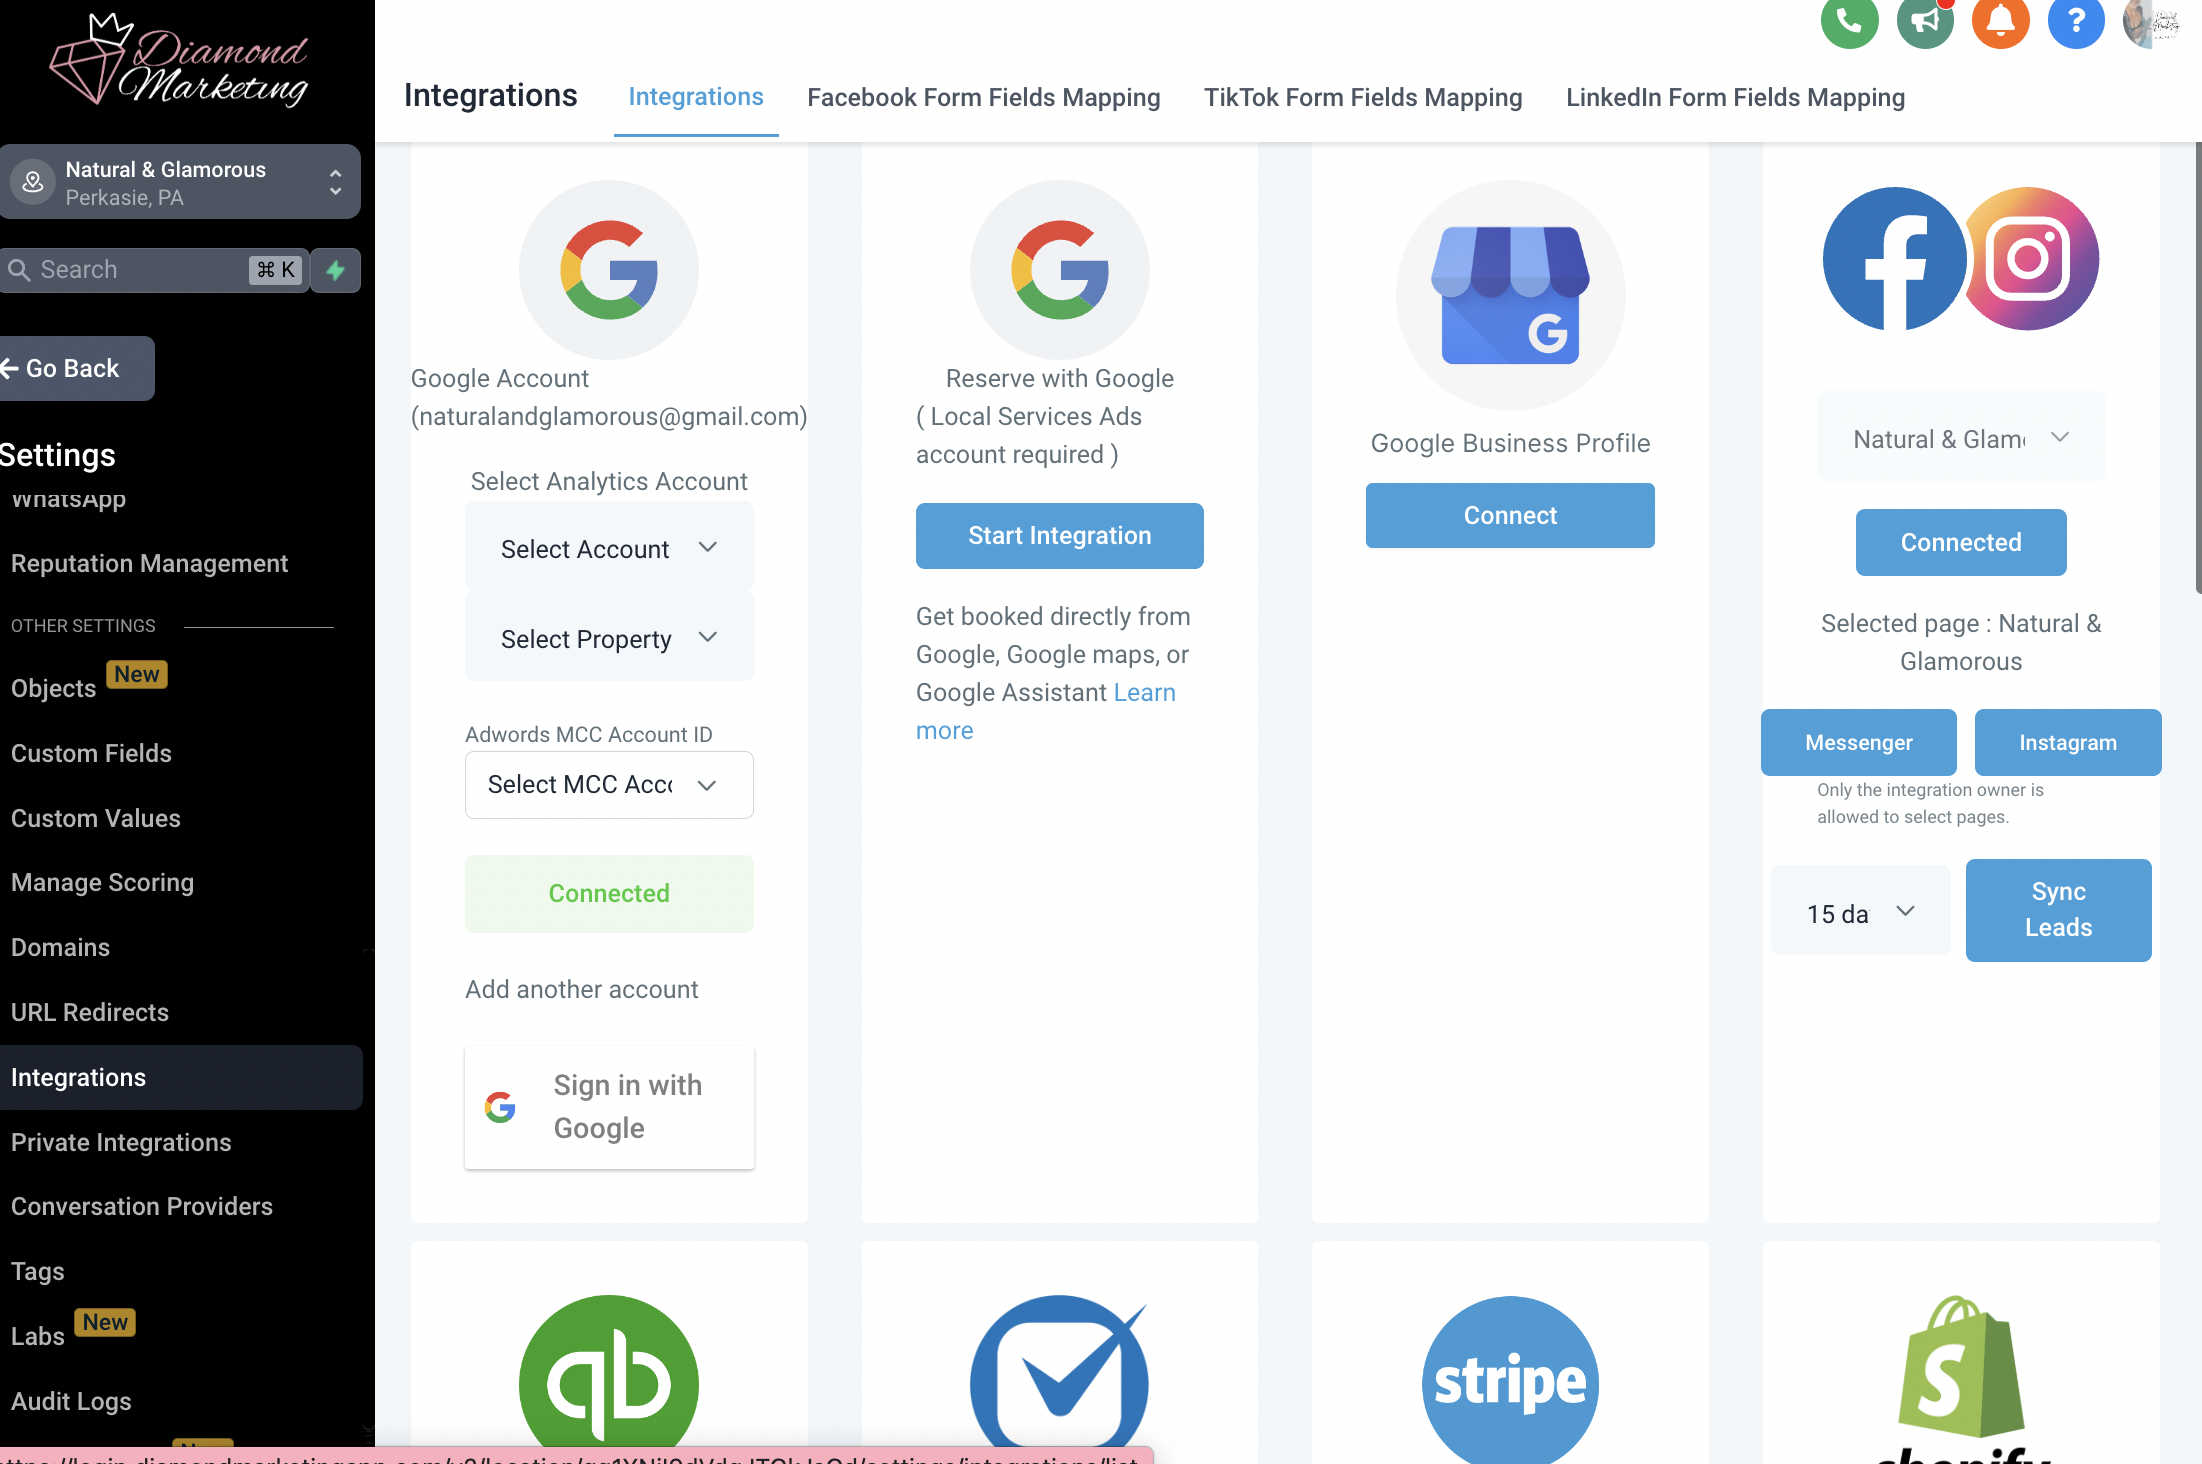
Step 3: Head to the settings menu in Diamond Marketing and click 'Integrations' and select "connect" under the Instagram and Facebook section.
Log into facebook
Select the Business page you have connected to your Creator Instagram page.
Be sure you see "Instagram is available for this account" and click connect
Pre-Made Social Media Response Workflows:
Introducing our Social Media Response Workflows – your secret weapon for engaging effortlessly with your audience on Facebook Messenger and Instagram DM!
These automated workflows operate seamlessly, like the popular app ManyChat, allowing you to set up trigger words that prompt automatic responses. Never miss a beat connecting with your FB and Insta contacts; these workflows provide timely and tailored messages based on specific keywords.
This tool isn't just about automation; it's about fostering genuine connections. You can craft personalized responses that resonate with your audience, turning casual interactions into meaningful conversations.
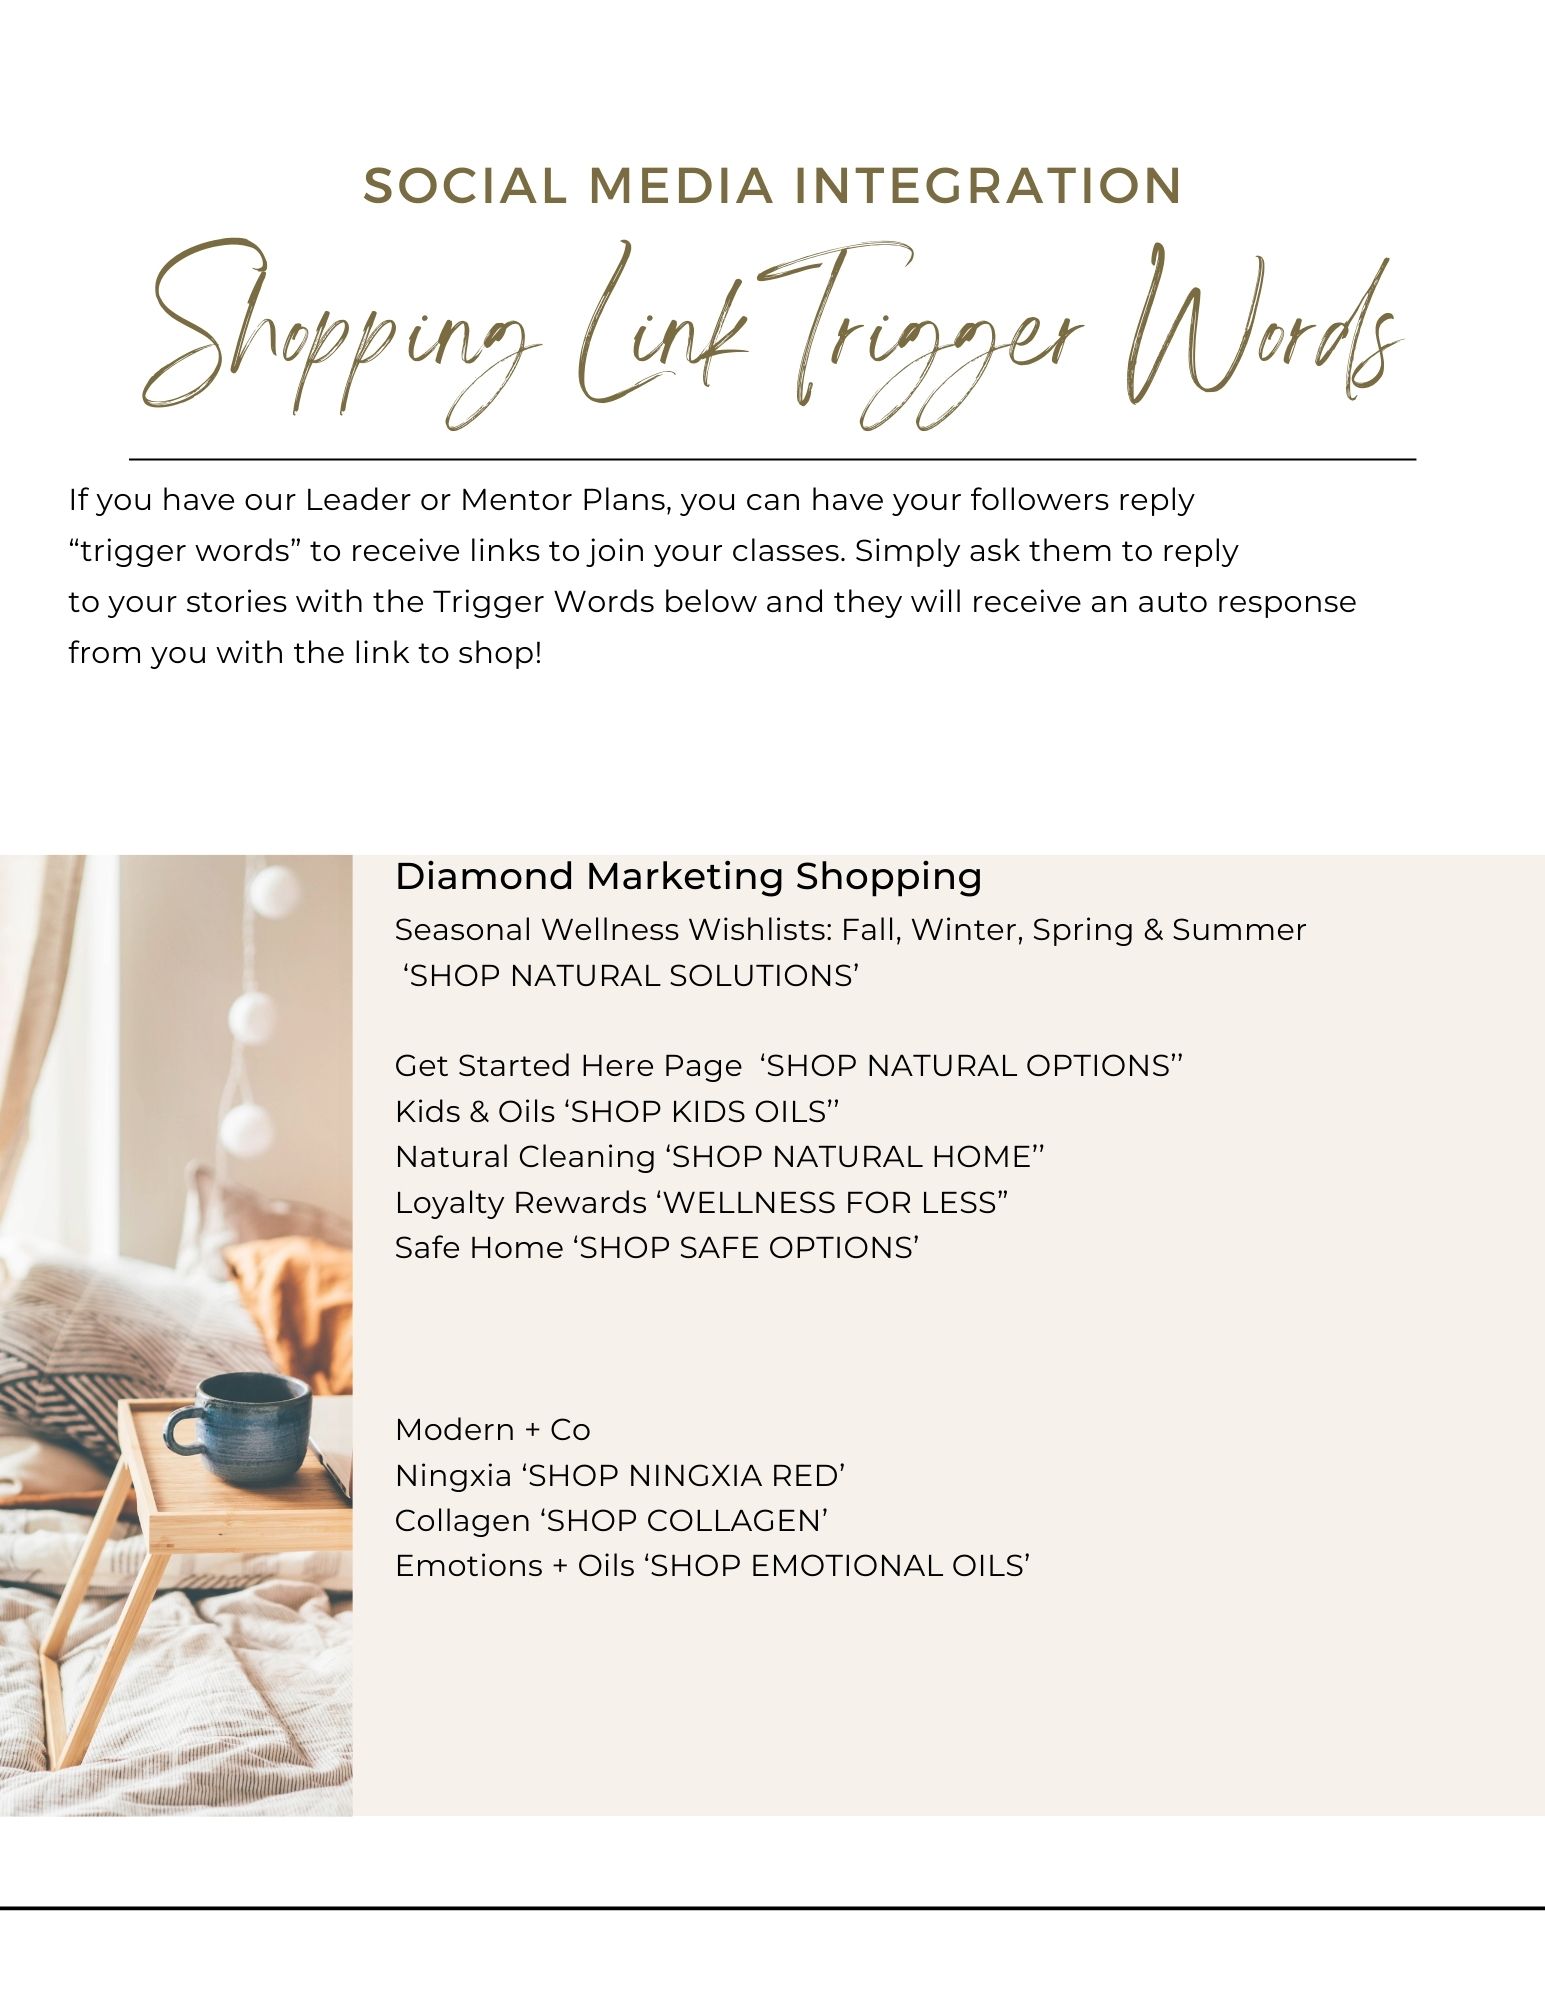
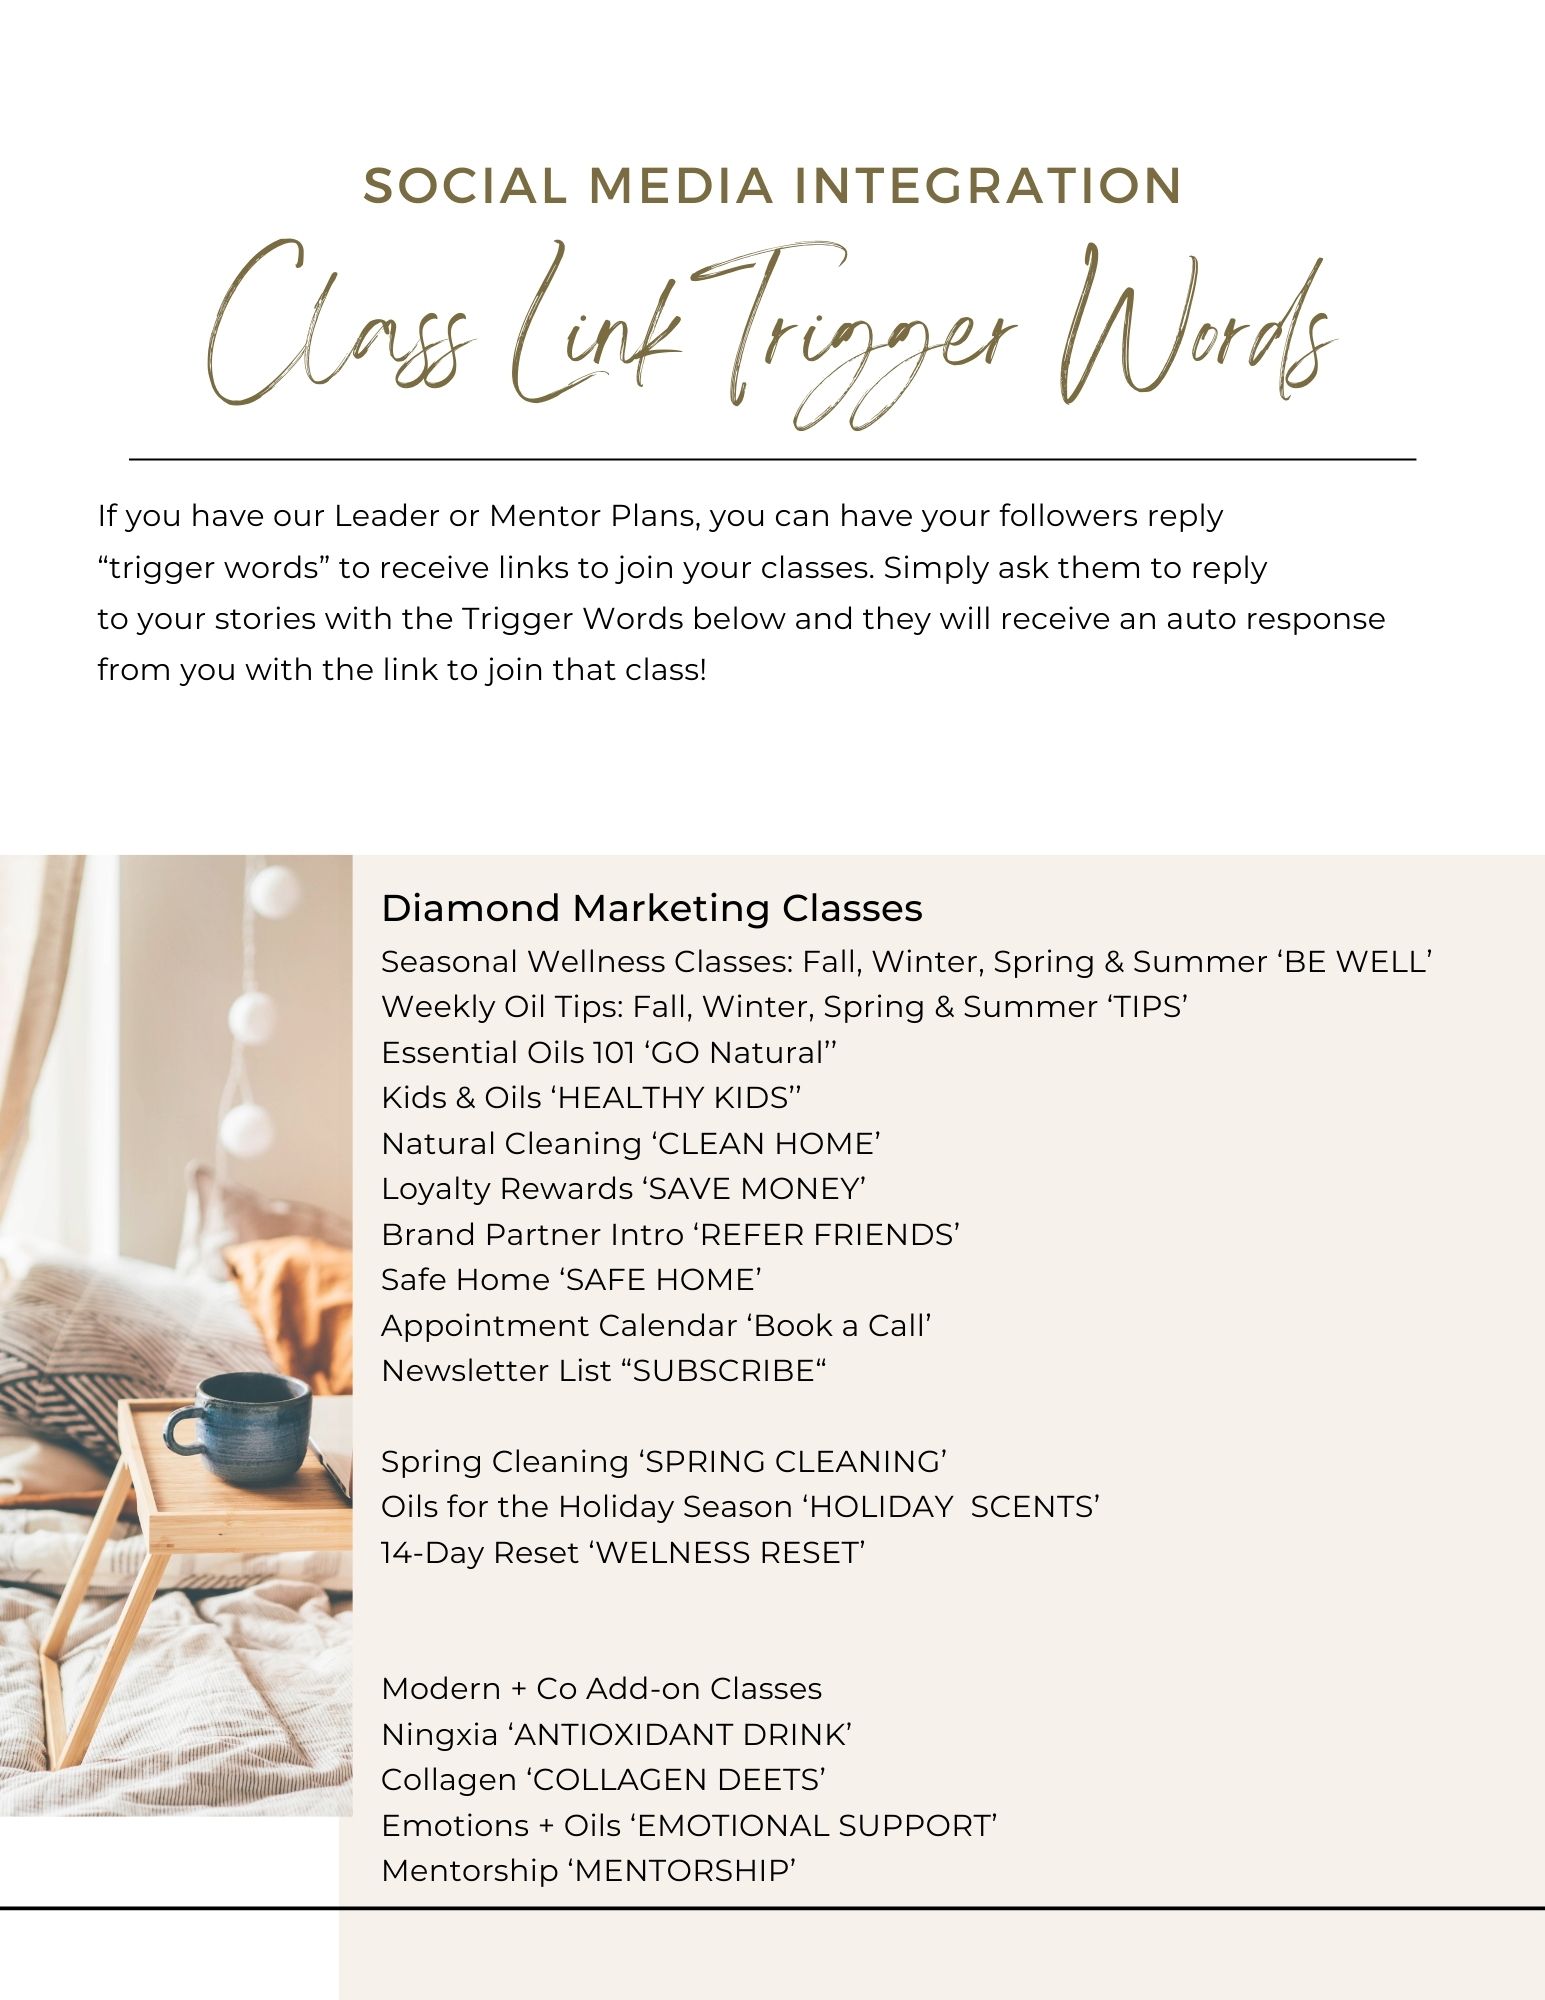
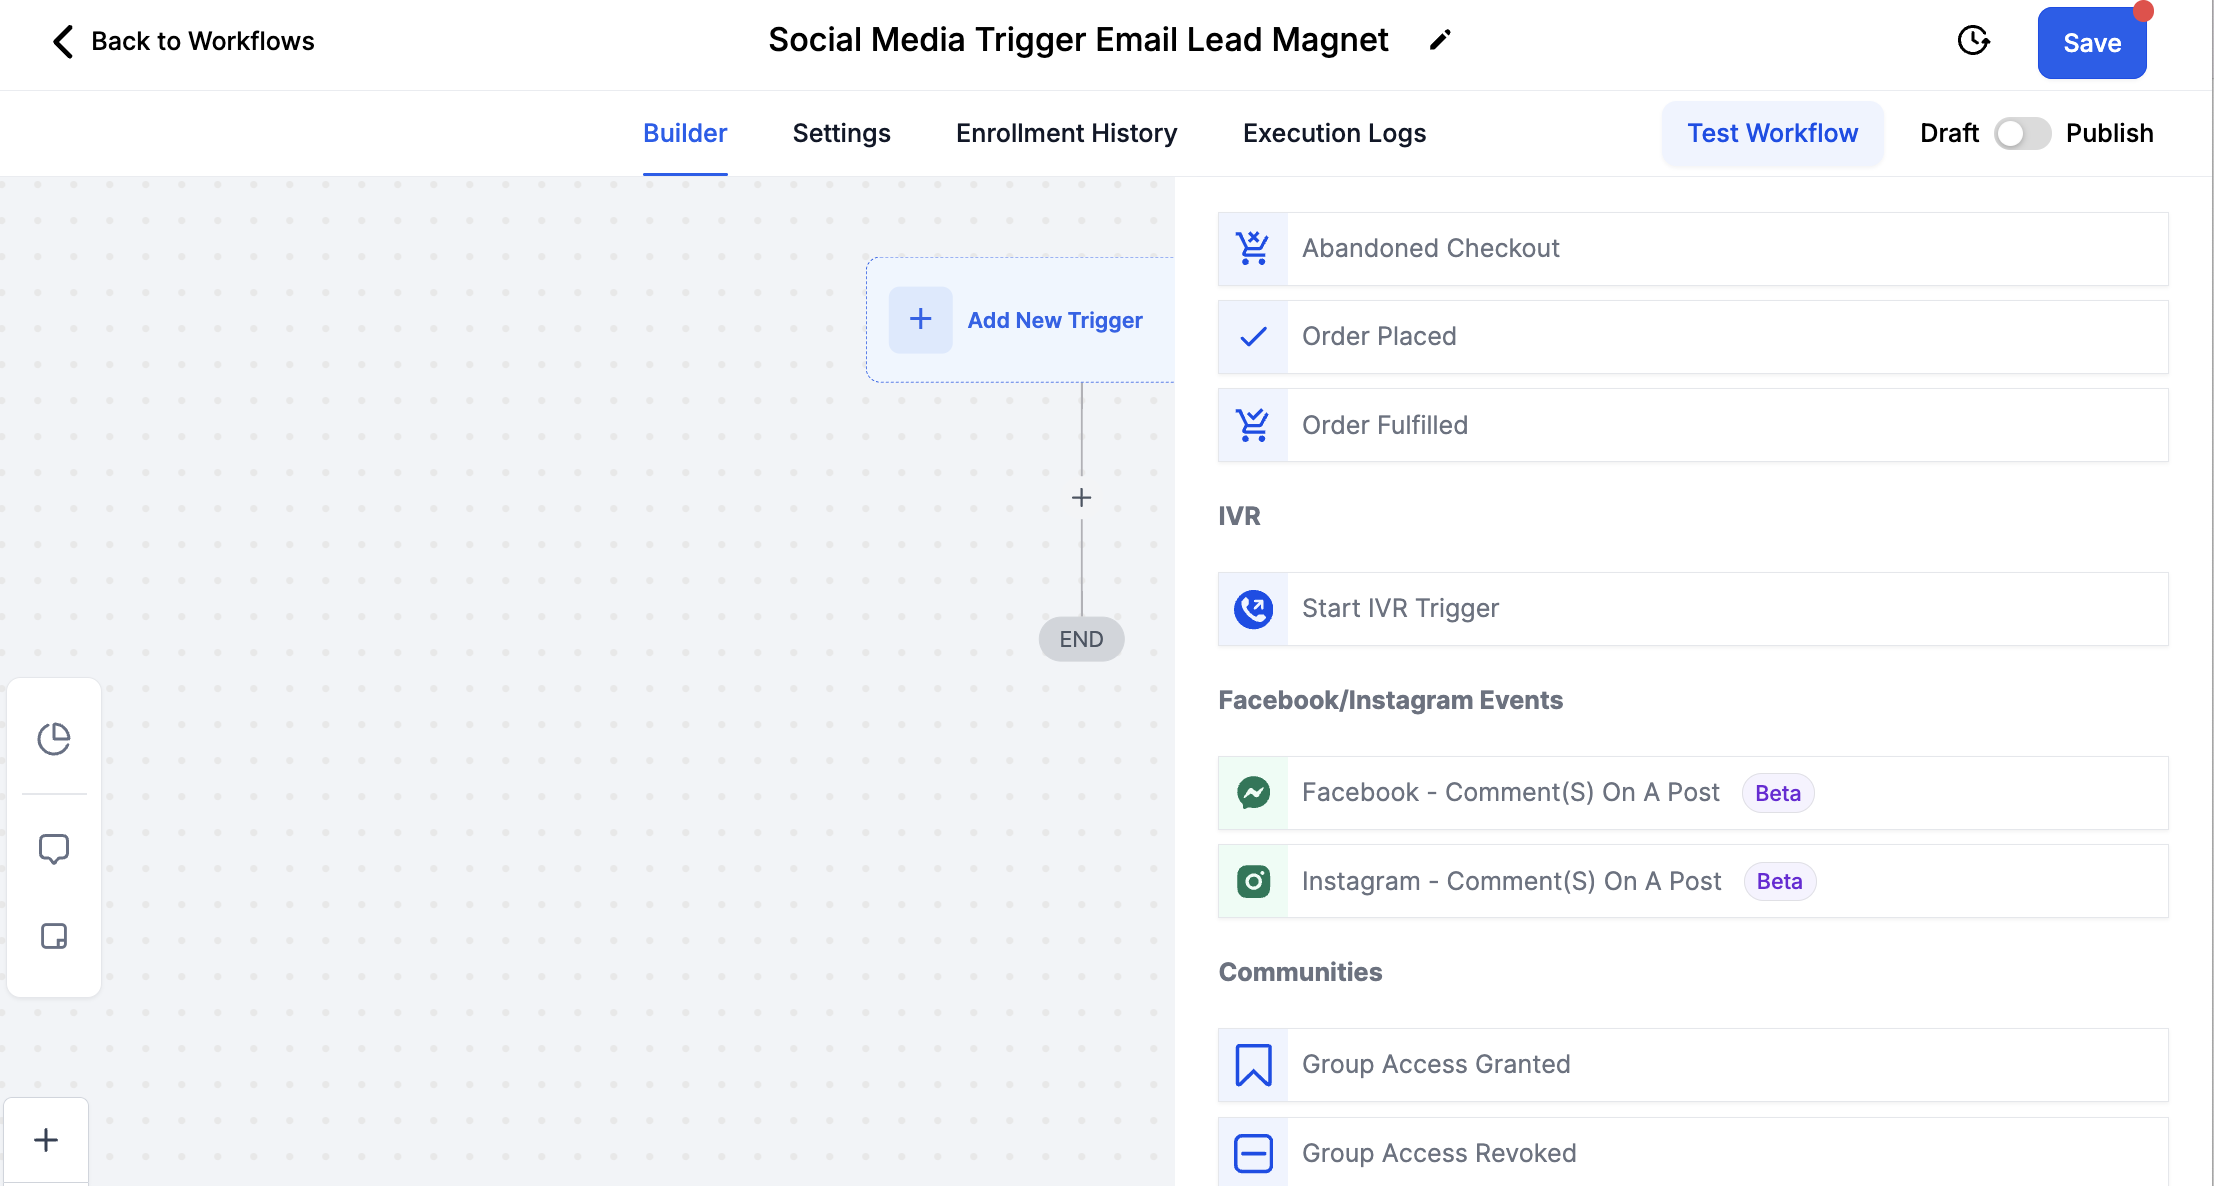
Our pre-loaded workflows include sending a link for:
Your Booking Calendar
Your Email Subscription Page
Your Get Started Here Page
Each Classes Opt-In Pages
Each Classes Shopping Page
You can create AS MANY DM and messenger responses as you'd like! Check out this lesson to learn how!
Social Media Pre-Made Triggers for DM Response:
Create Your Own Social Media Triggers:
How To Create Your Own Social Media Auto Response:
Be sure you have integrated Social Media using the steps above
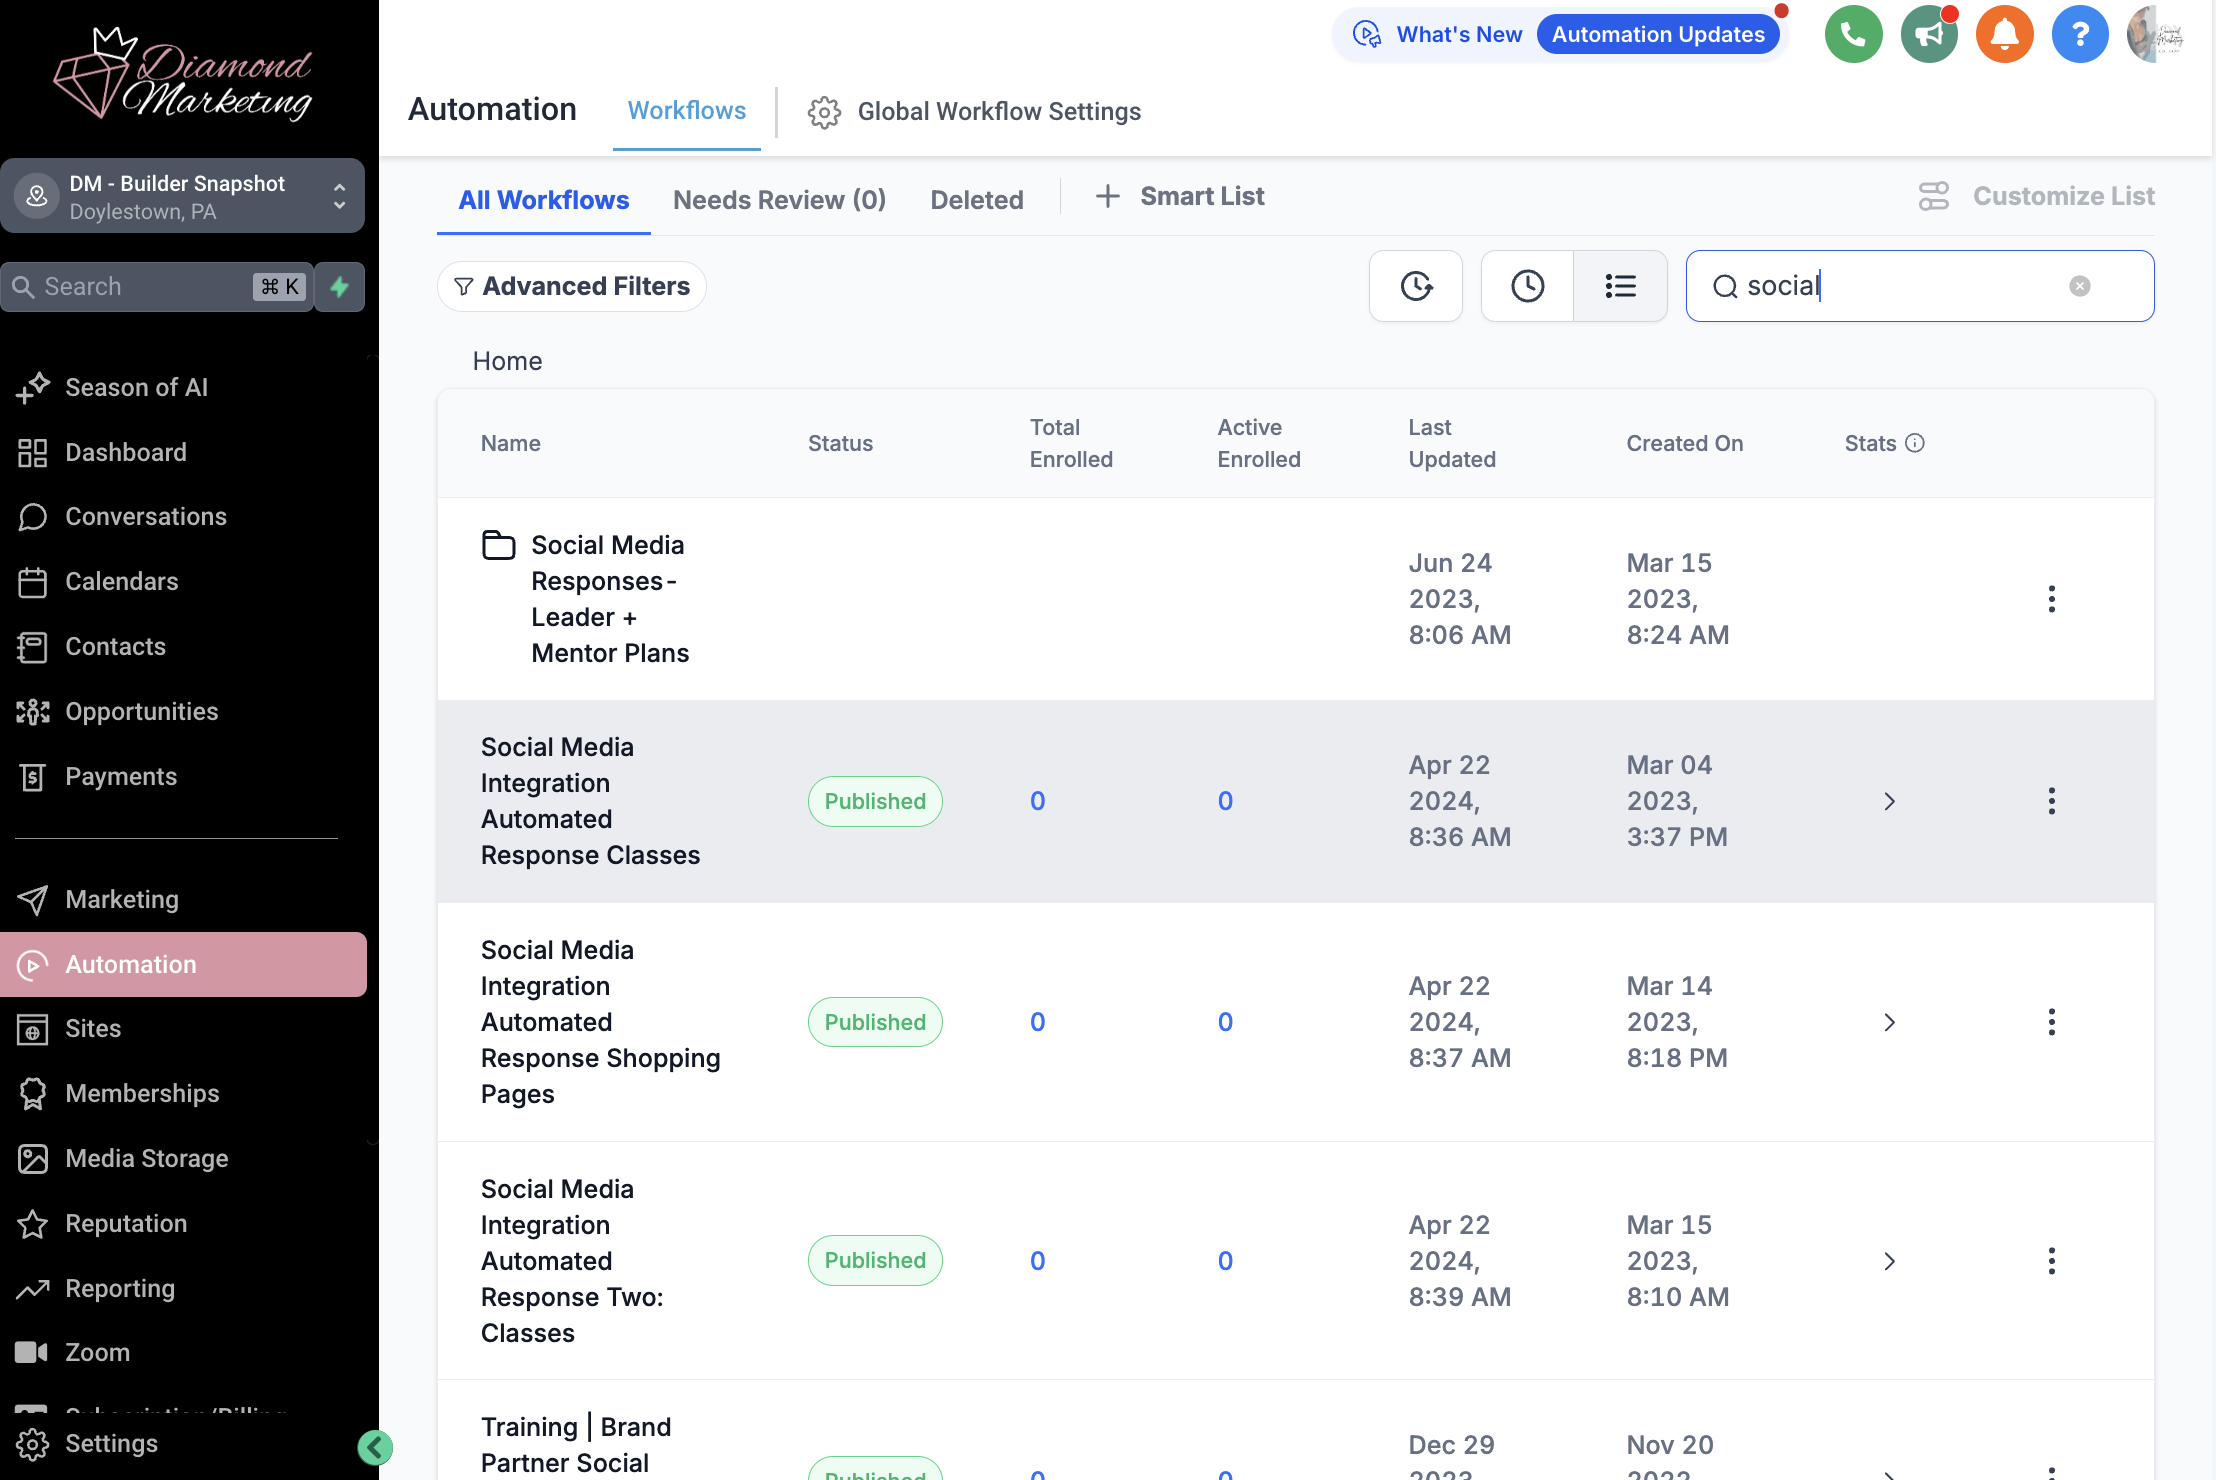
Head to the 'Automation' Tab and select + Create Workflow
Select + Create from Scratch
Name Your Workflow in the top
Click 'Add New Trigger'
You have two options for Facebook and Social Media the first is 'Customer Replied via DM or Messenger'
Customer Replied via Instagram DM or Facebook Messenger:
Use this Trigger when you want someone to reply to a story and receive an automated message. This is how our Class Opt-In and Shopping webpage responses are set up.
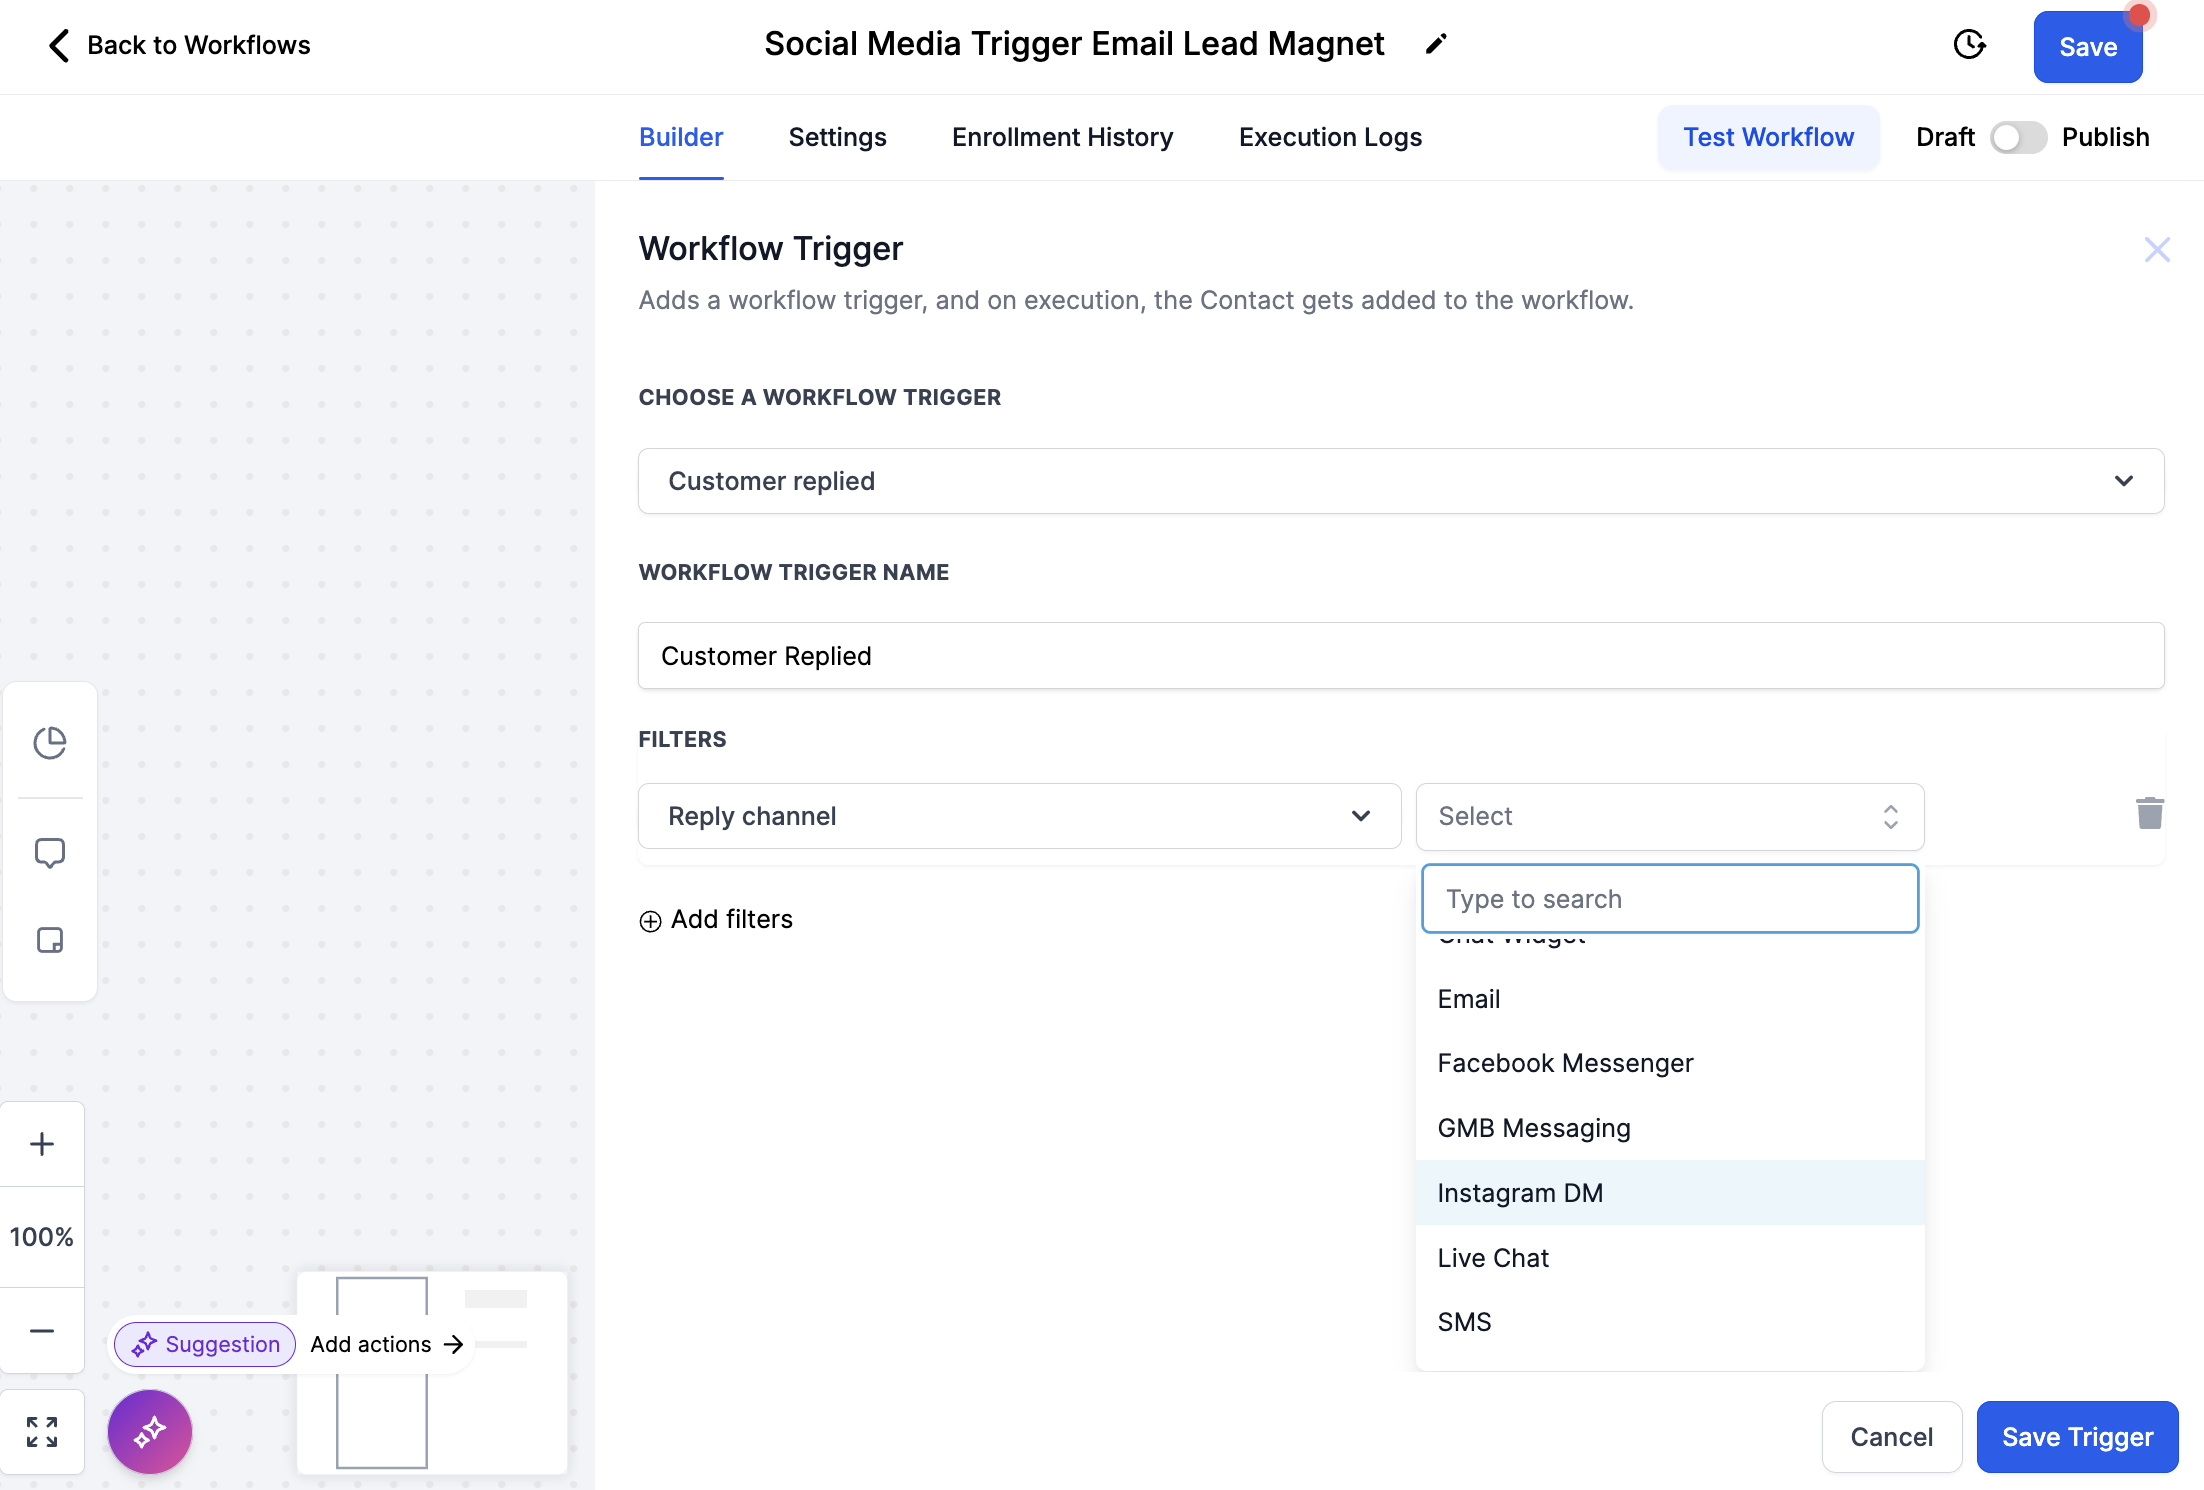
Select 'Customer Replied'
Select +Add Filters
Select the filter 'Reply Channel is'
Select 'Facebook Messenger' or 'Instagram DM' *For Both add a second trigger using the same steps. (Create a separate workflow to make sending the response a lot less complicated!)
Select +Add Filters again and choose 'Contains Phrase' *Here you will add the trigger words you want to use. We recommend a multi-word phrase to better avoid accidental triggering.
Save the trigger and then save the entire workflow in the top left.
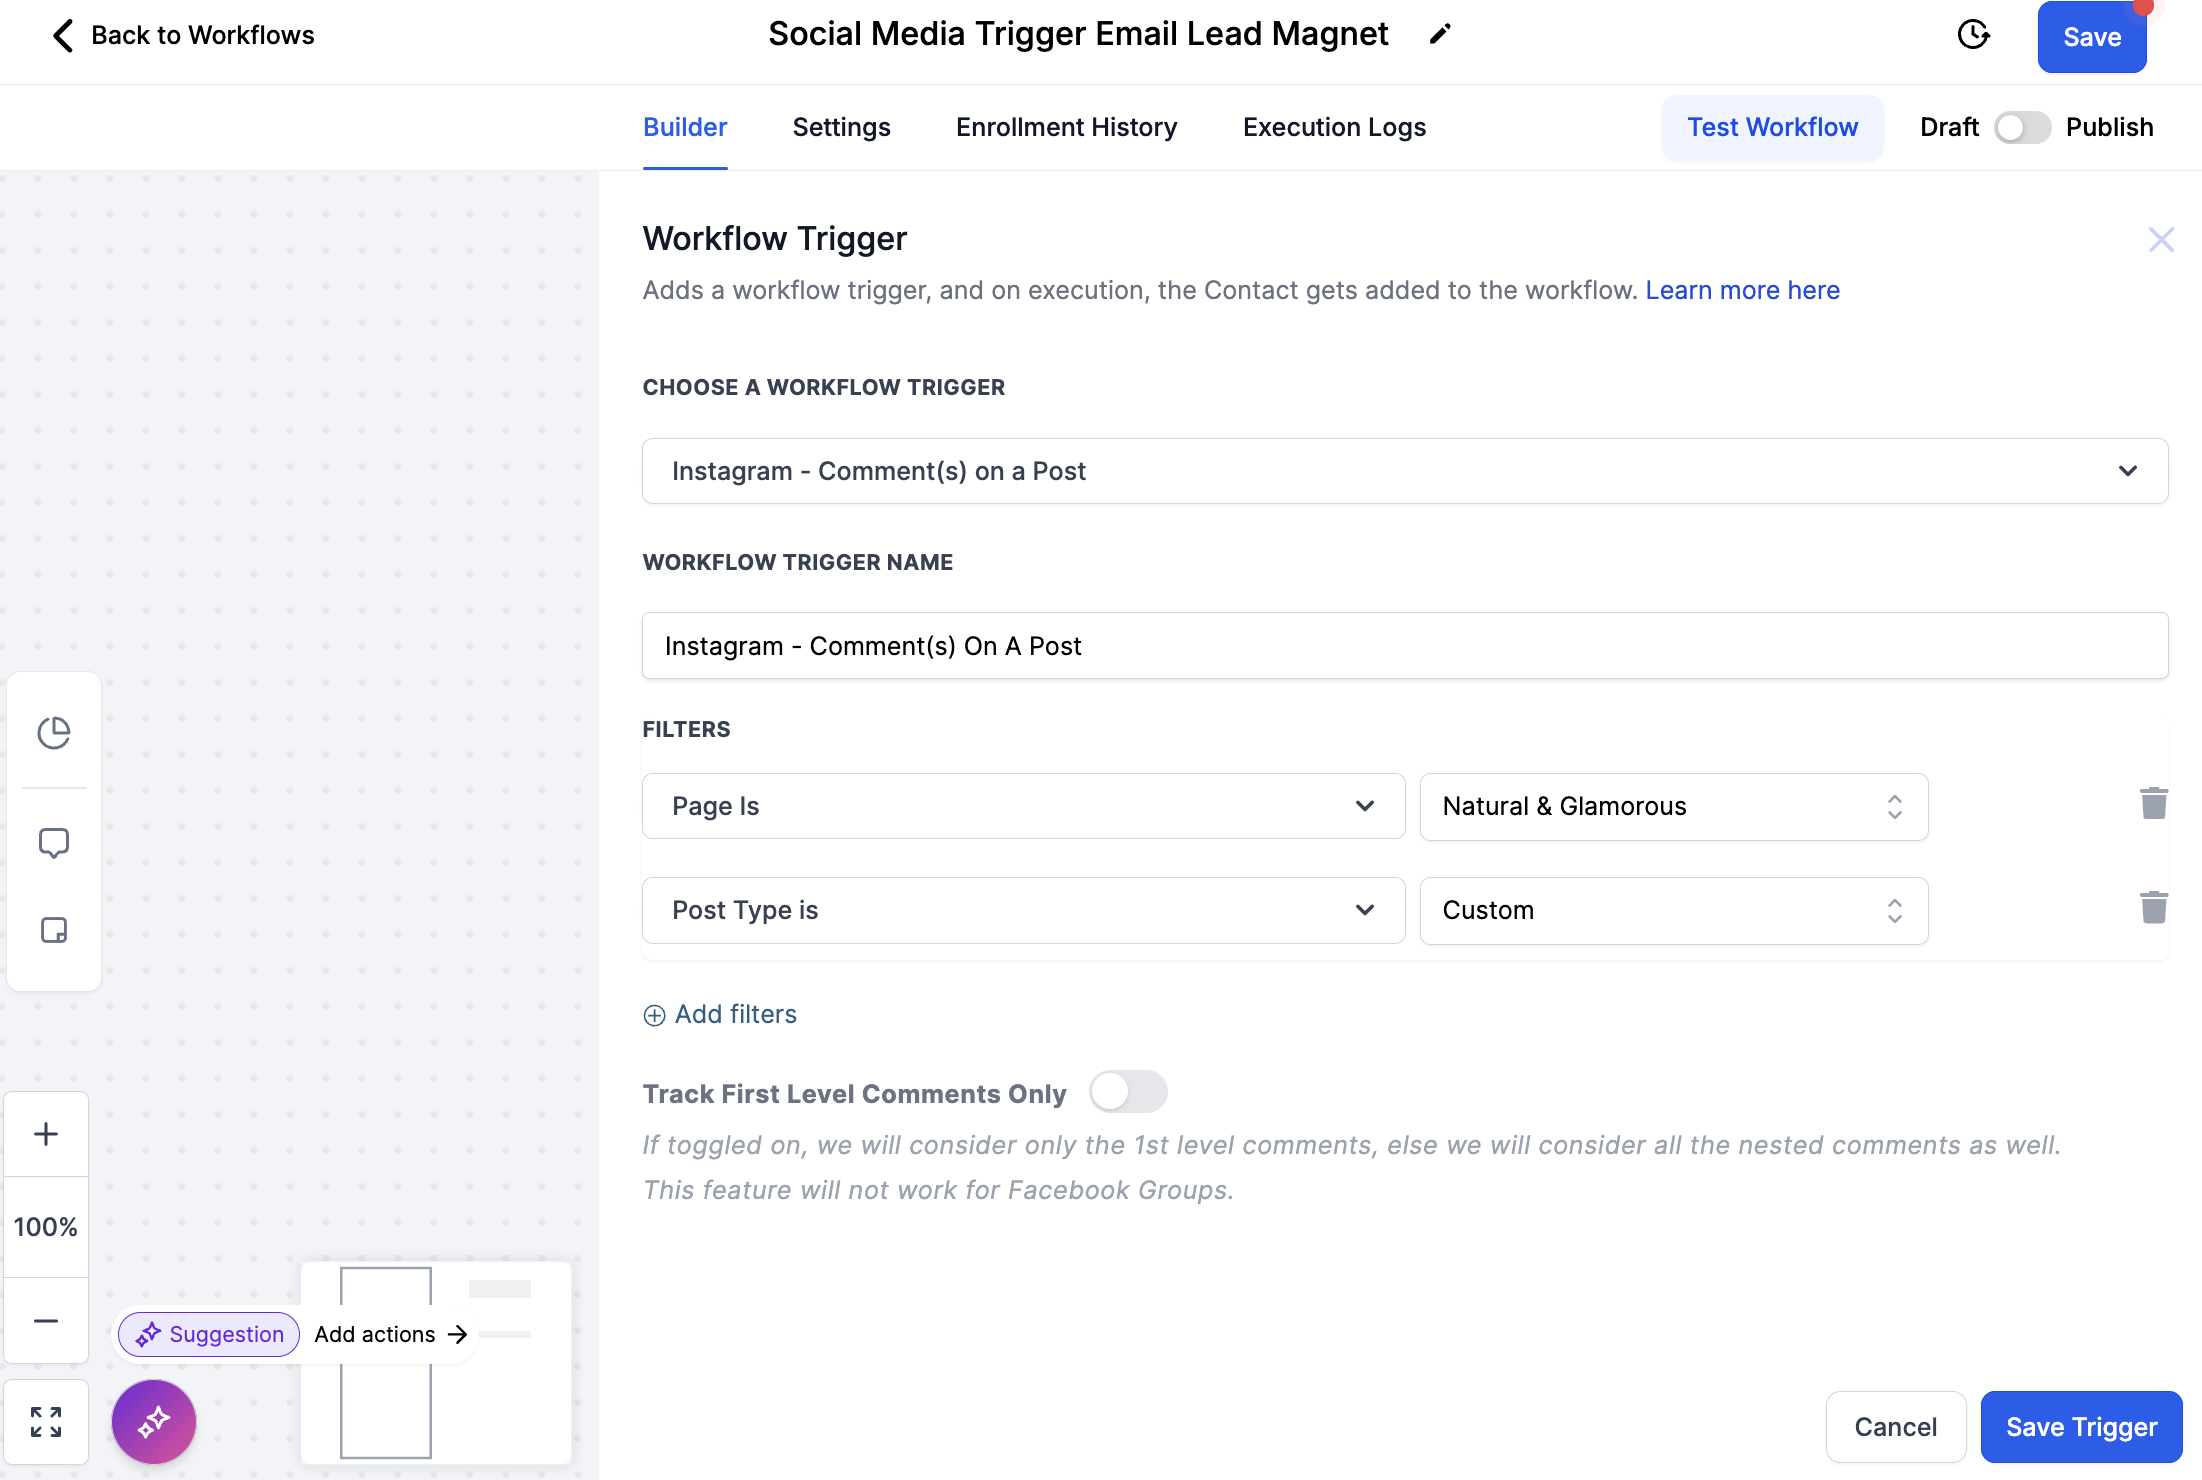
Instagram/Facebook Comments on Post:
Use this Trigger when you want someone to reply with a comment on a post and receive a DM auto response.
Select 'Instagram - Comment(s) On A Post' or 'Facebook - Comment(s) On A Post'. For both, add a second trigger and repeat the exact same steps. (Create a separate workflow to make sending the response a lot less complicated!)
Select + Add Filters and choose Page is
Select the page you want to use (This will give a drop down of pages you have connected)
Select + Add Filters and choose 'Post Type is'
Select 'Published Post' to add a trigger word onto.
Select 'Custom' to trigger an auto response on aImageny post.
Select + Add Filters and choose 'Contains Phase' and add your trigger word
Add your Auto-Response and Send Your Lead Magnet/Offering:
Bullet list
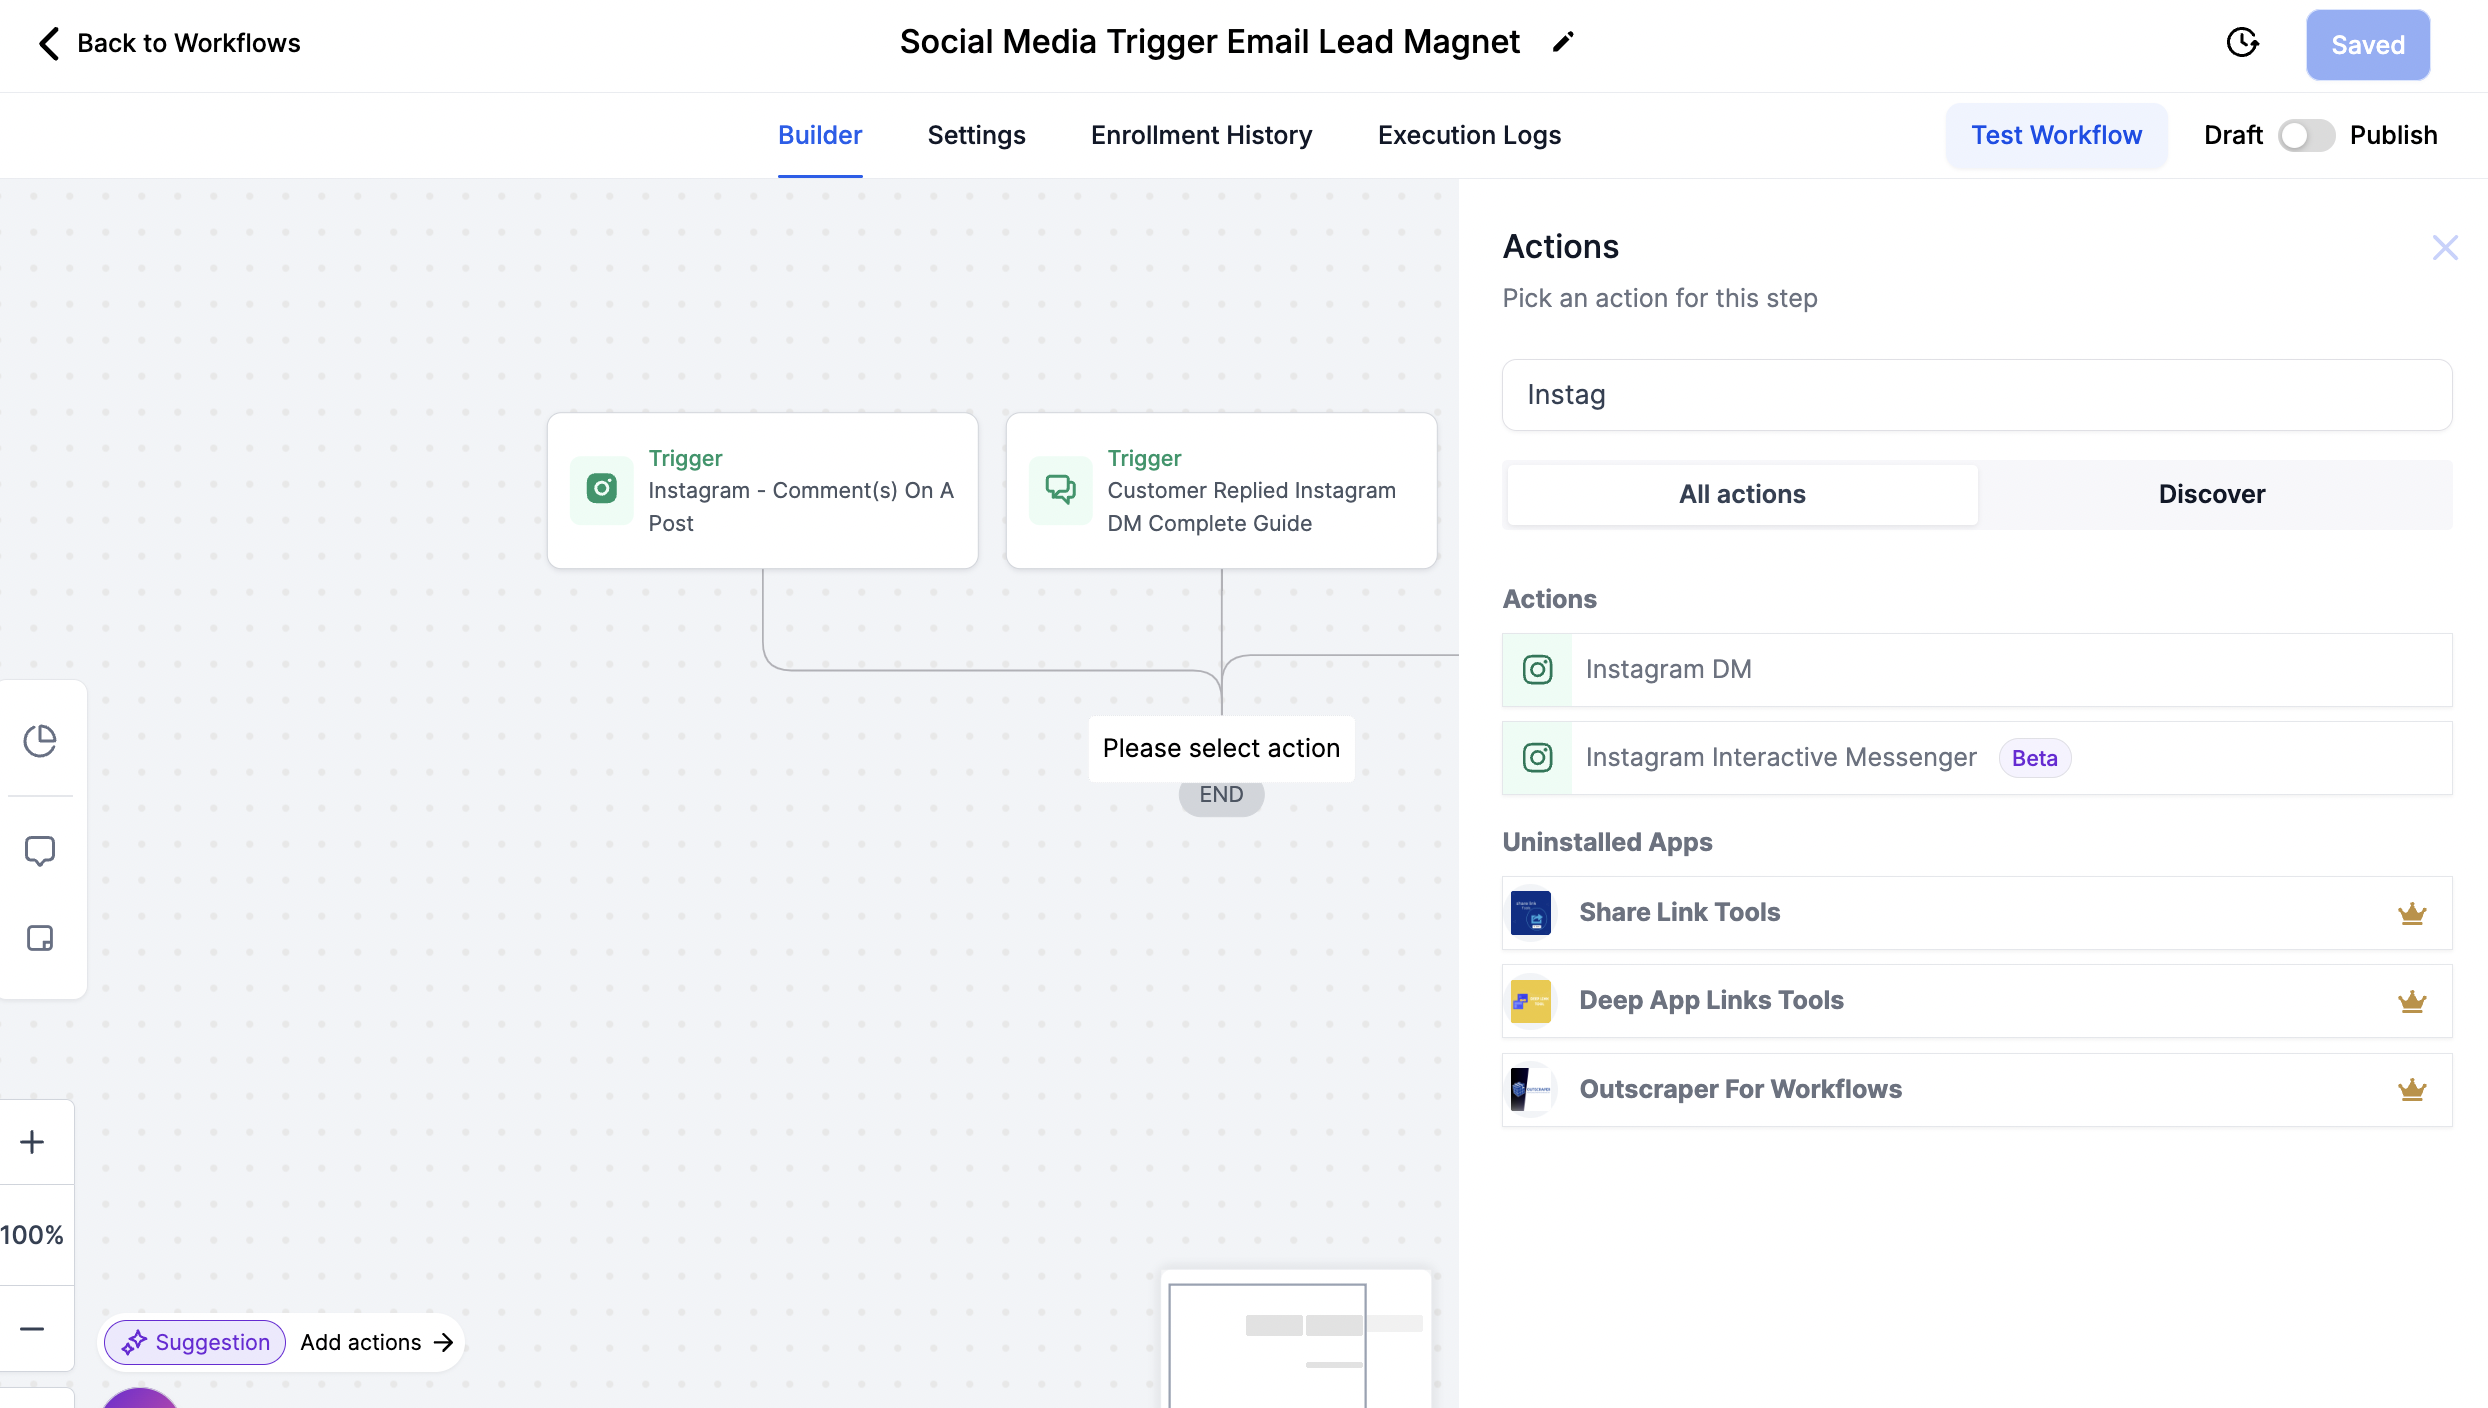
Click the + under the trigger you just created to add Actions
NOTE: Adding actions to workflows with multiple triggers is more complicated and will not be detailed here, although it is possible. For simplifying purposes, create a new workflow for each trigger
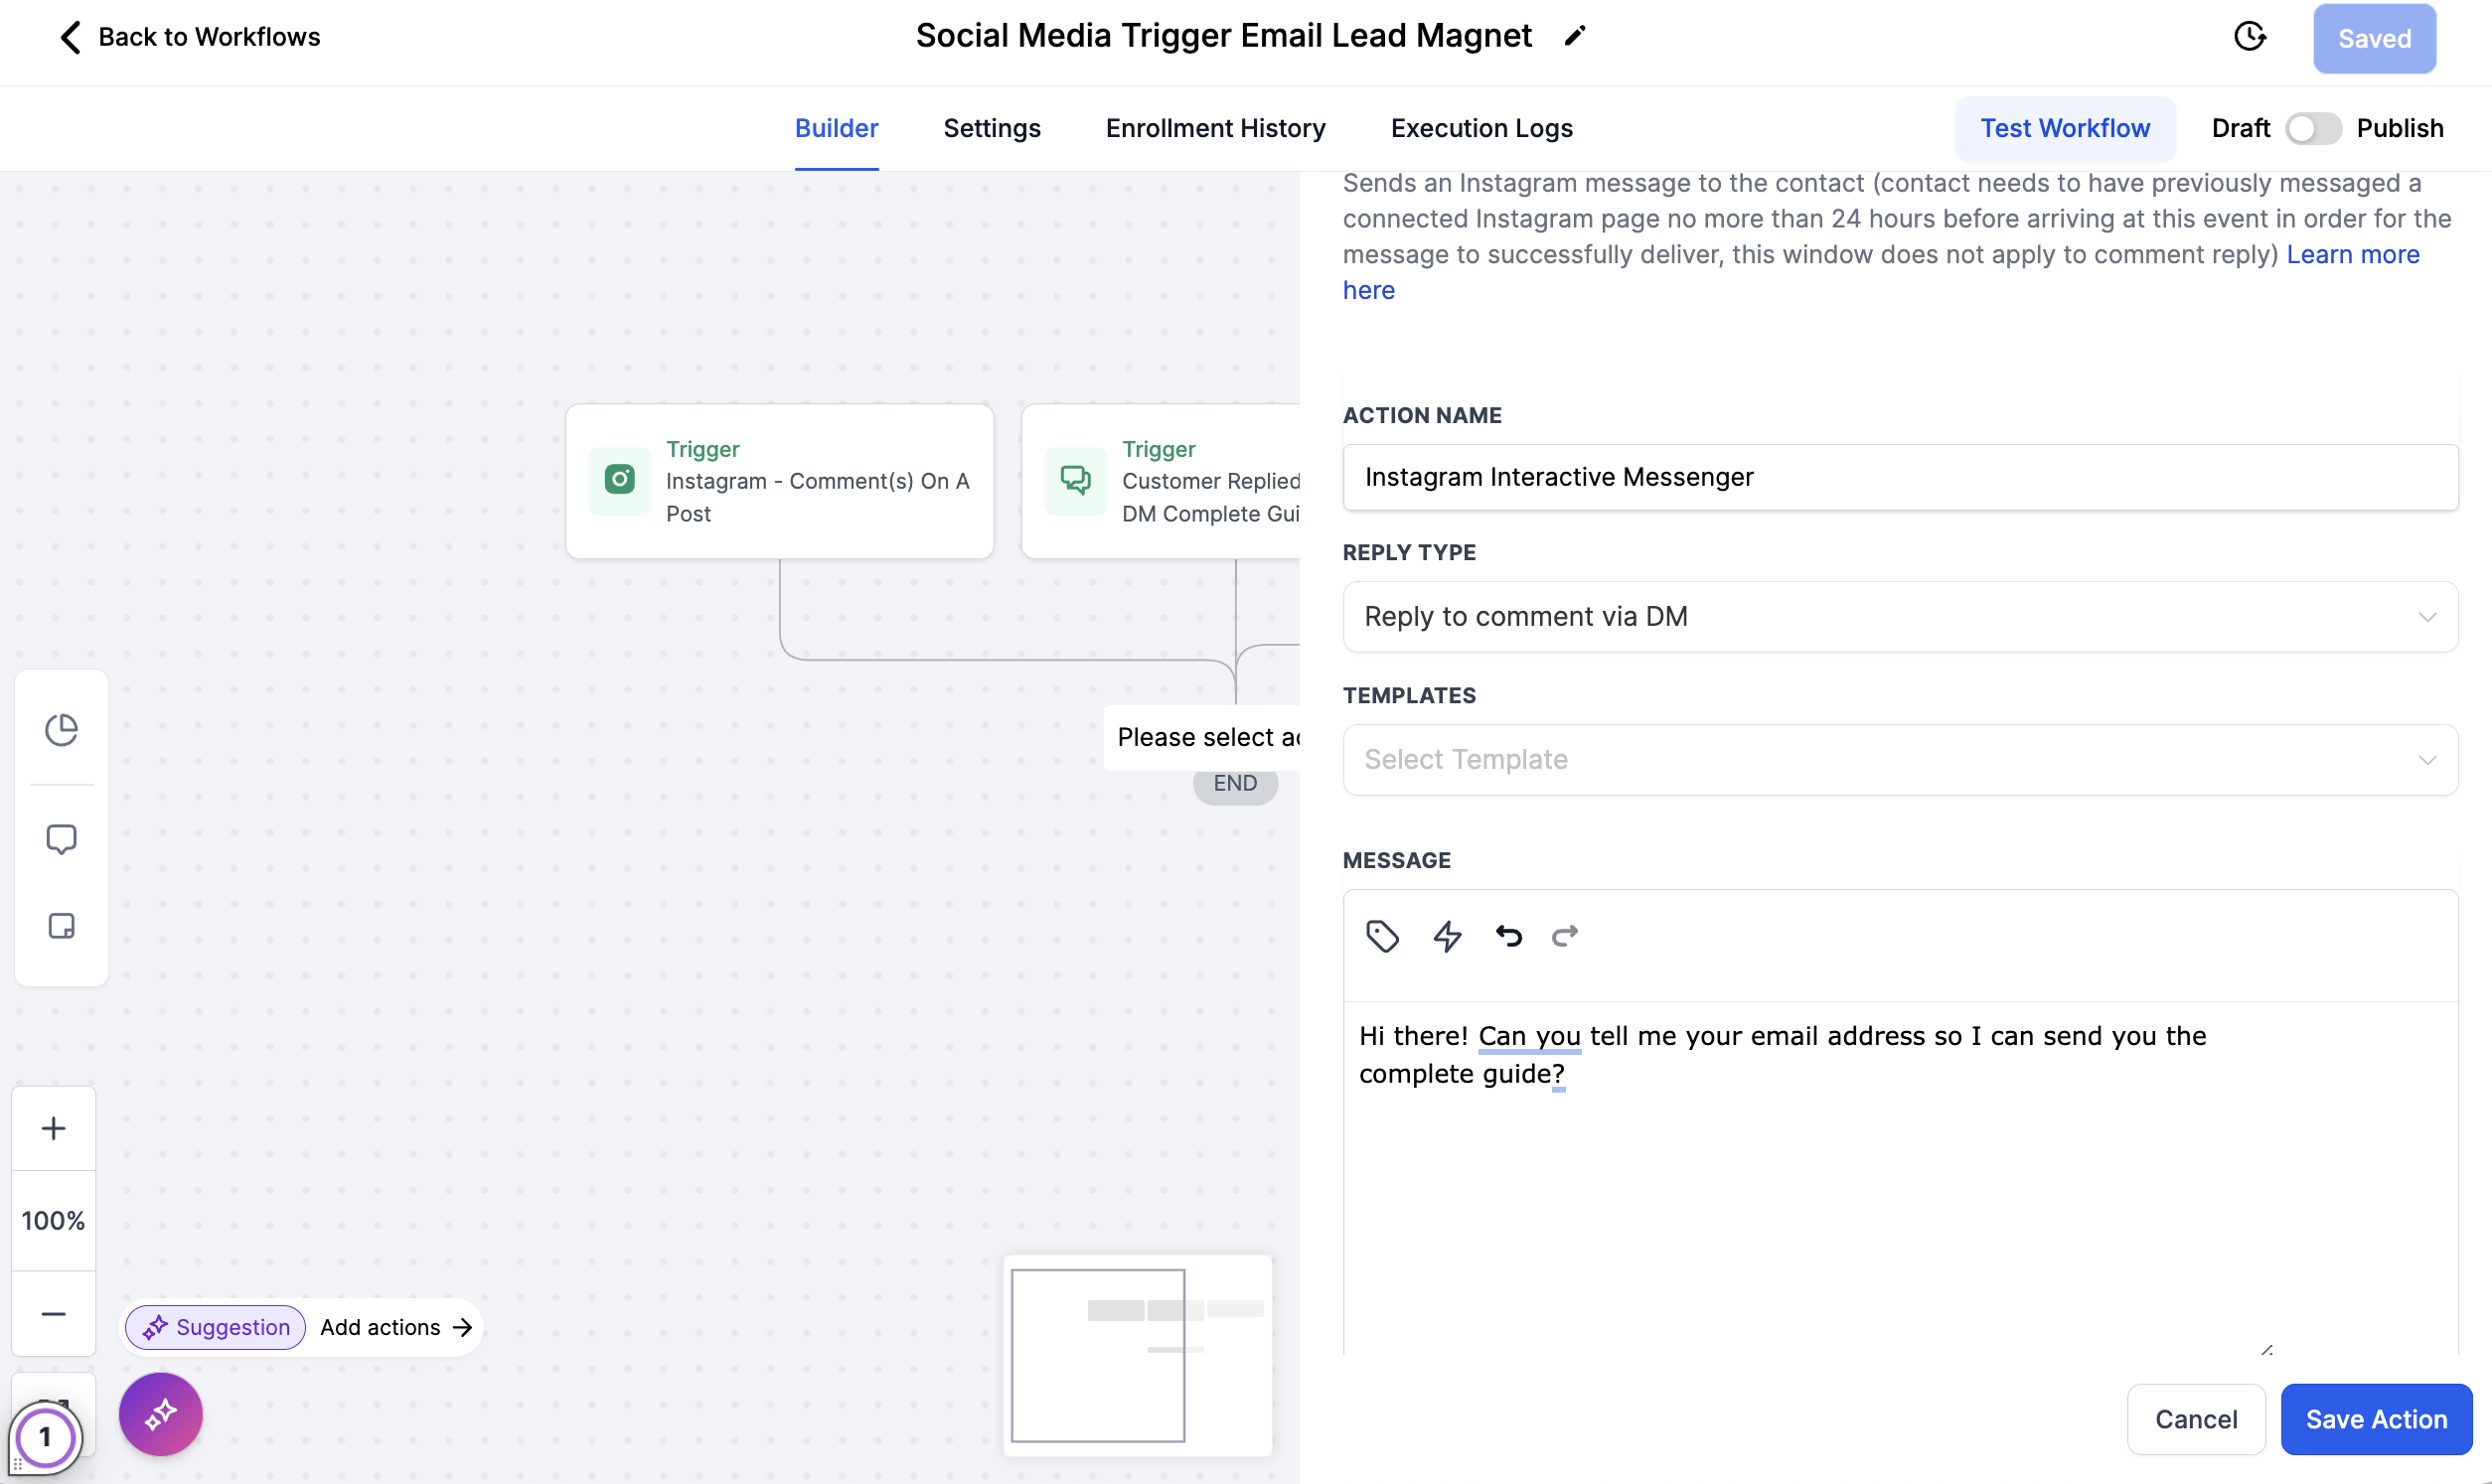
Select 'Instagram or Facebook Interactive Messenger' and select either 'Reply to DM' or 'Reply to comment via 'DM'
Add your reply in the text box. Here is where you can send a link to a webpage or canva offer.
Collect Contacts' Emails to Auto Send an Email Guide:
Bullet listImage
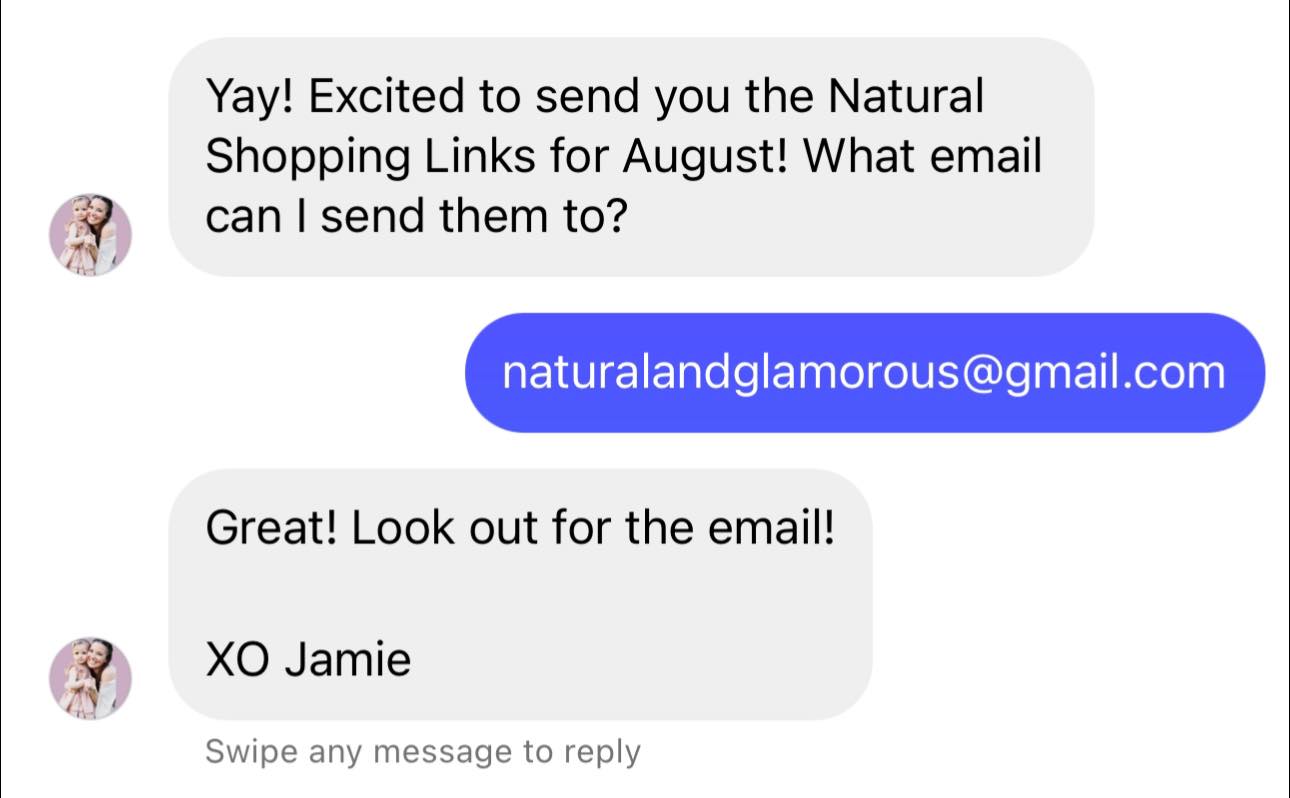
To use our Complete Email Guides, (The content of each of your DM classes compiled into one email full of each classes specific information and links) you must ask your social media contact for their email.
This feature is super cool, if you do not already have the social media contacts email address it will use their response to add the email to their contact inside of Diamond Marketing for you automatically and then you can add an action to send the email!
Send an Email:
Bullet listImage
Select the + under your DM response action to add the next action
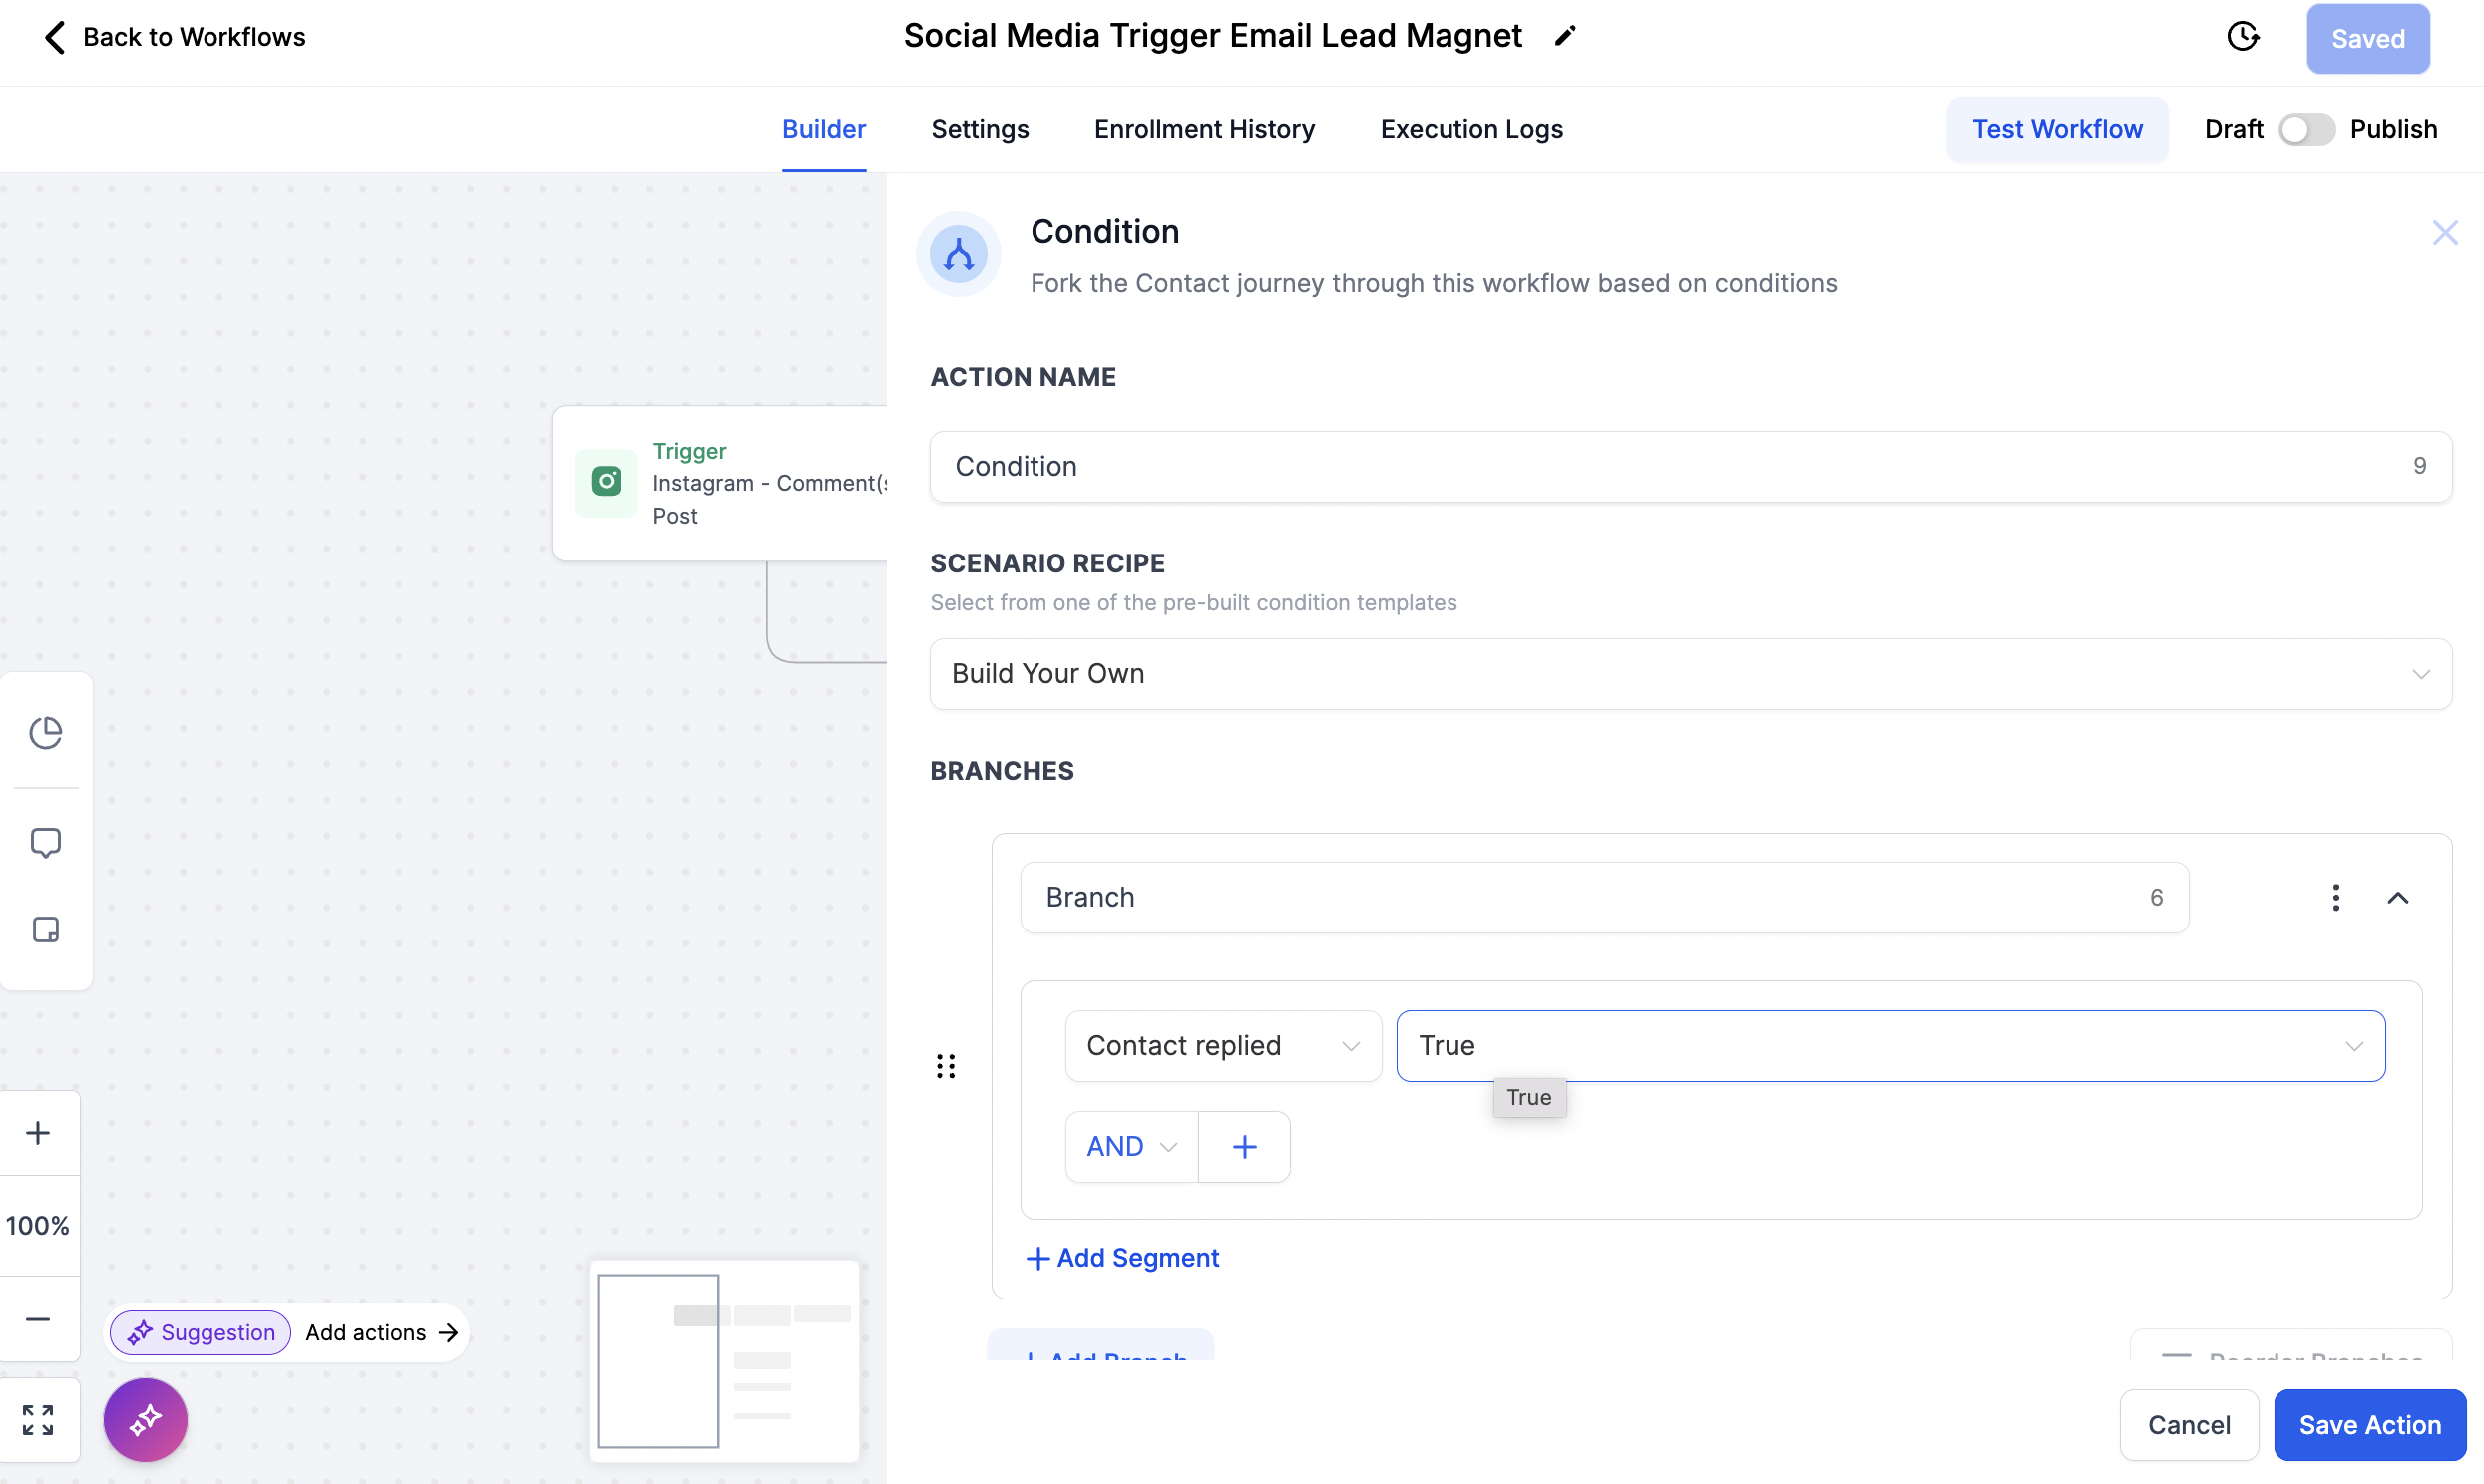
Select 'If/Else'
Under 'Build your Own' you can write over the word Branch to say 'Email Collected'
Select 'Contact Reply' and then 'Contact replied'
Click on the Select box next to Contact replied and choose True
This will send the next action only AFTER you have received the response with the email address.
You can create an additional action 'Reply to DM' and respond back to contacts email if you'd like. In this example, I let them know I got it and and to look out for the email
Save the Actiona and then Save the Workflow in the top right after eah action is created
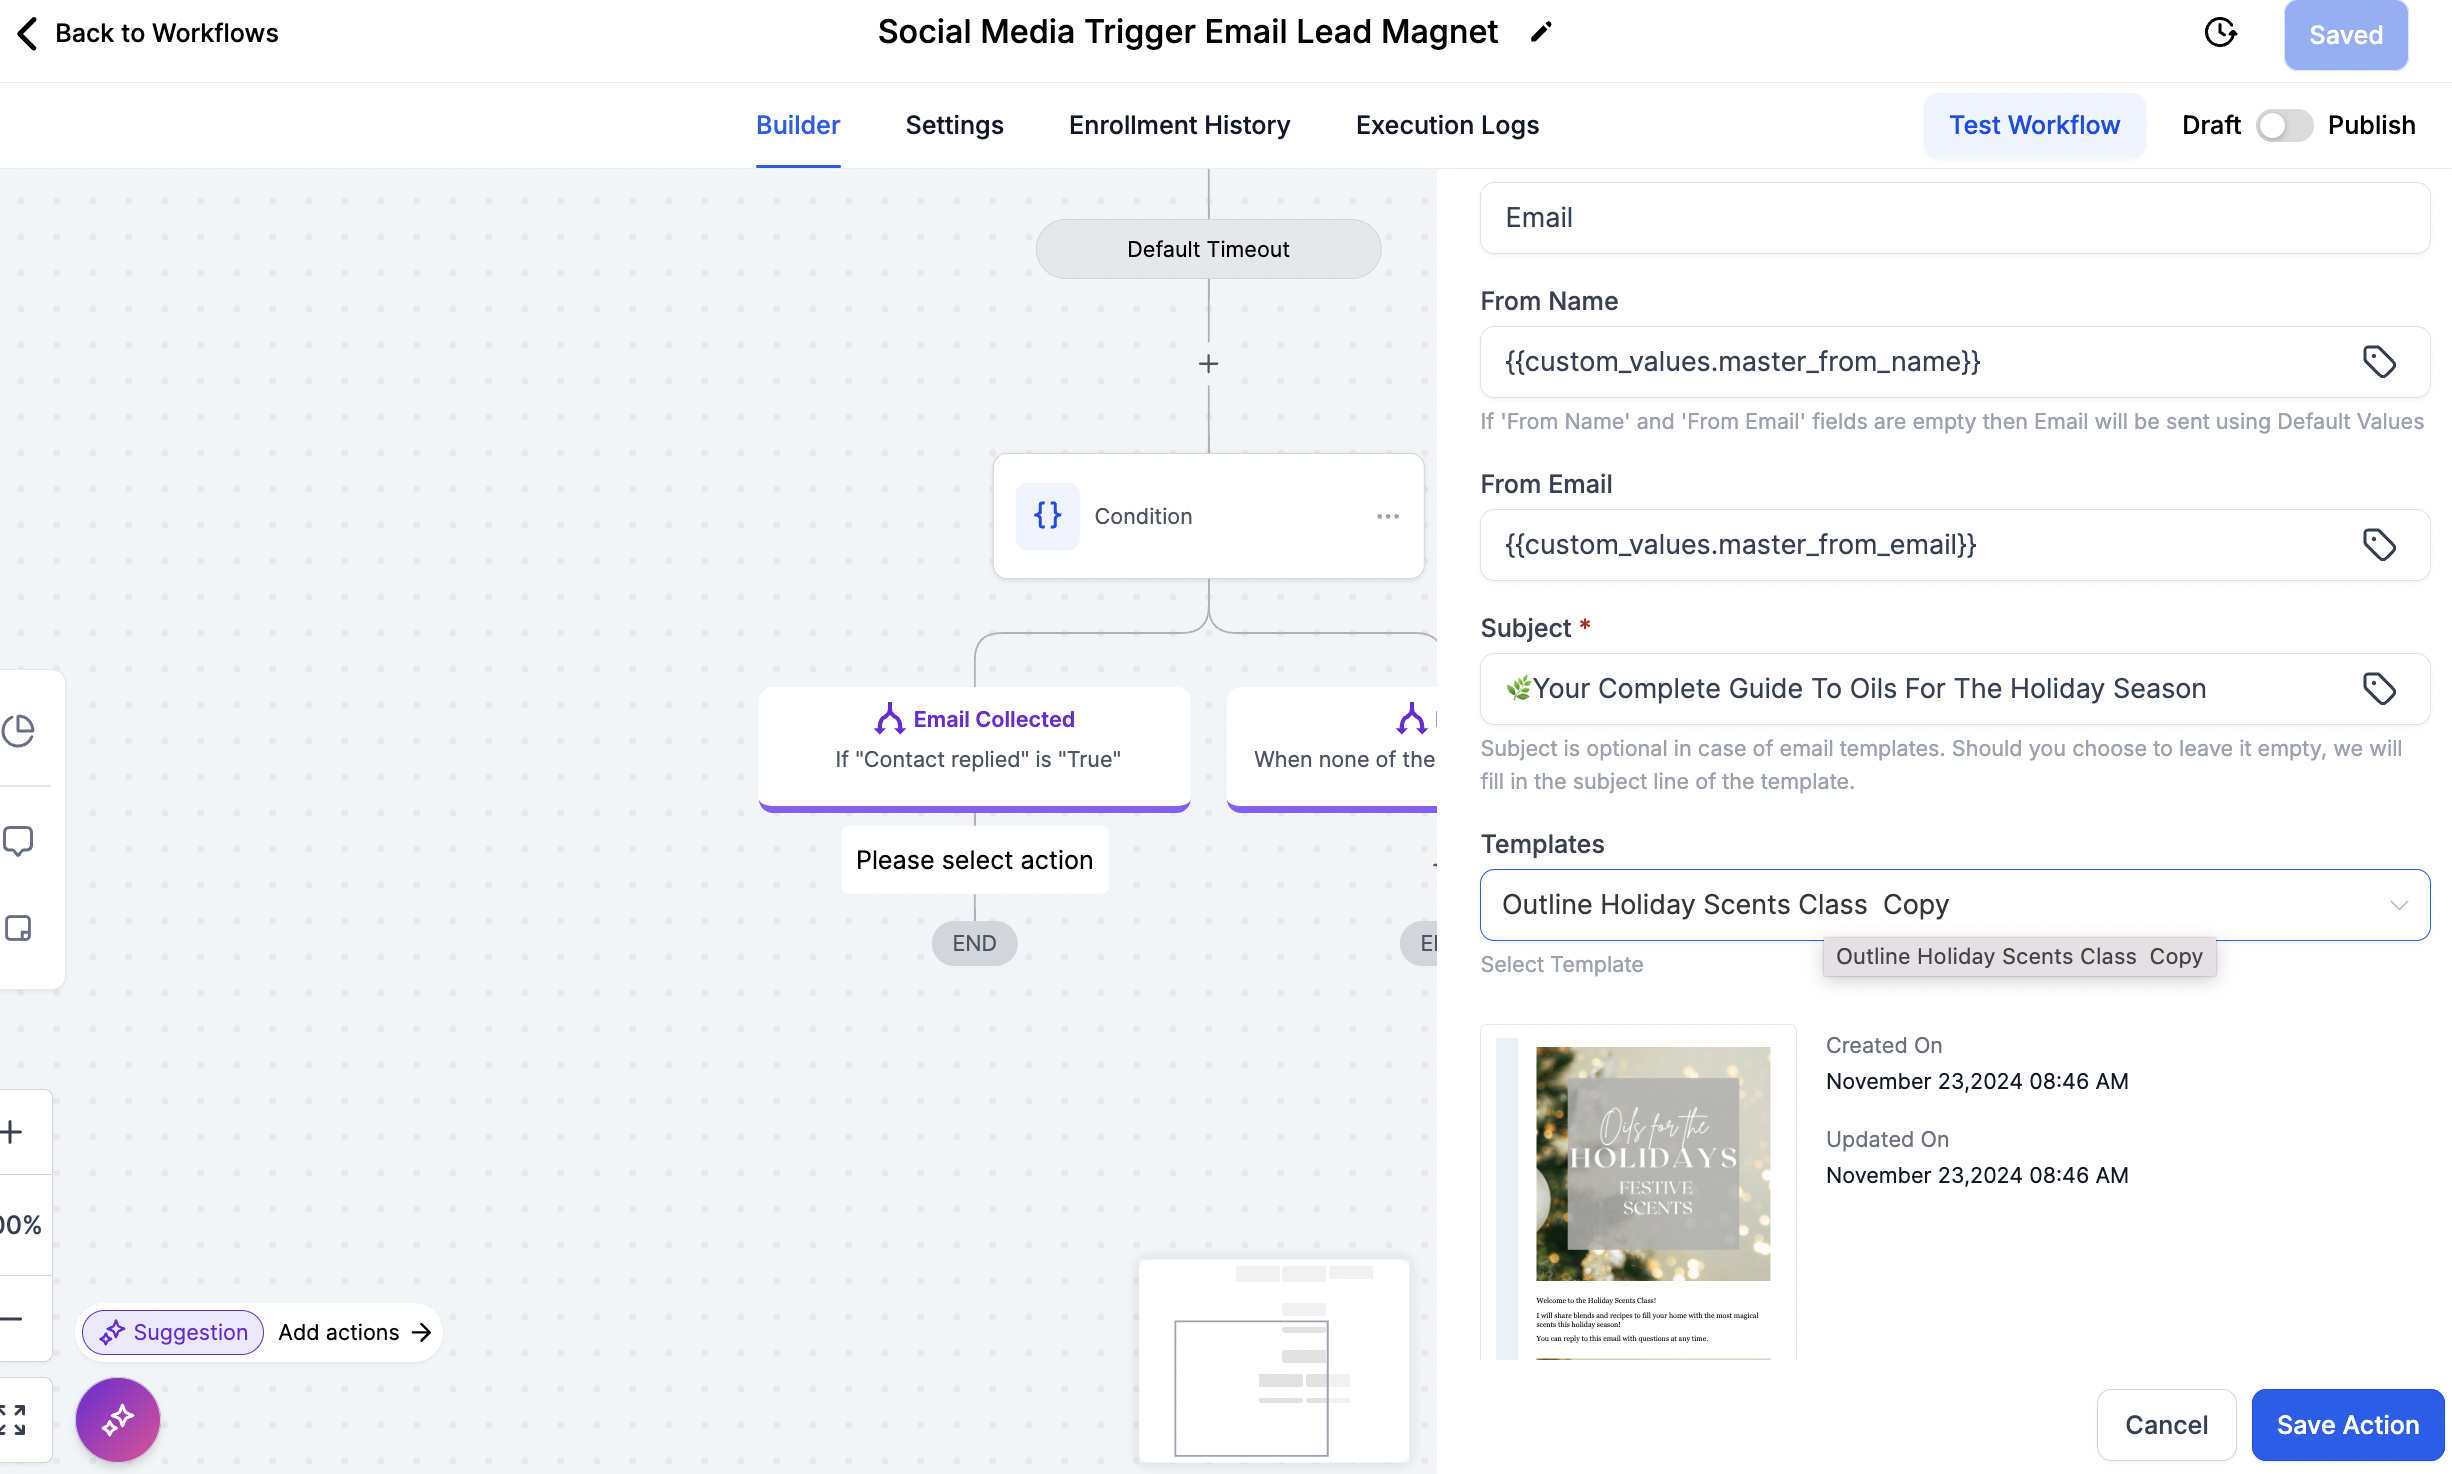
Click the + button under Email Collected
Search Send Email
Scroll to the Templates box and search Outline. All of the 'Complete Guide Emails are titled Outline.
Select the Outline of the class you'd like to send.
The Final Steps:
Bullet listImage
Toggle on Publish next to the save button
Save your workflow
Test your workflow by using the trigger from another social media account
iamond Marketing is a customer care platform design for Young Living Brand Partners. All content provided by Diamond Marketing is the property of Diamond Marketing App LLC and cannot be copied or redistributed outside of Diamond Marketing. without prior consent.